When we finished our kitchen remodel last fall there was a mad rush to get everything unpacked and in working order again. When you finally get your kitchen back after cooking in the garage for two months you just to get going. Patience is not really my thing. And things ended up a bit disorganized, to say the least.
Opening my pantry doors and showing you guys the ‘before’ picks is a deeply humbling moment! But one of my goals this year is to go zero waste in the kitchen. (Or close-to-zero waste, is that a thing?) And before I could start working on buying things in bulk I needed a do-over on the pantry organization.
Now I love, love, love my pantry; it feels like a moment of zen when I open the doors. It was a full-day 2-person effort to get this pantry under control.
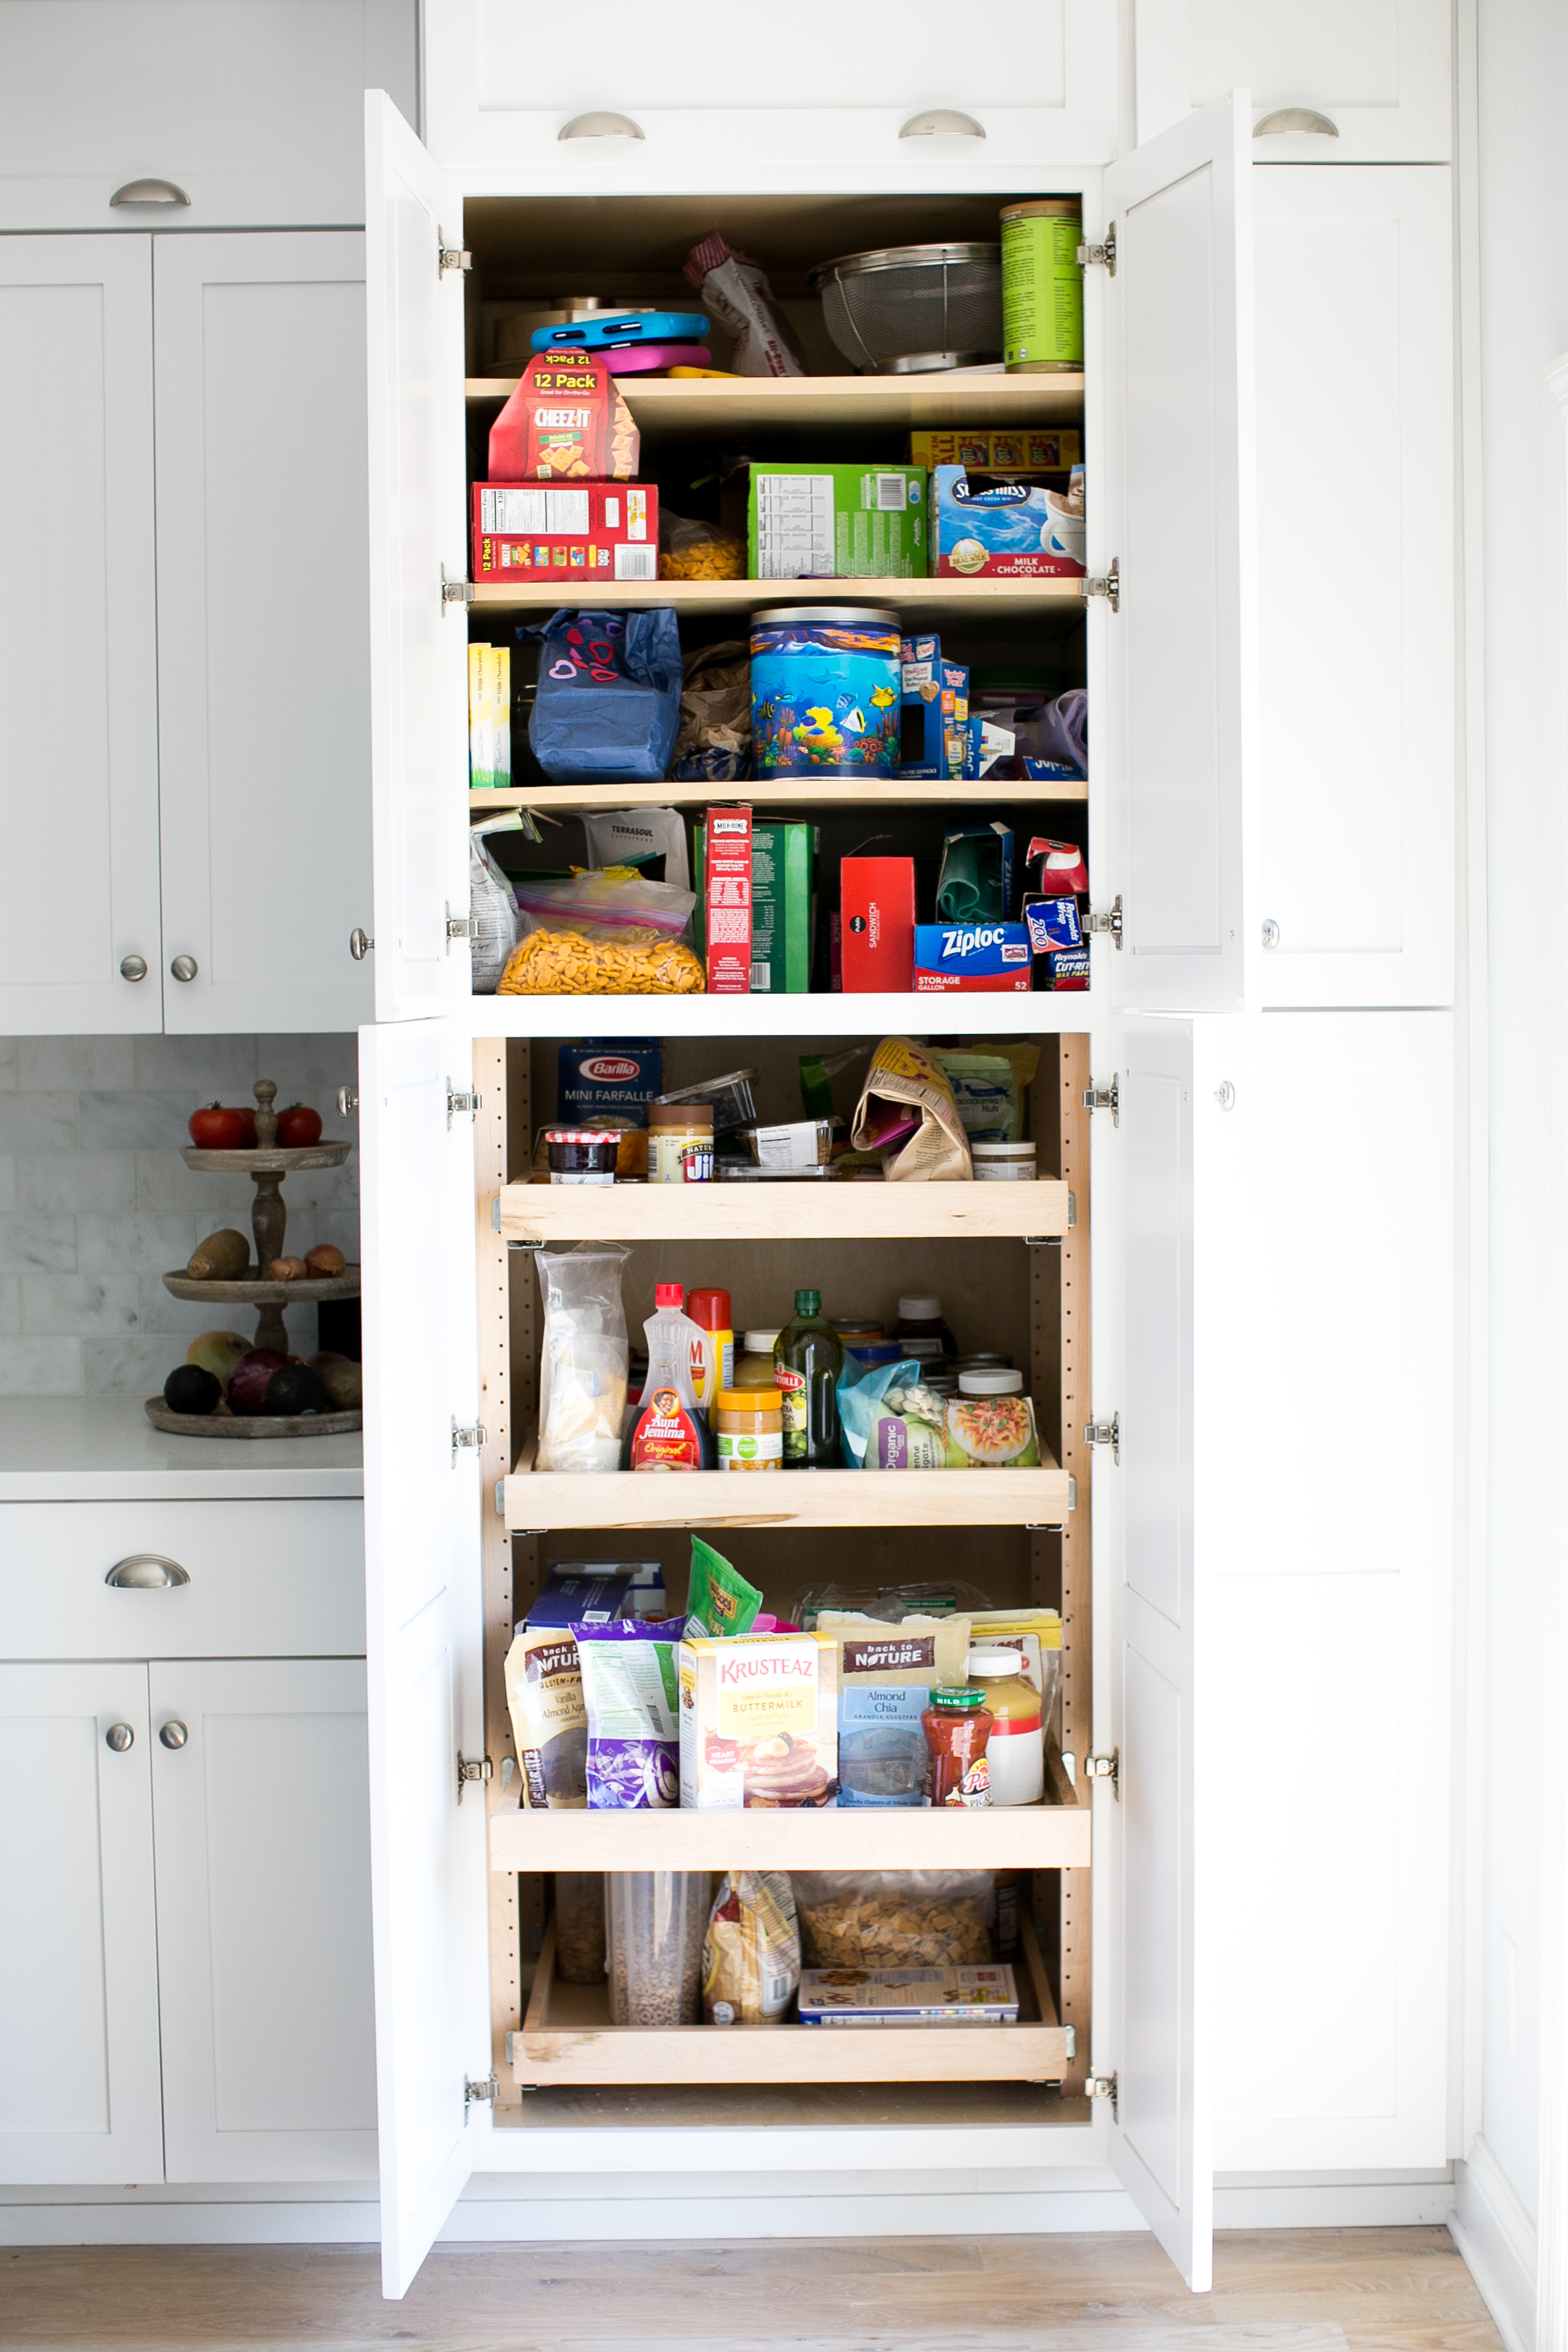
Here’s a quick look at my pantry before the reorg. It’s a hot mess because things are shoved anywhere and everywhere. There was no system telling me (or the kids) what should go where.
And before someone points it out, yes, my kids eat Cheezits. Resistance is futile when you’re packing three lunches a day. I don’t really stress over having organic everything. As long as they eat organic meat, fruit and some veggies, I’m pretty happy. And yes, we use plastic baggies on occasion. I feel guilty just owning them! But this is the start of my more zero waste kitchen efforts so I’m trying to not judge myself too much.
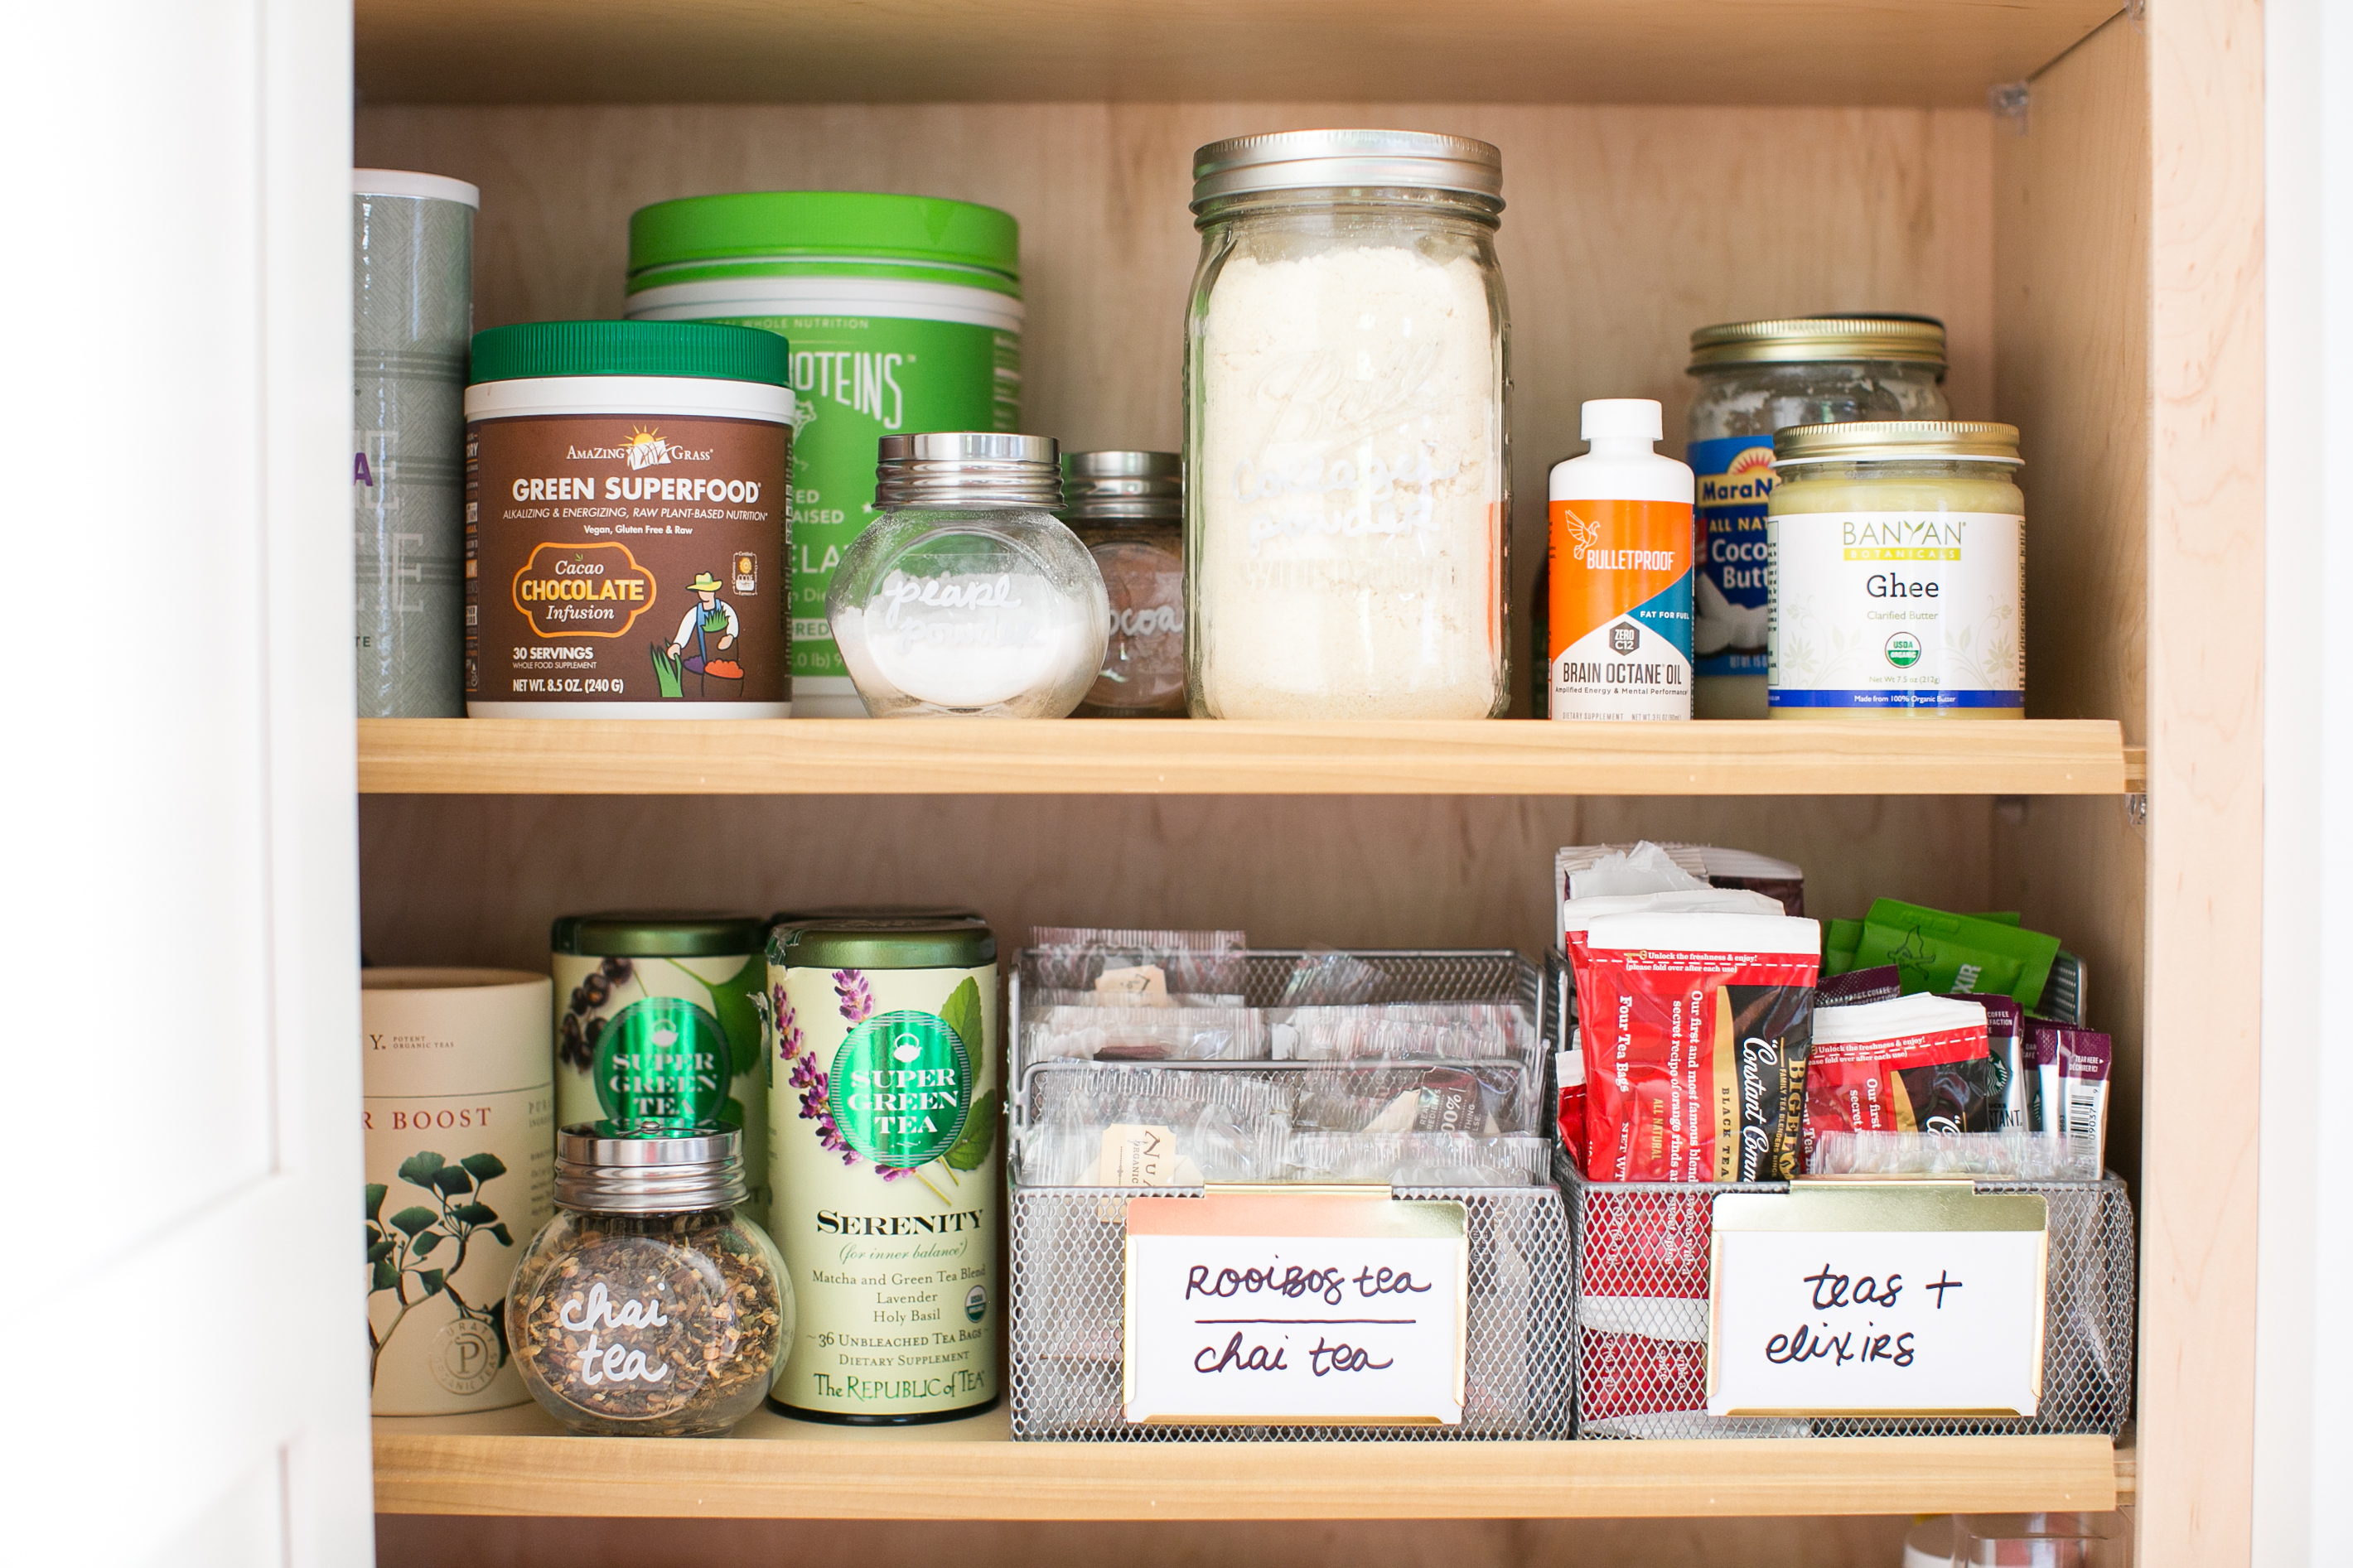
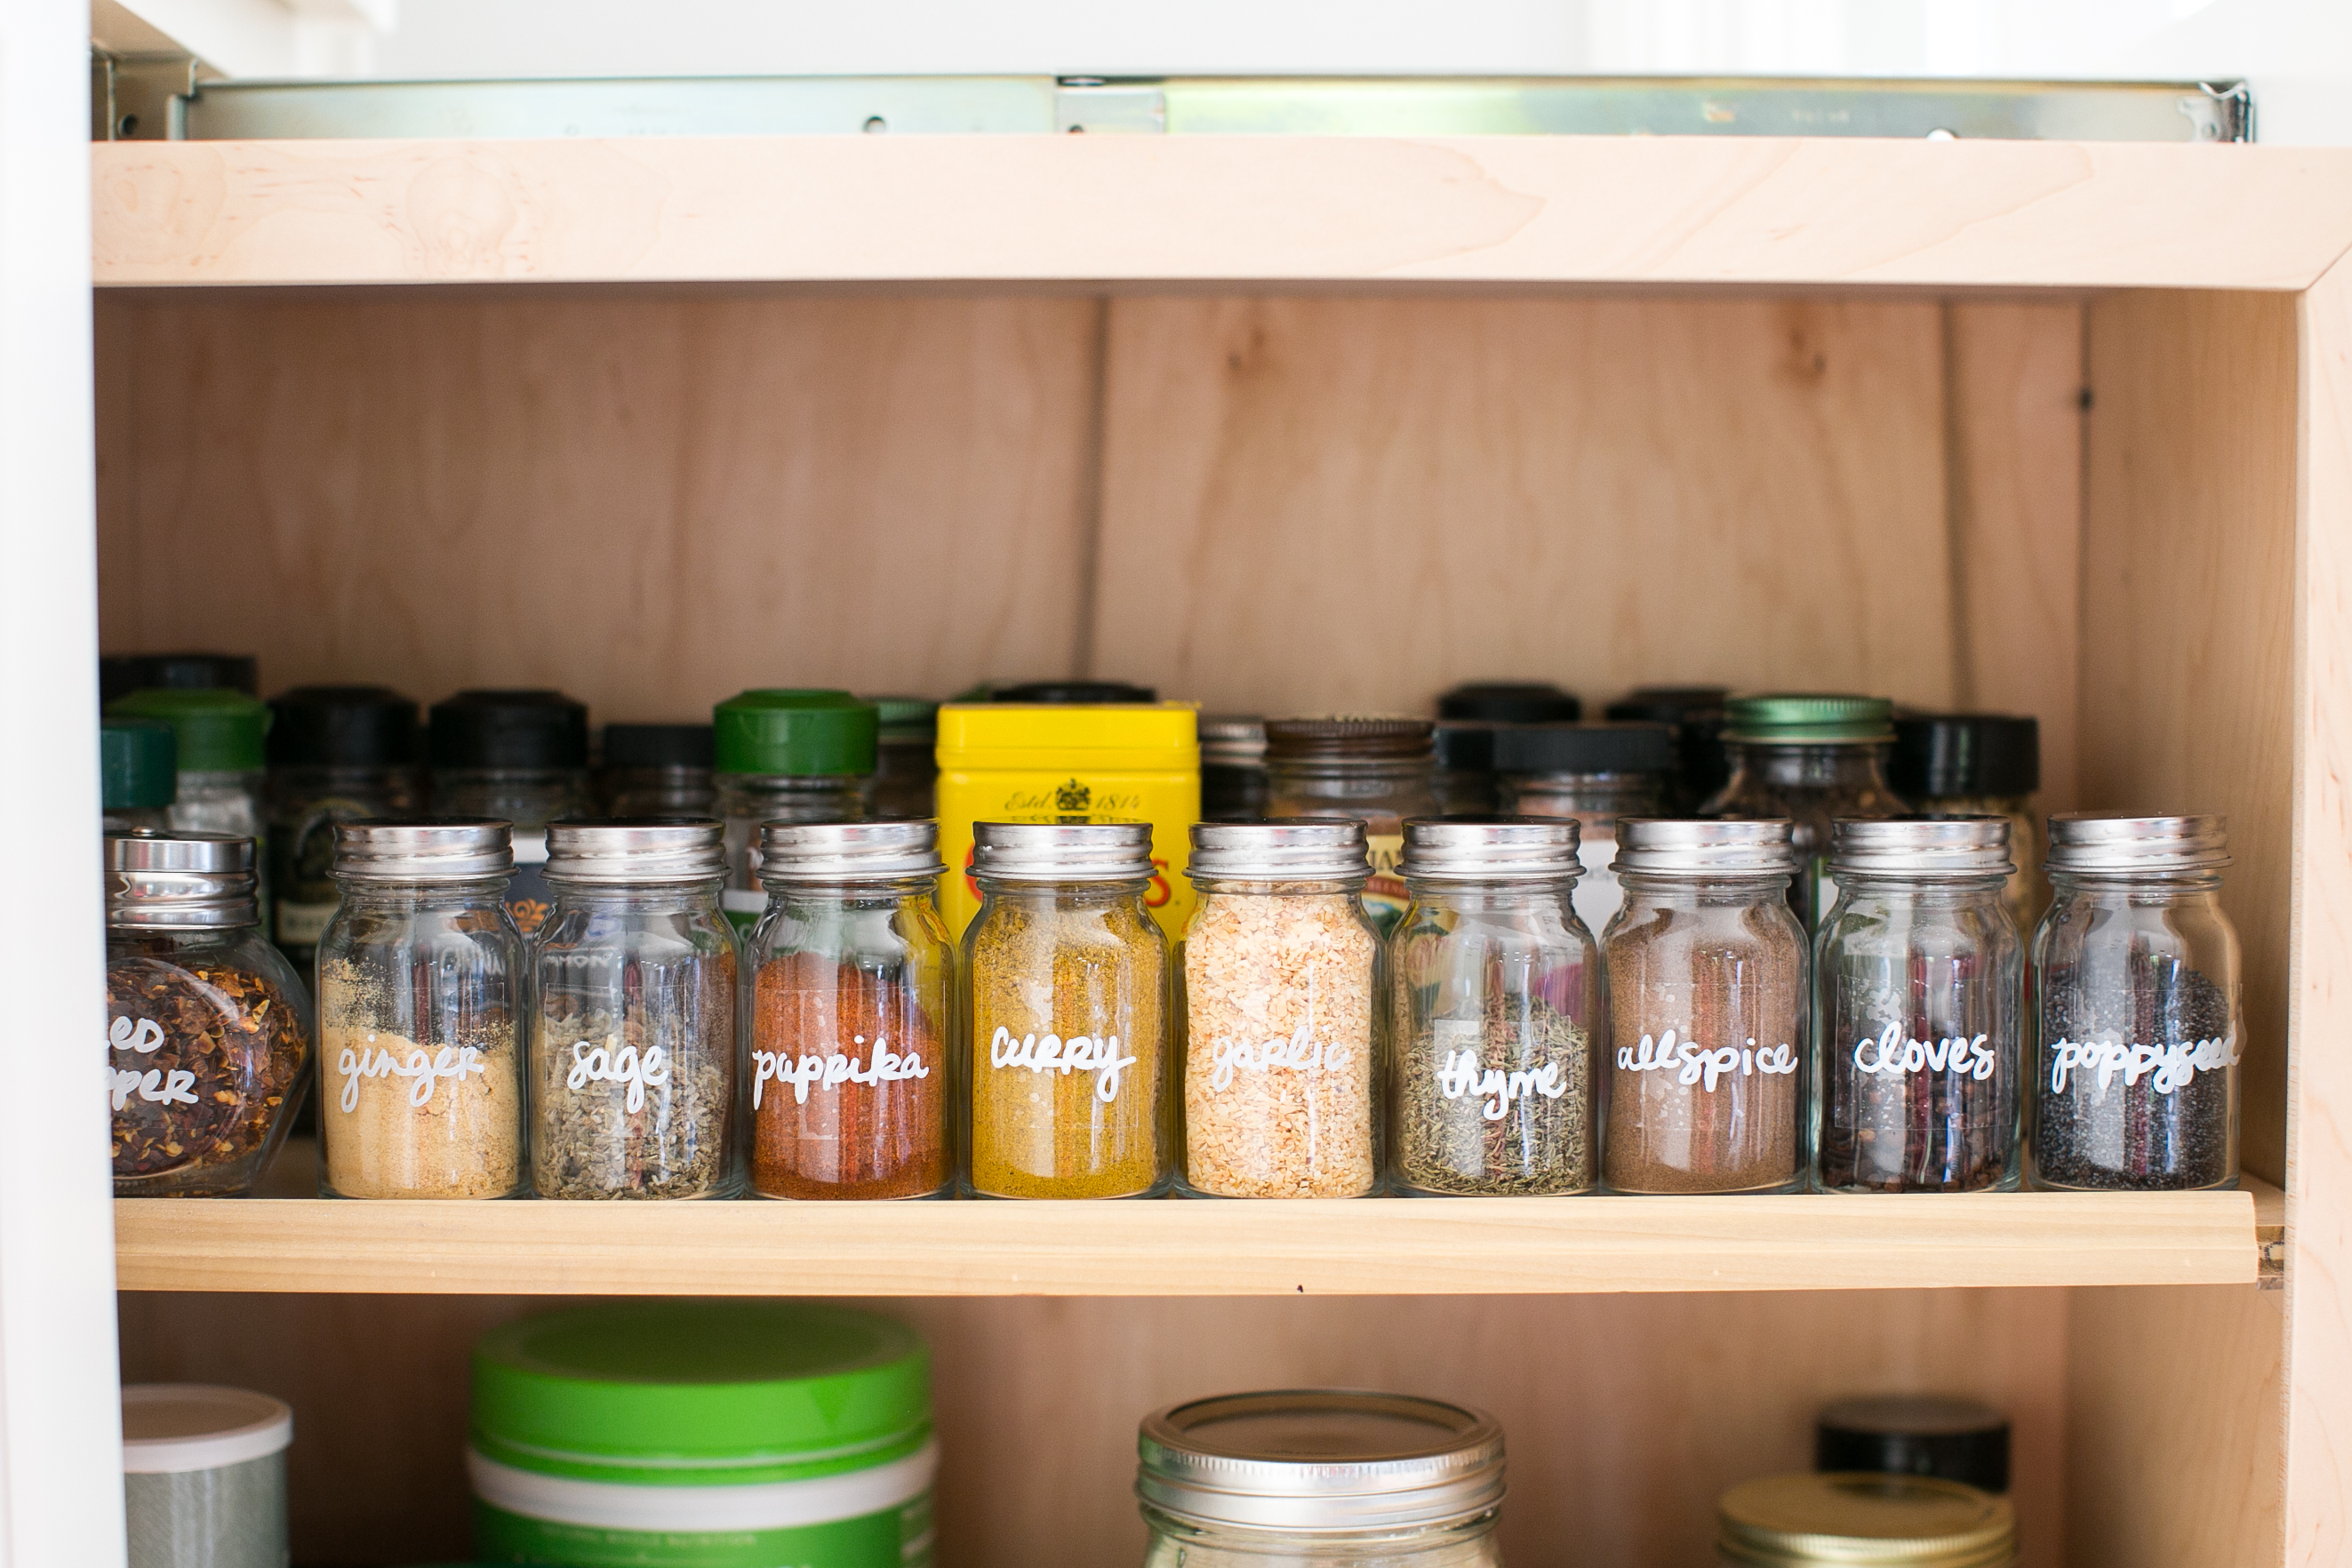
First we tackled the spice rack! The plan for what it should house:
- spices
- powders
- tea
- tall bottles (vinegars, oils, etc)
After taking everything out, we adjusted the shelves to accommodate tall bottles at the very bottom and short spices at the top. Culling the duplicate and old spices was very satisfying. Since most of the spices were already in glass containers we left them alone. Others found a new home in small glass jars with labels.
It looks like we wrote on the bottles, but Elizabeth used this cling film so it’s removable. Smart, right? (I would never have thought of that.) Then she wrote on the film with this paint marker and cut them out.
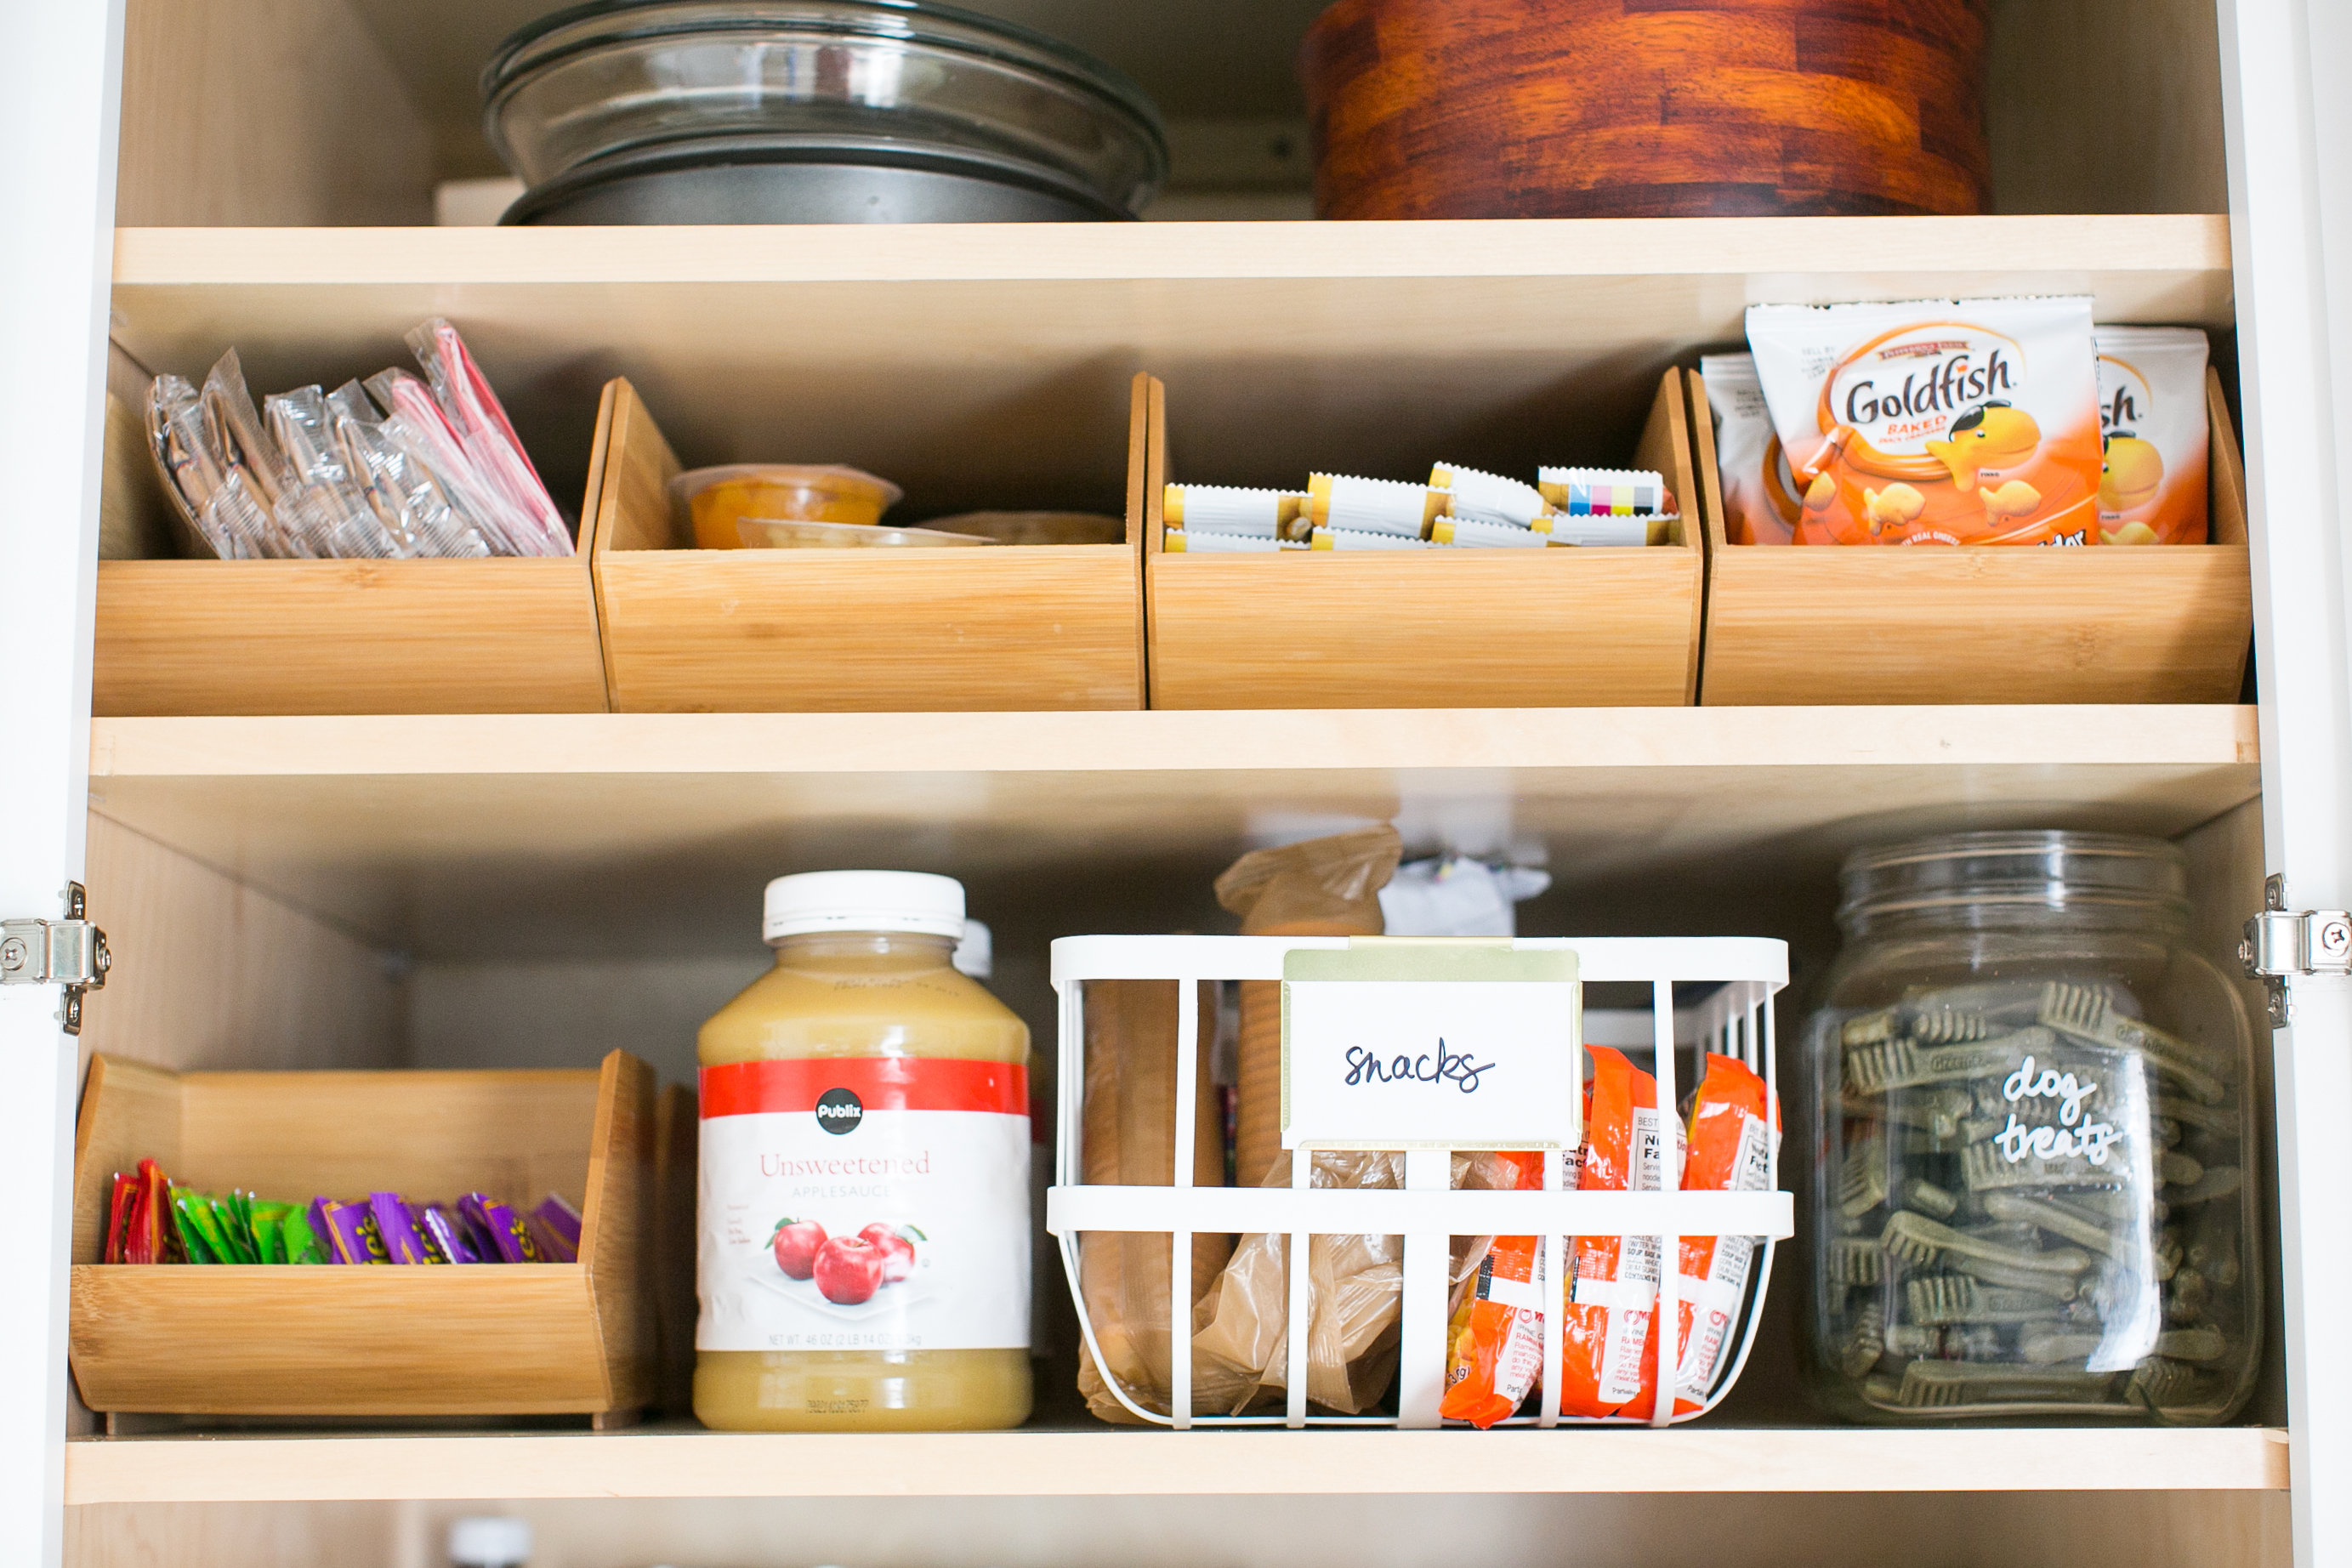
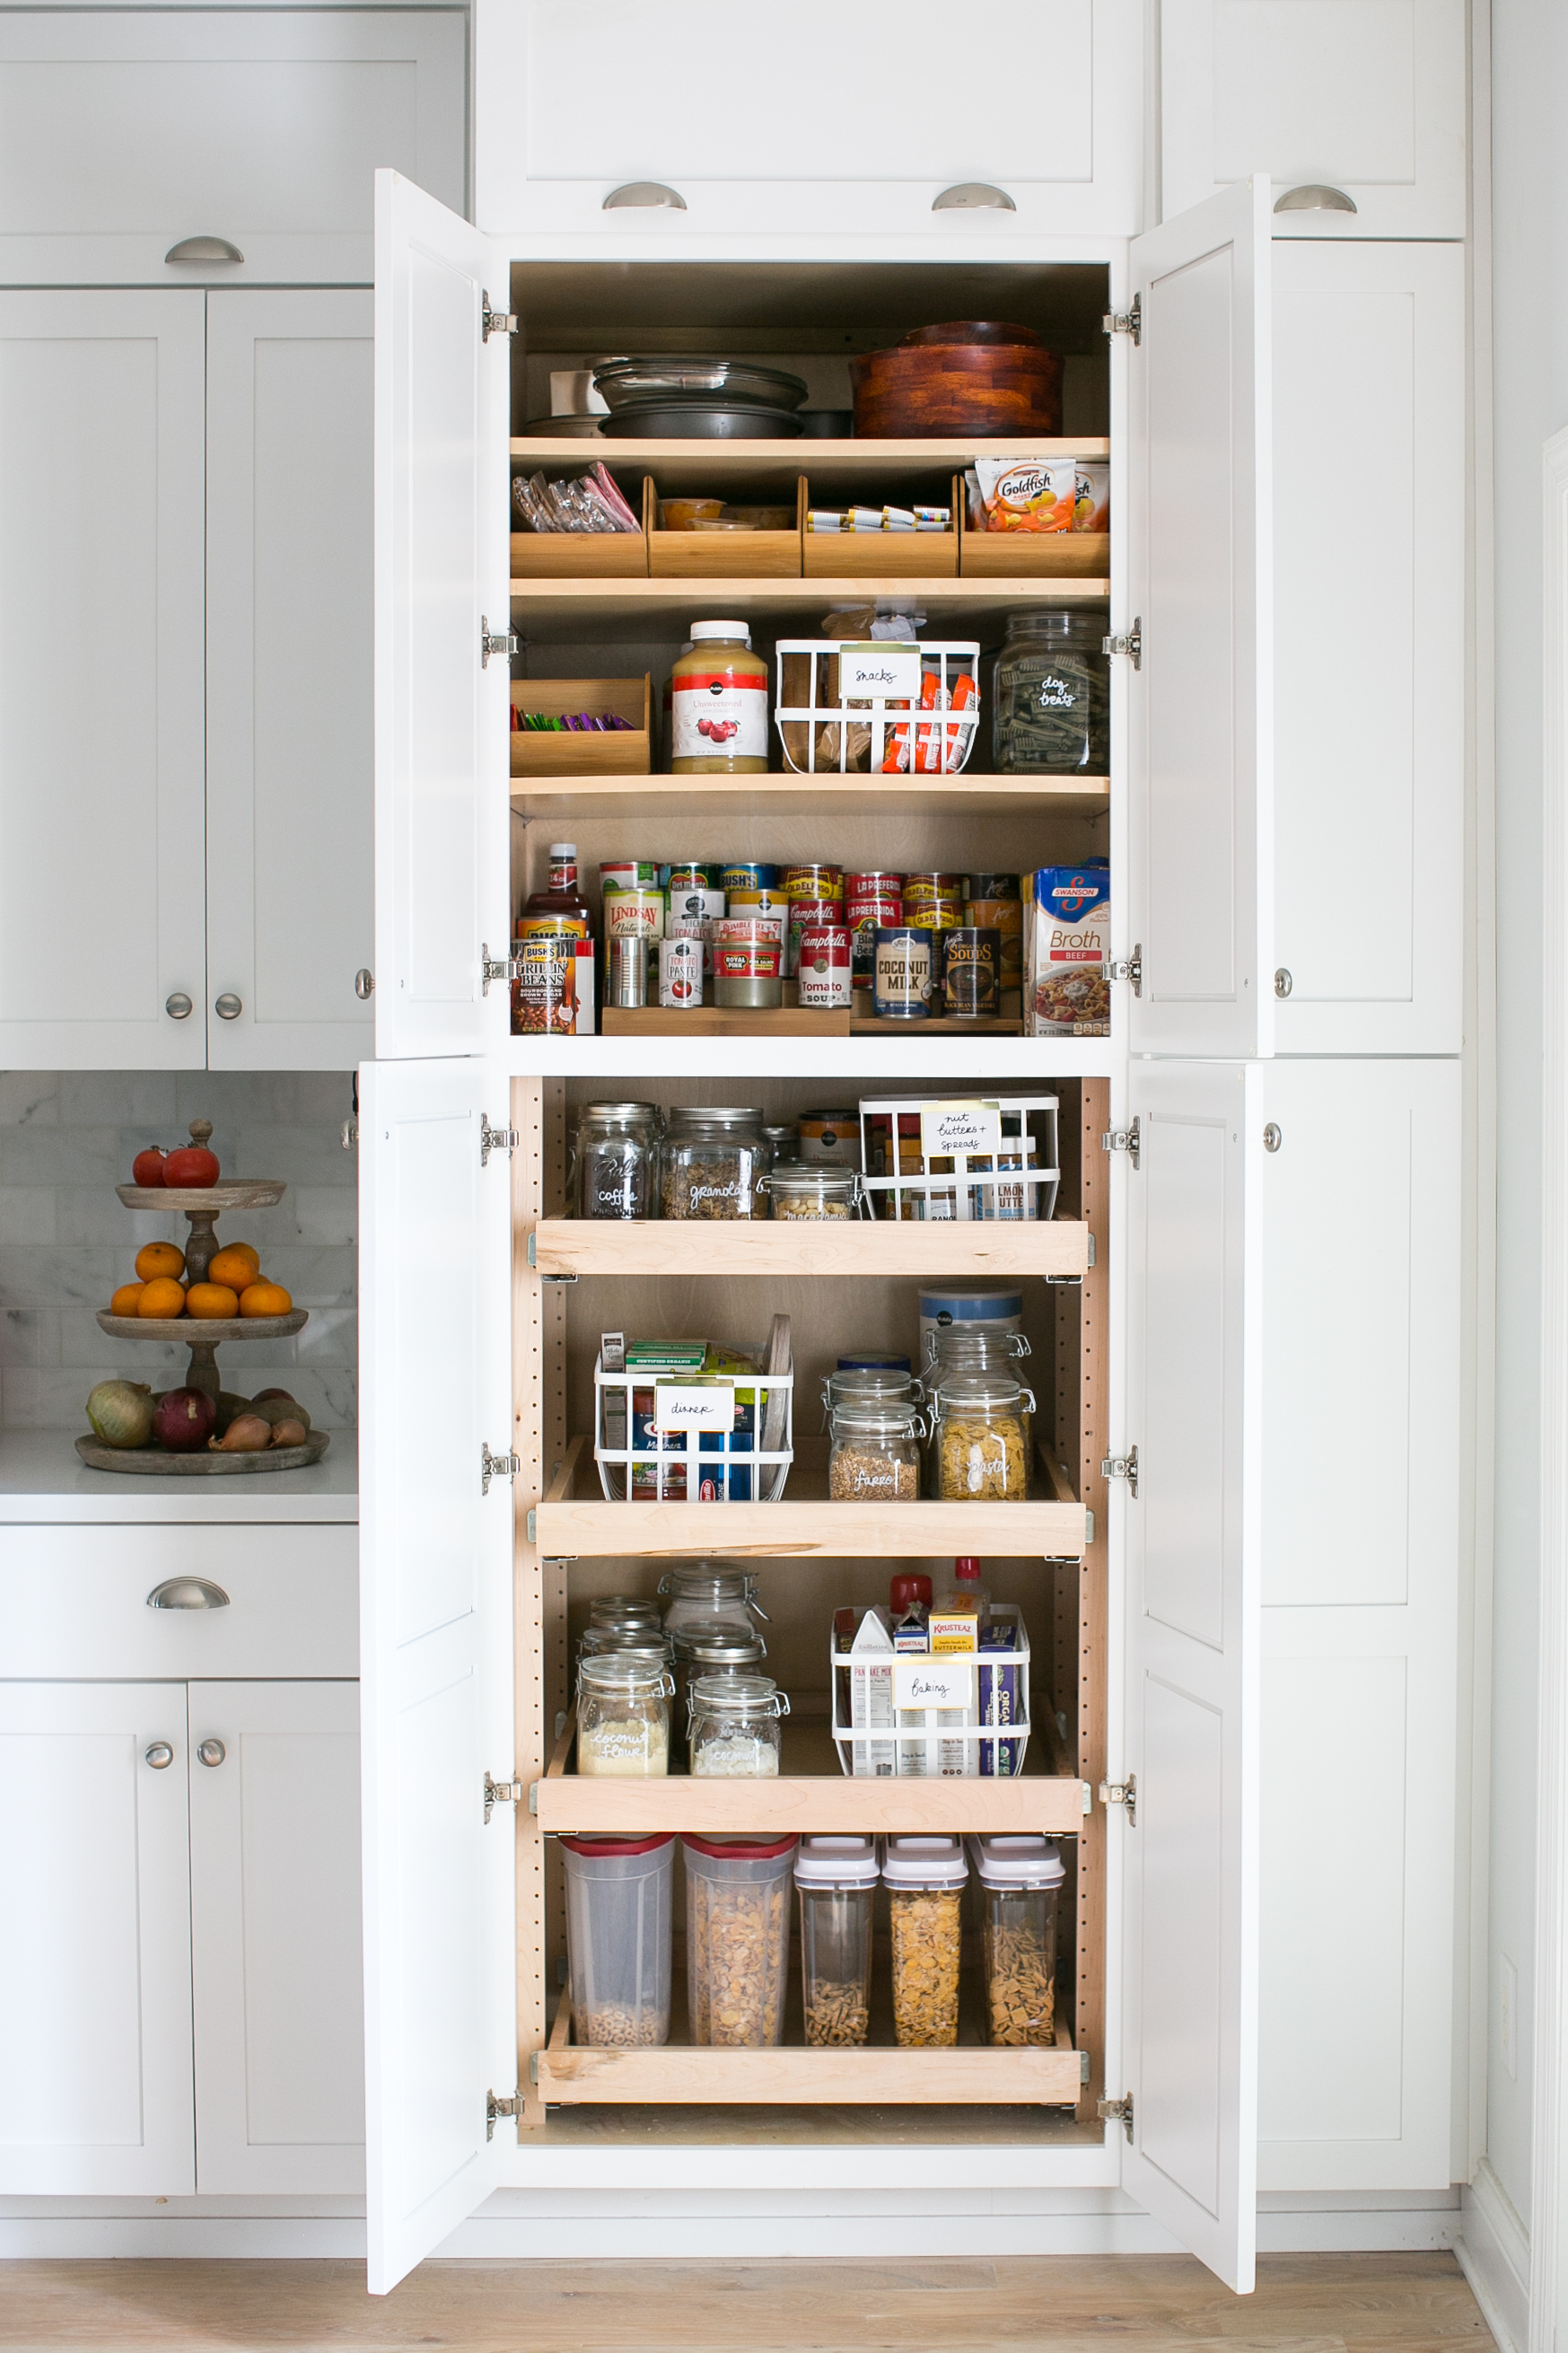
Next up, the top cabinet. I put things that I don’t really want the kids to reach up there! We made room for:
- Snacks and candy
- Can goods
- Dog treats
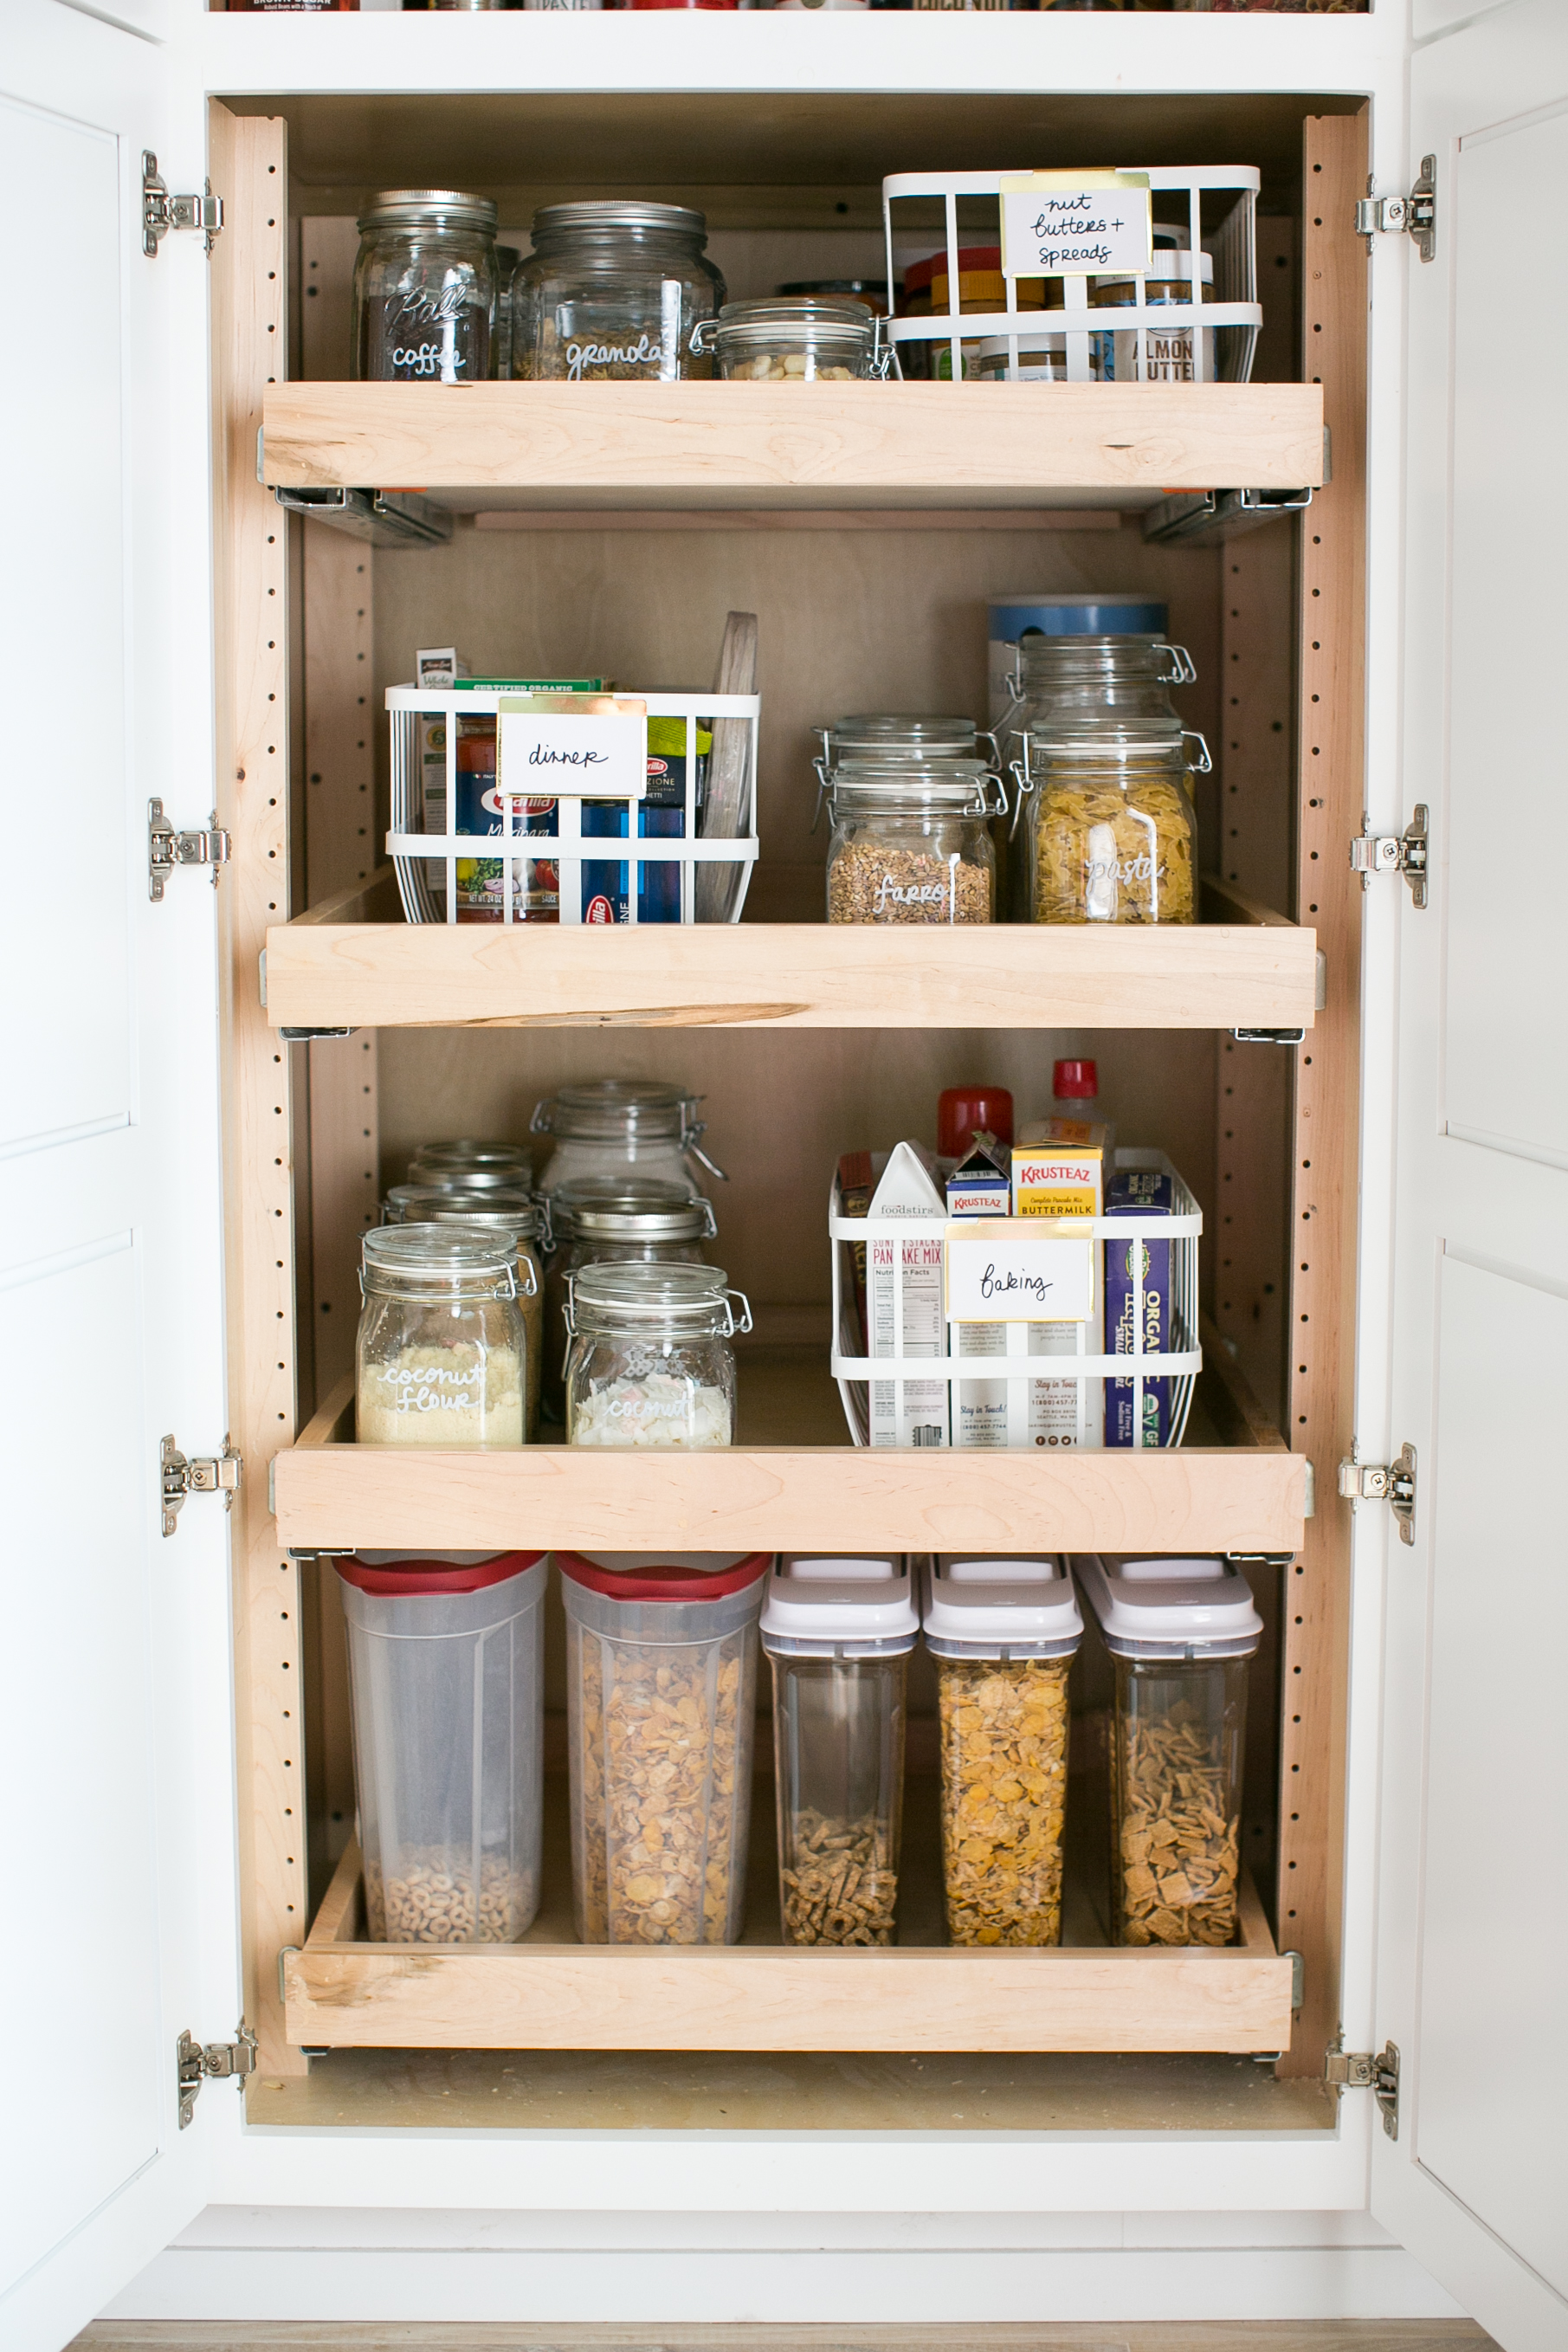
The bottom pull out section we organized the shelves to hold:
- cereal
- baking goods
- Dinner stuff (rice, pasta)
- Everyday stuff like coffee and granola
I love the glass jars because they’re aesthetically pleasing, but honestly, the biggest difference is just how much room there is without packaging. Boxes take up so much space! We used some mason jars that I already had as well as these storage jars in different sizes. The white baskets are awesome! (Here’s another size too.) I like that they’re metal so they’re sturdy, and they hold way more than I thought they would.
And of course, labels. Now that I’ve been using the pantry for a couple of weeks I have a whole new appreciation for baskets and labels. Life sort of pulls things into chaos, don’t you think? Those labels staring me in the face are helping to maintain order. Now the nut butter (we have like 8 jars?!) always goes back into the nut butter basket.
Cereal went into the bottom drawer and into these dispensers. We went with plastic for these guys because my kids drop things… a lot.
And that’s it! Here’s a look at the whole cabinet. This may be one of the most satisfying projects I’ve ever done.
How do you organize your pantry? Let me know your tips and tricks!
Photos: Susan Hudson
Styling: Elizabeth Ulrich
8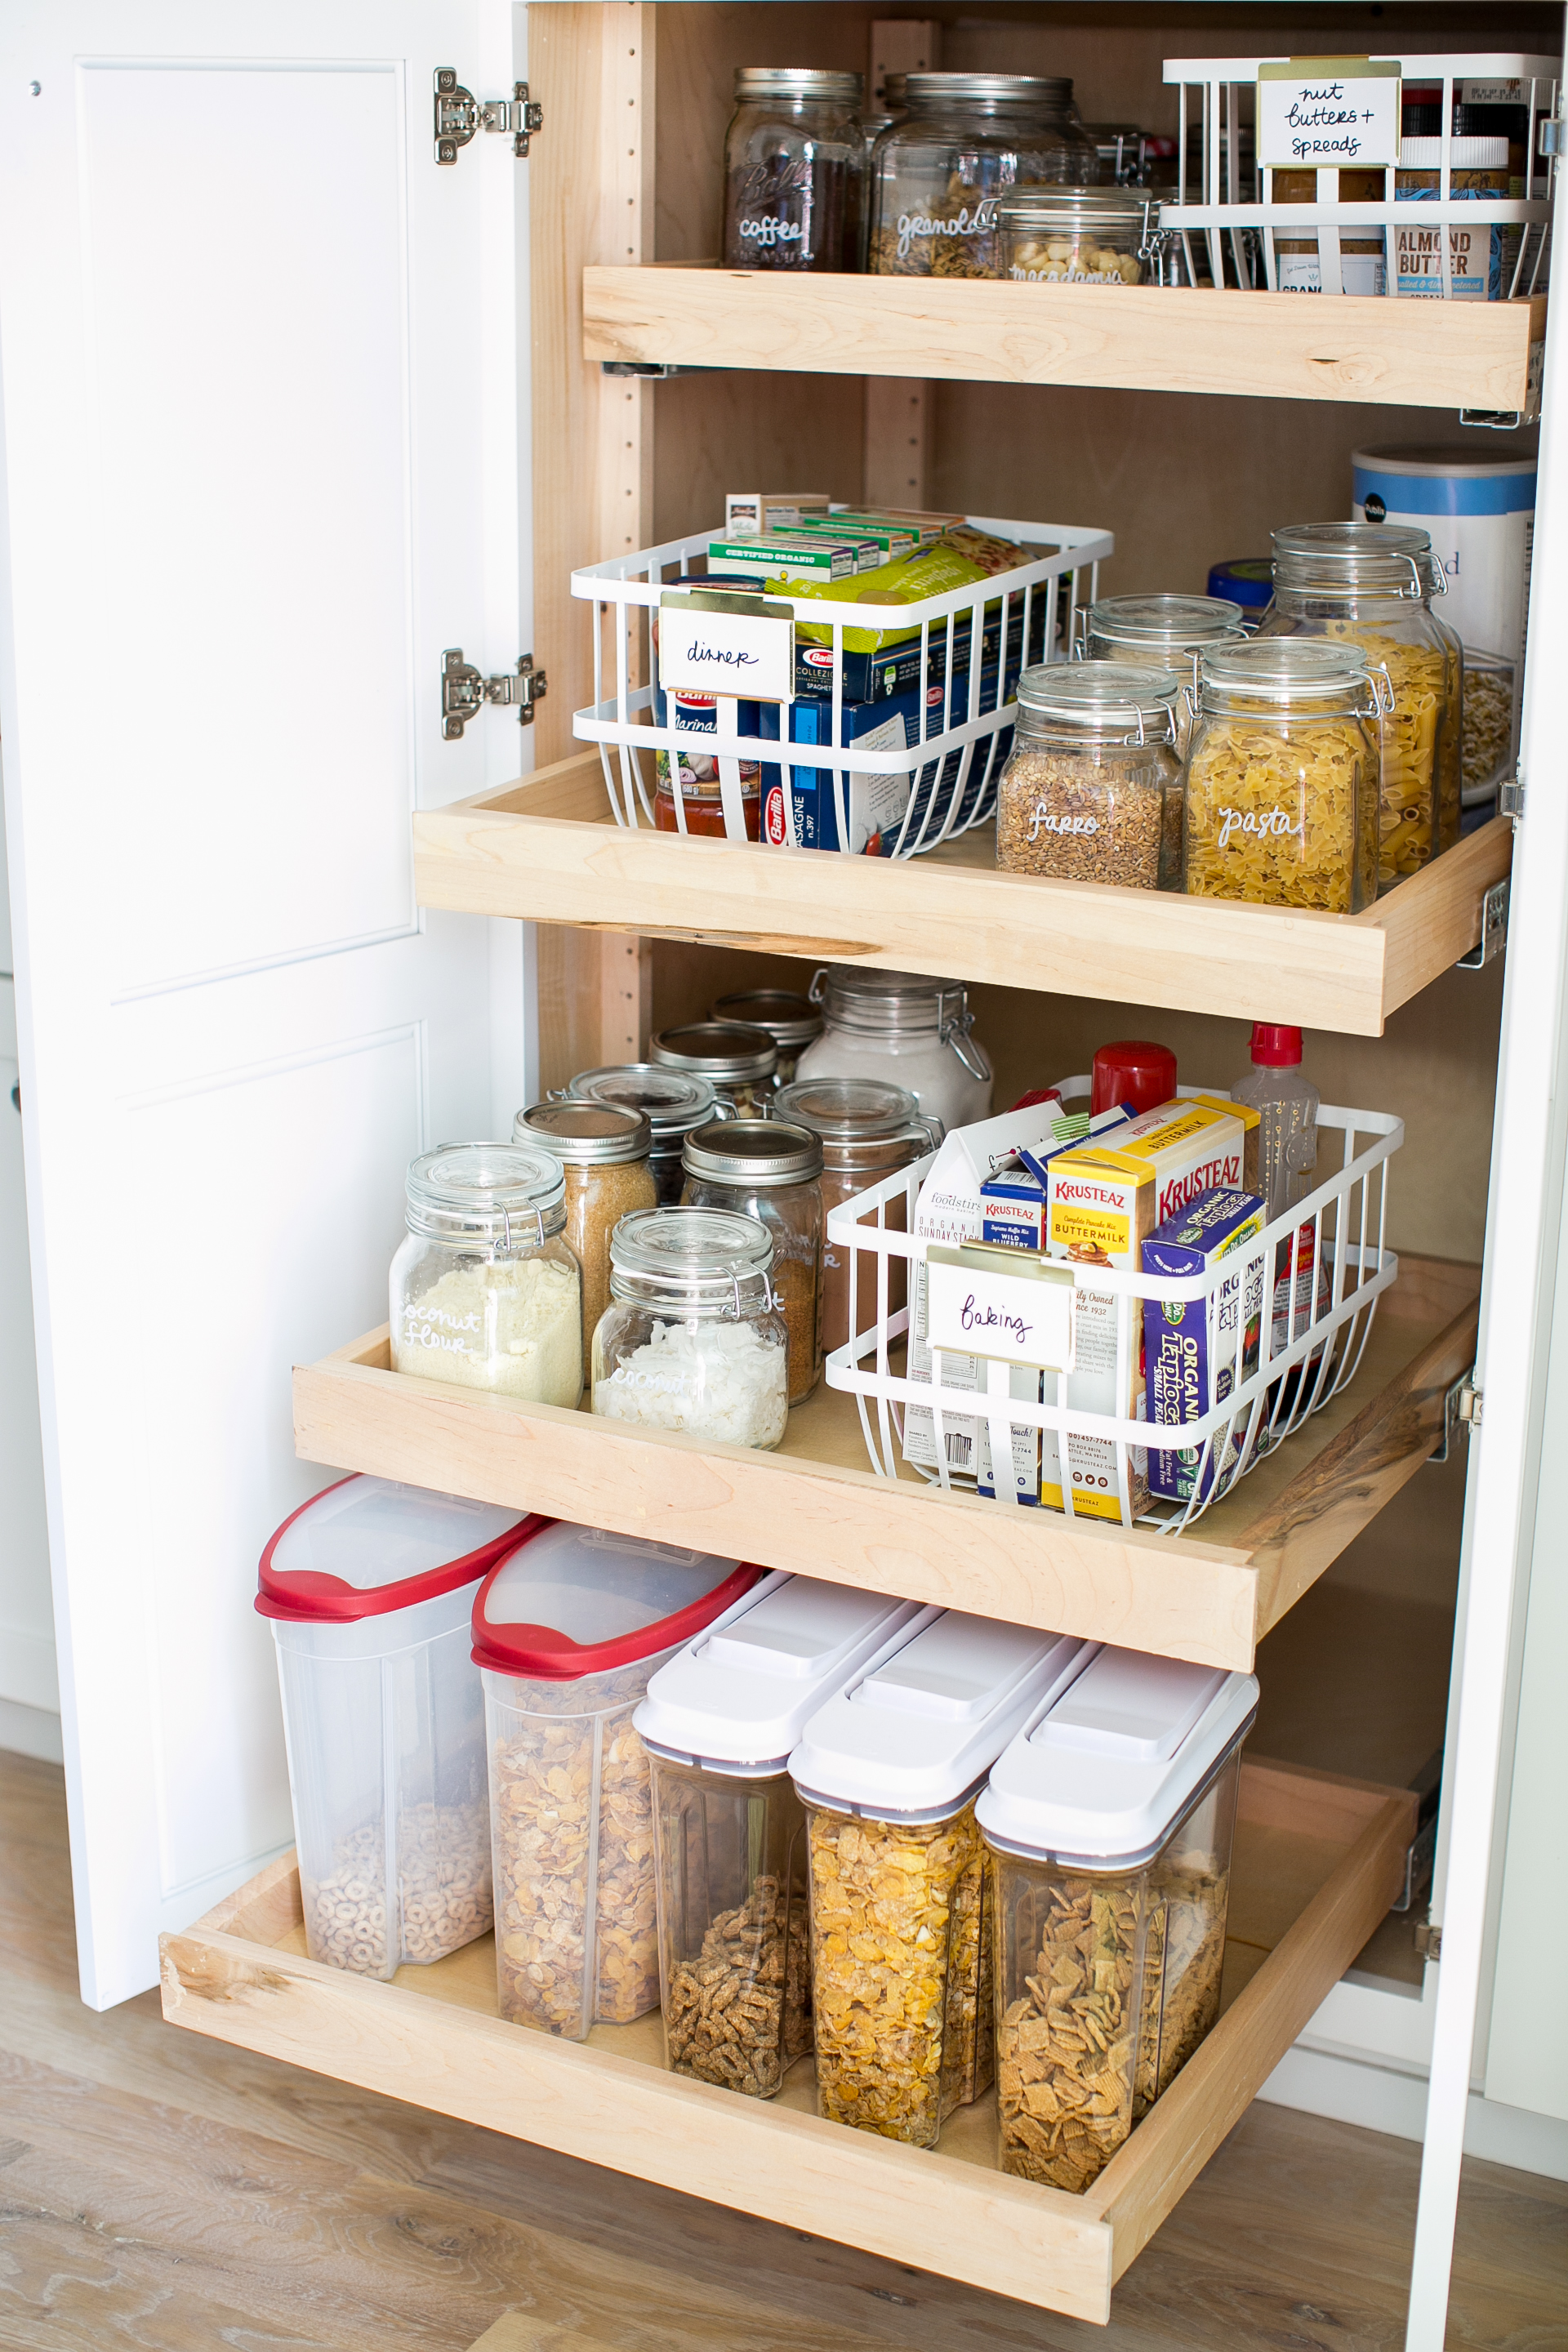

Mobdro says
hey… Your pantry is really very neat and clean. Thanks for sharing those photographs with us.