 Supplies needed
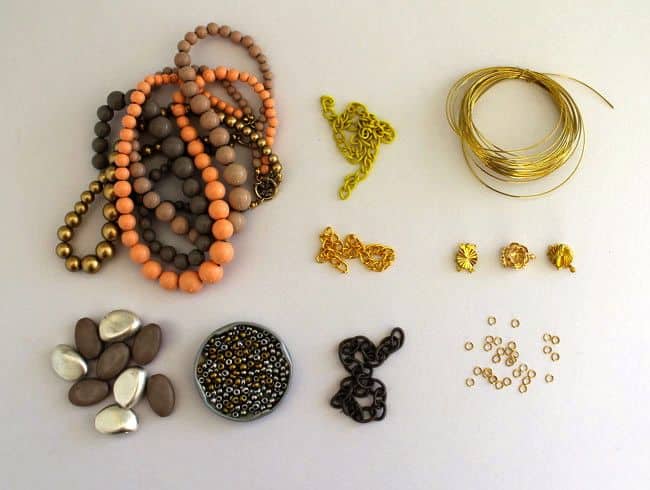
- beads – I used a selection from old necklaces
- large curb chain
- 0.8mm wire
- 5mm jump-rings
- vintage style jewelry clasps
Step 1
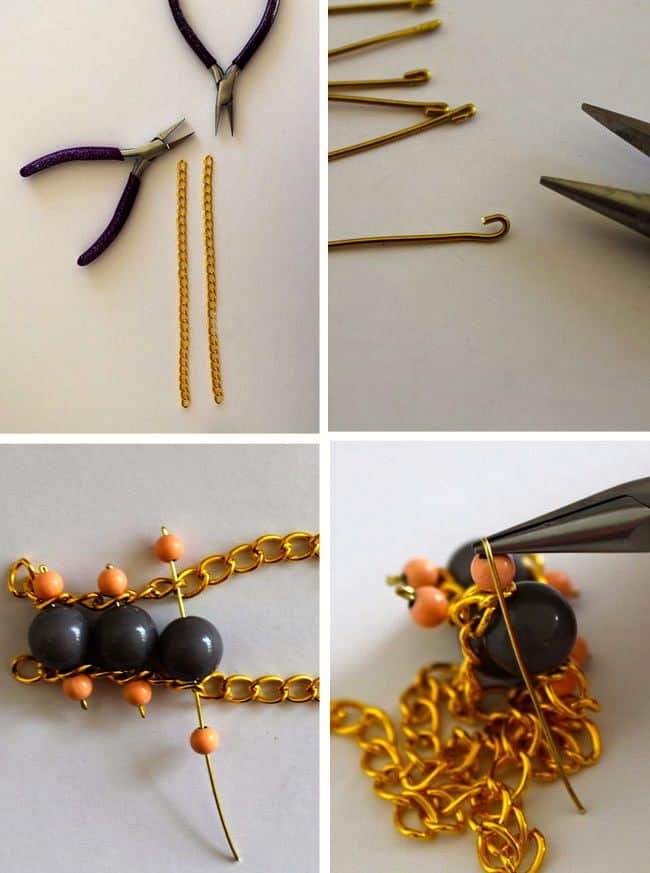
Cut two lengths of chain, measuring the same width as your wrist plus 5 cm.
Step 2
Cut lengths of wire of approximately 10 cm long. Fold over one end by a few millimeters and squeeze closed, forming little loops or ‘pin heads.’ I found it was easier to make a batch of these all at once.
Step 3
Now start to thread your beads. Leave two links of chain at the end of the bracelet, and then thread: bead, chain, bead, chain, bead. You can use all the same size beads if you prefer but I liked the contrast of sizes. You will also need to make sure the holes of the outside beads are quite small so that the wire can’t pass through.
Step 4
Once all the beads are in place, fold the end of the wire over the thinnest part of the pliers. You need the beads to be sitting really snug, and make sure the loop of the wire is as close as you can get to the last bead, to keep everything from moving around.
Step 5
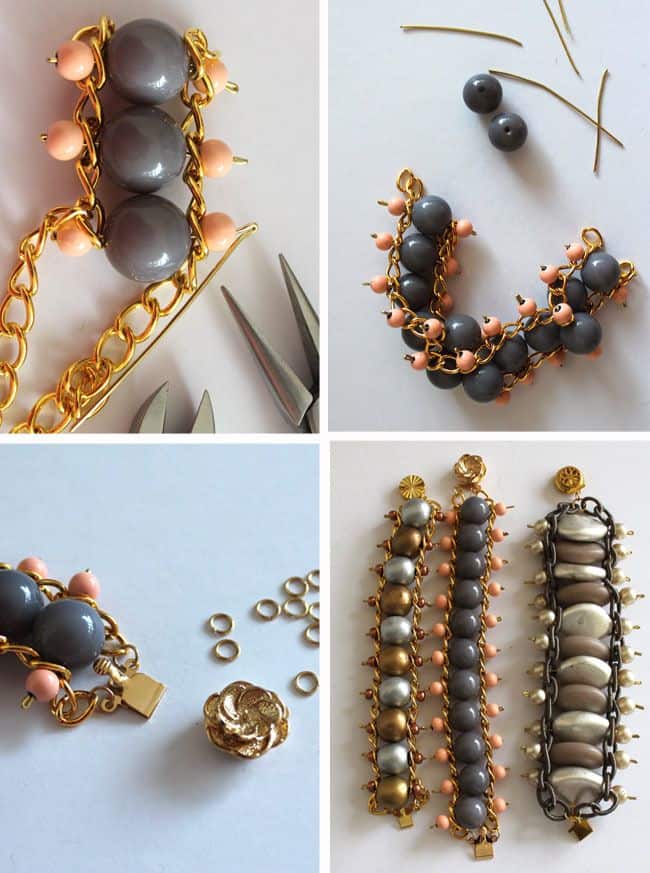
Squeeze the loop together and snip off the excess wire.
Step 6
Repeat the above steps until you have a full bracelet of beads making sure you stop two links from the end of the chain. You want to keep your beads as close together as possible. I tried to put a bead every two links but sometimes it got a bit bunchy so I had to do every three links. Keep an eye on bunching, and if you have to miss a link, do so.
Step 7
Add your clasps to the ends of the bracelet, using 5mm jump rings. Each of these clasps has different holes. If there are two holes per clasp, then link either side of the chain accordingly. If there is only one hole, first link your chain together forming a ‘triangle’ shape, then fasten to your clasp.
Step 8
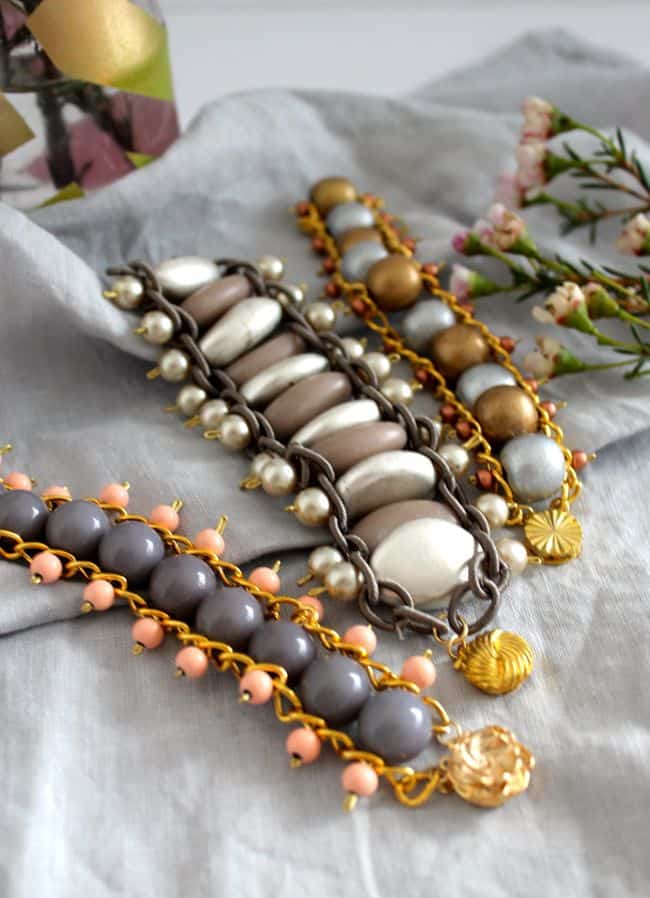
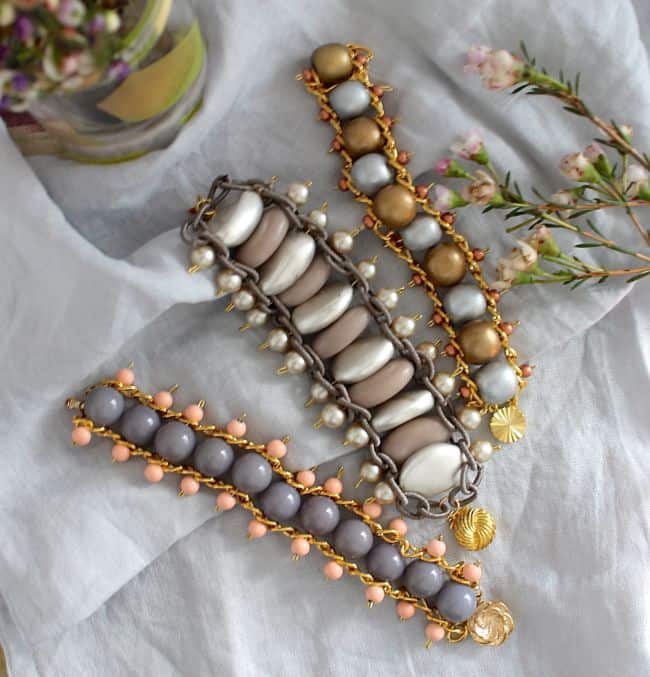
Make more bracelets – as soon as I made one, I had to give a few more variations a go!
 Supplies needed
Melissa Page says
Who would have thought these bracelets were so easily put together? They look gorgeous! *Looking for old beads right now*
diana says
No picture!
Candy lang says
If you were to sell one like this, how much would you charge?
Emilia says
Gorgeous! I’m going to make one for myself!
Samantha says
Nice jewelry rehab.