The last few days our house has been covered in glitter and Mod Podge. One of my favorite traditions is decorating the Christmas tree the weekend after Thanksgiving. It marks the shift into Christmas and gives the official “ok” to holiday music. But recently I realized that I have no idea where our ornaments are. (In one of the many unpacked boxes in our basement I hope.)
Now that the kids are older, they are getting into the tree trimming festivities (the hot chocolate bribe doesn’t hurt). So I thought it would be a fun project for us to make some new ornaments. Glitter was a big hit!
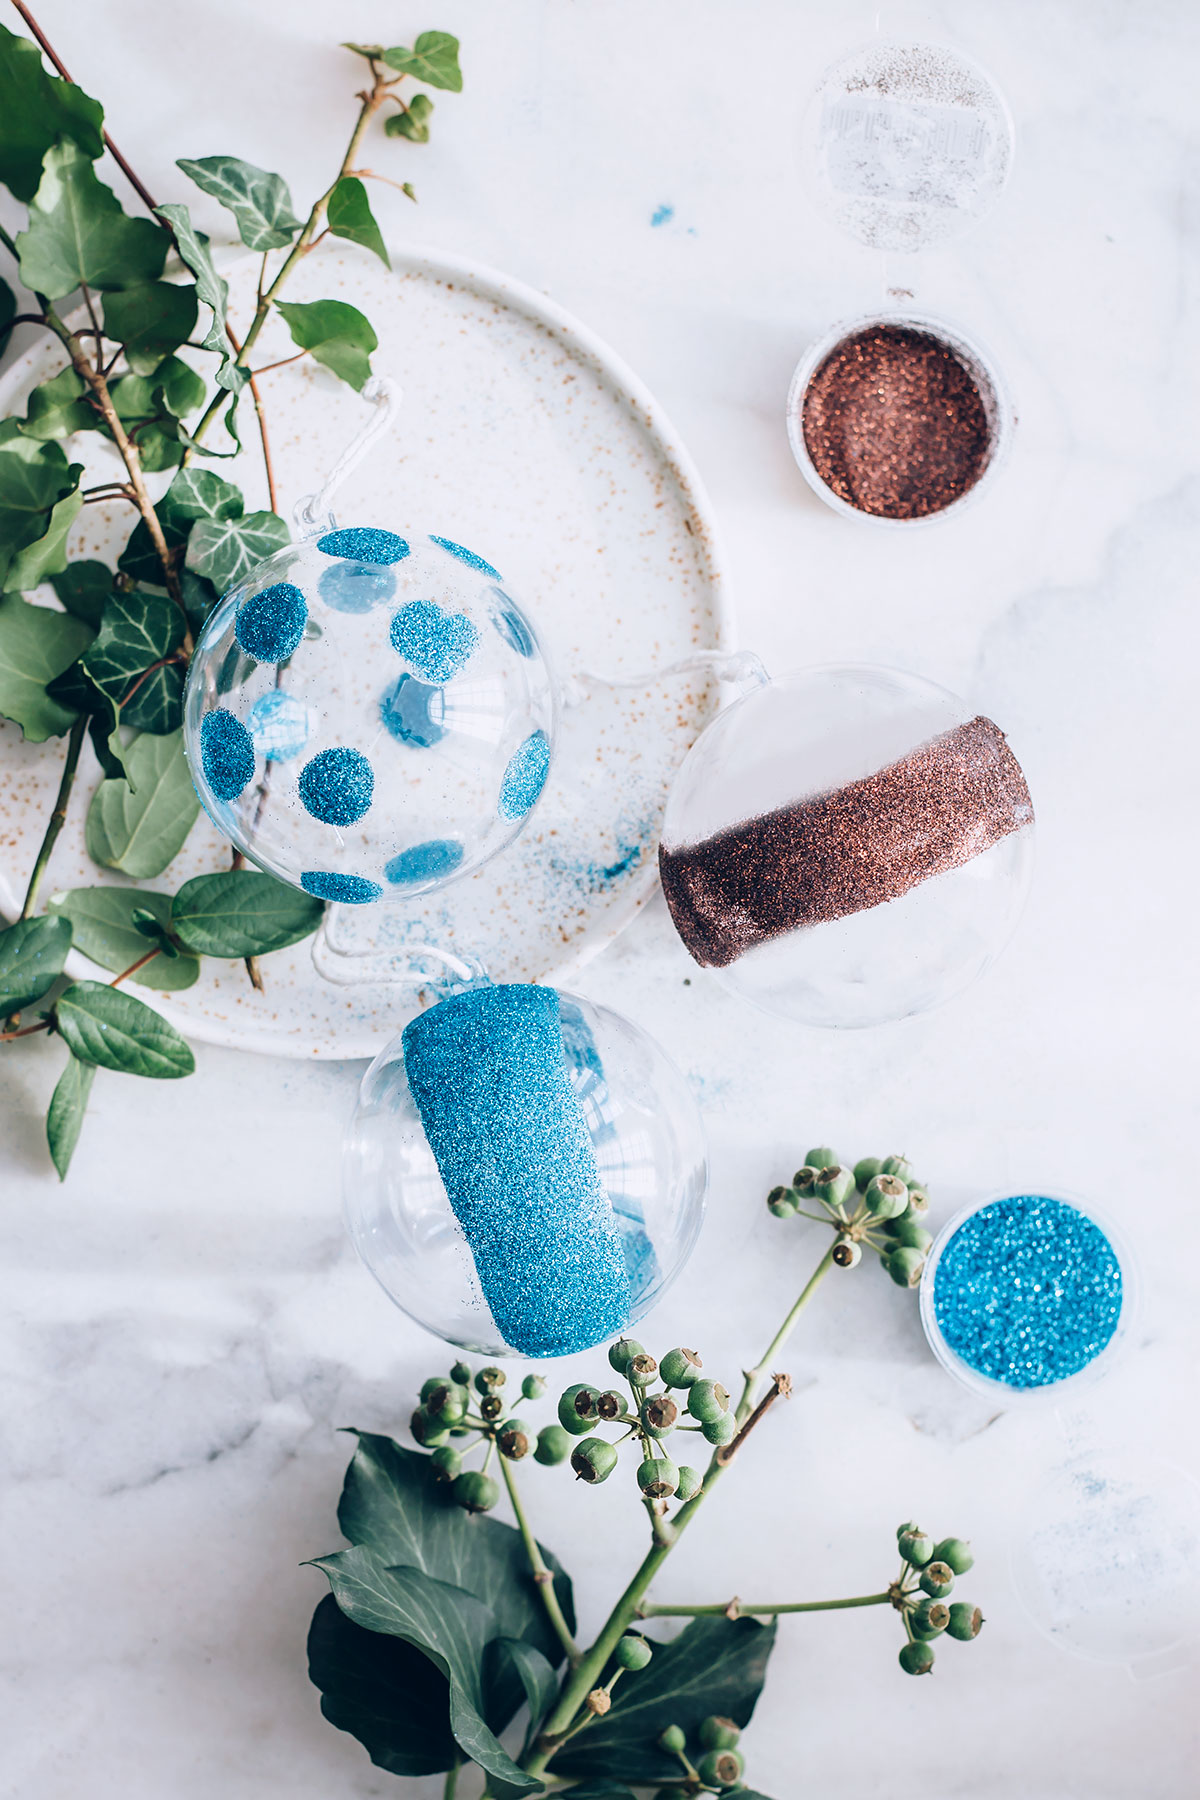
DIY Glitter Ornaments
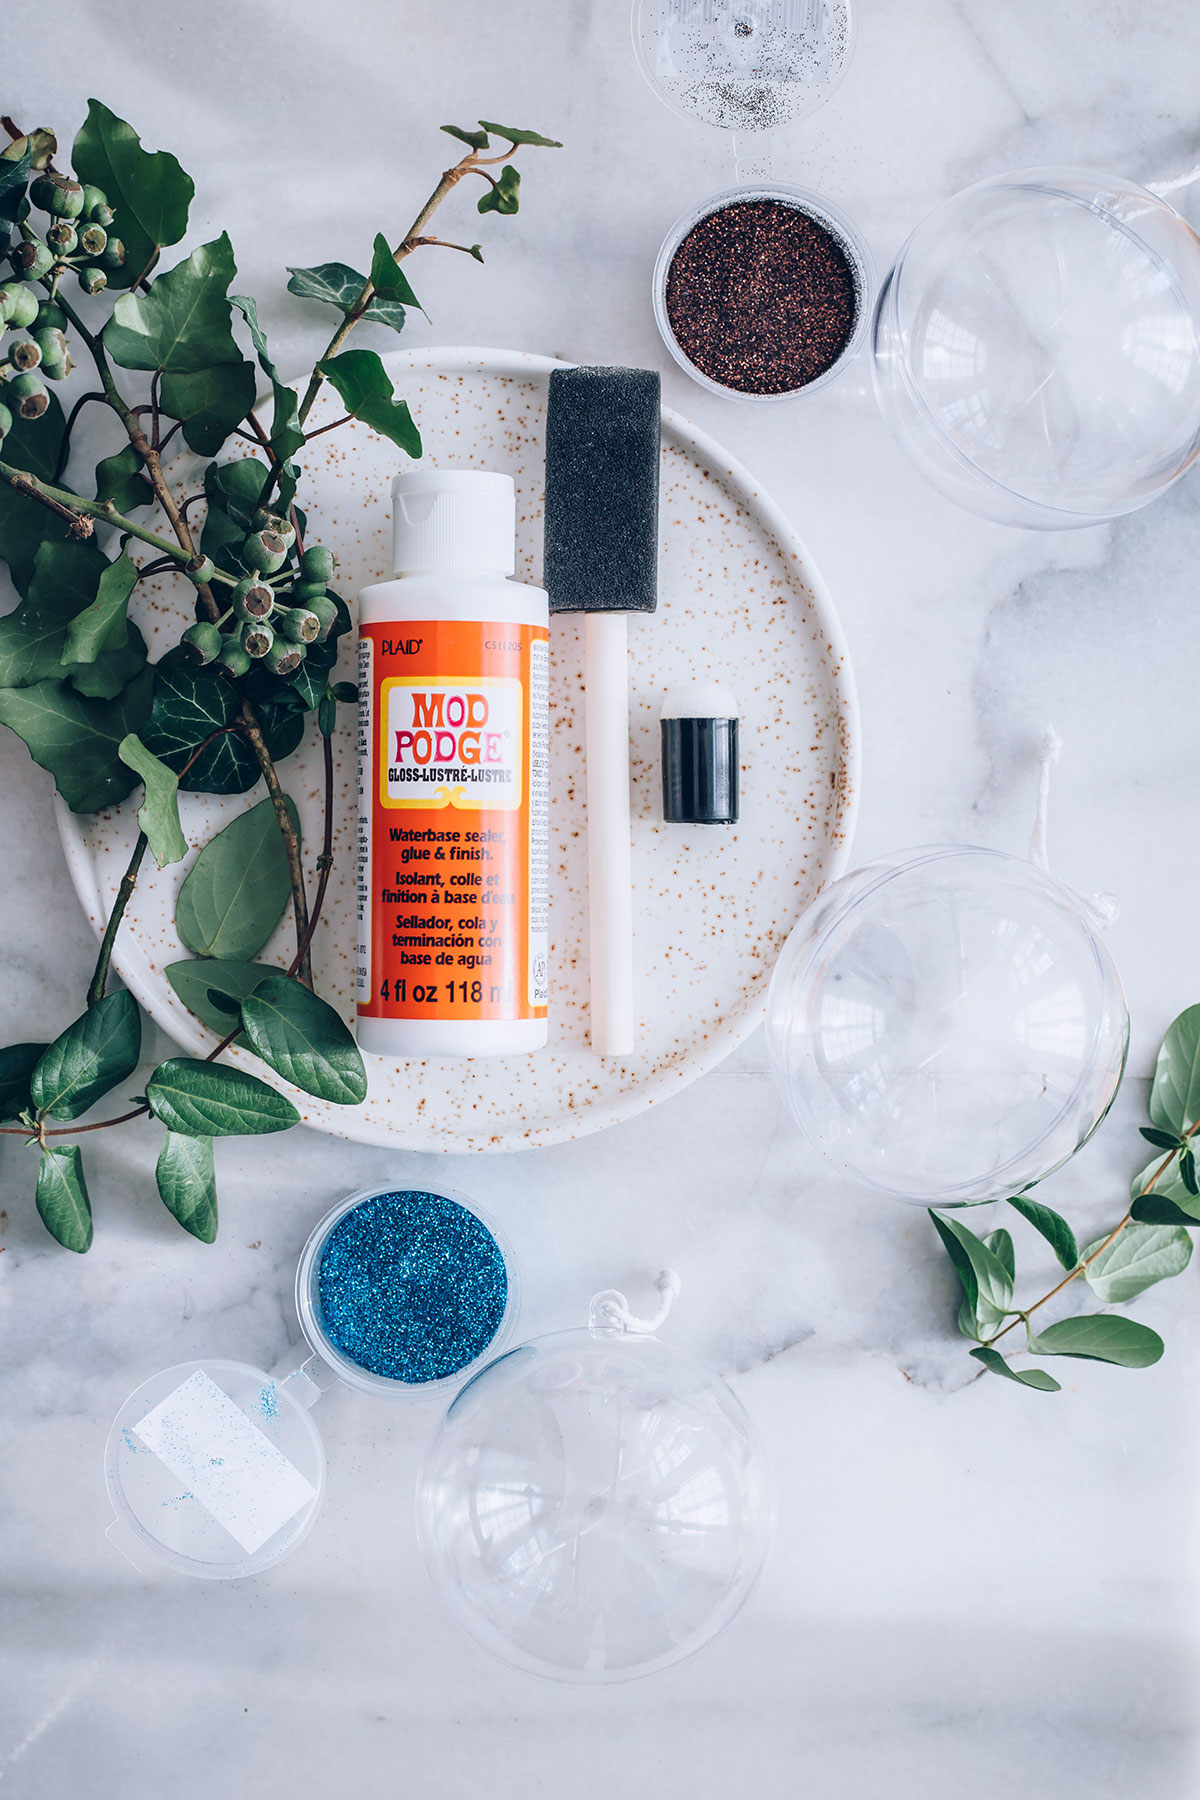
You’ll need:
—Glass ornaments. You can get them now for half off at Michaels.
—Foam brush and round foam brush.
—Glitter in various colors. Fine glitter worked better than chunkier glitter.
—Clear acrylic sealer (optional)
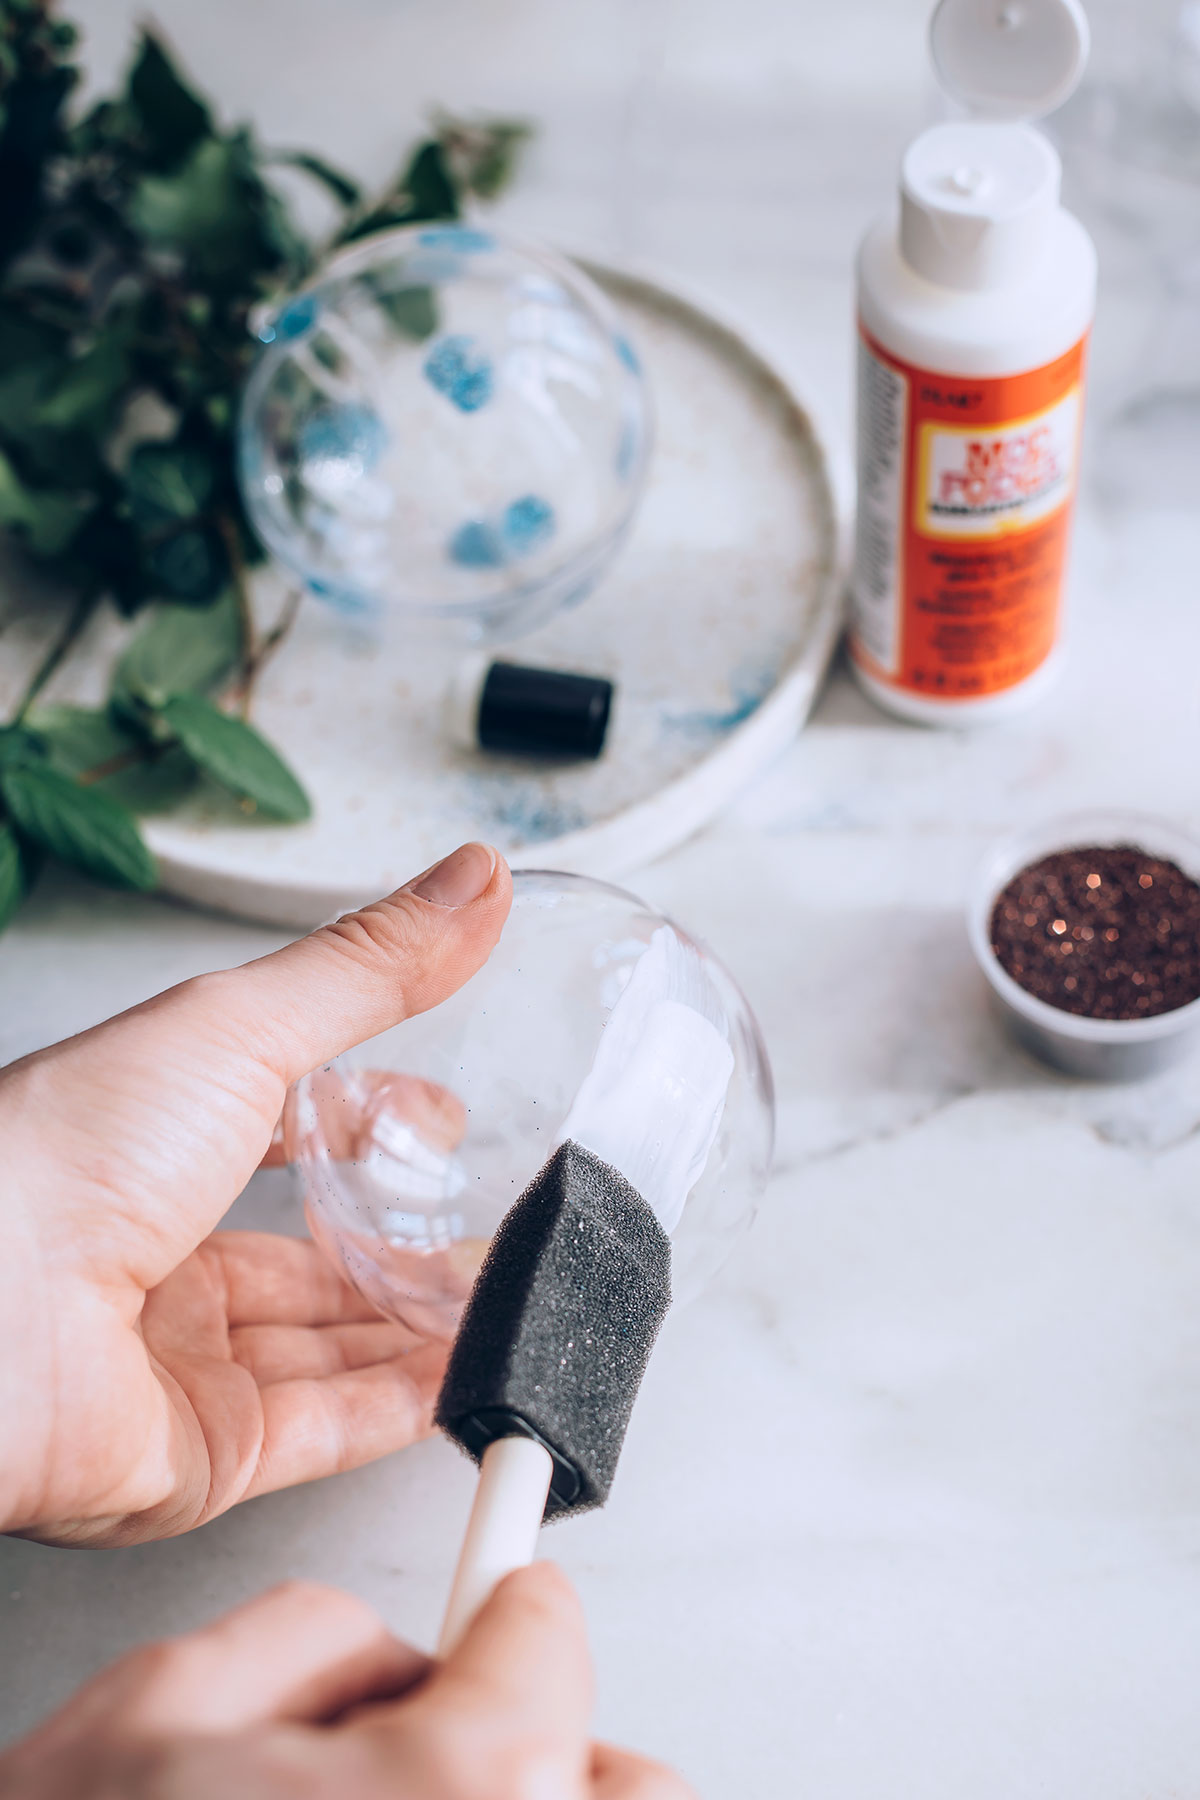
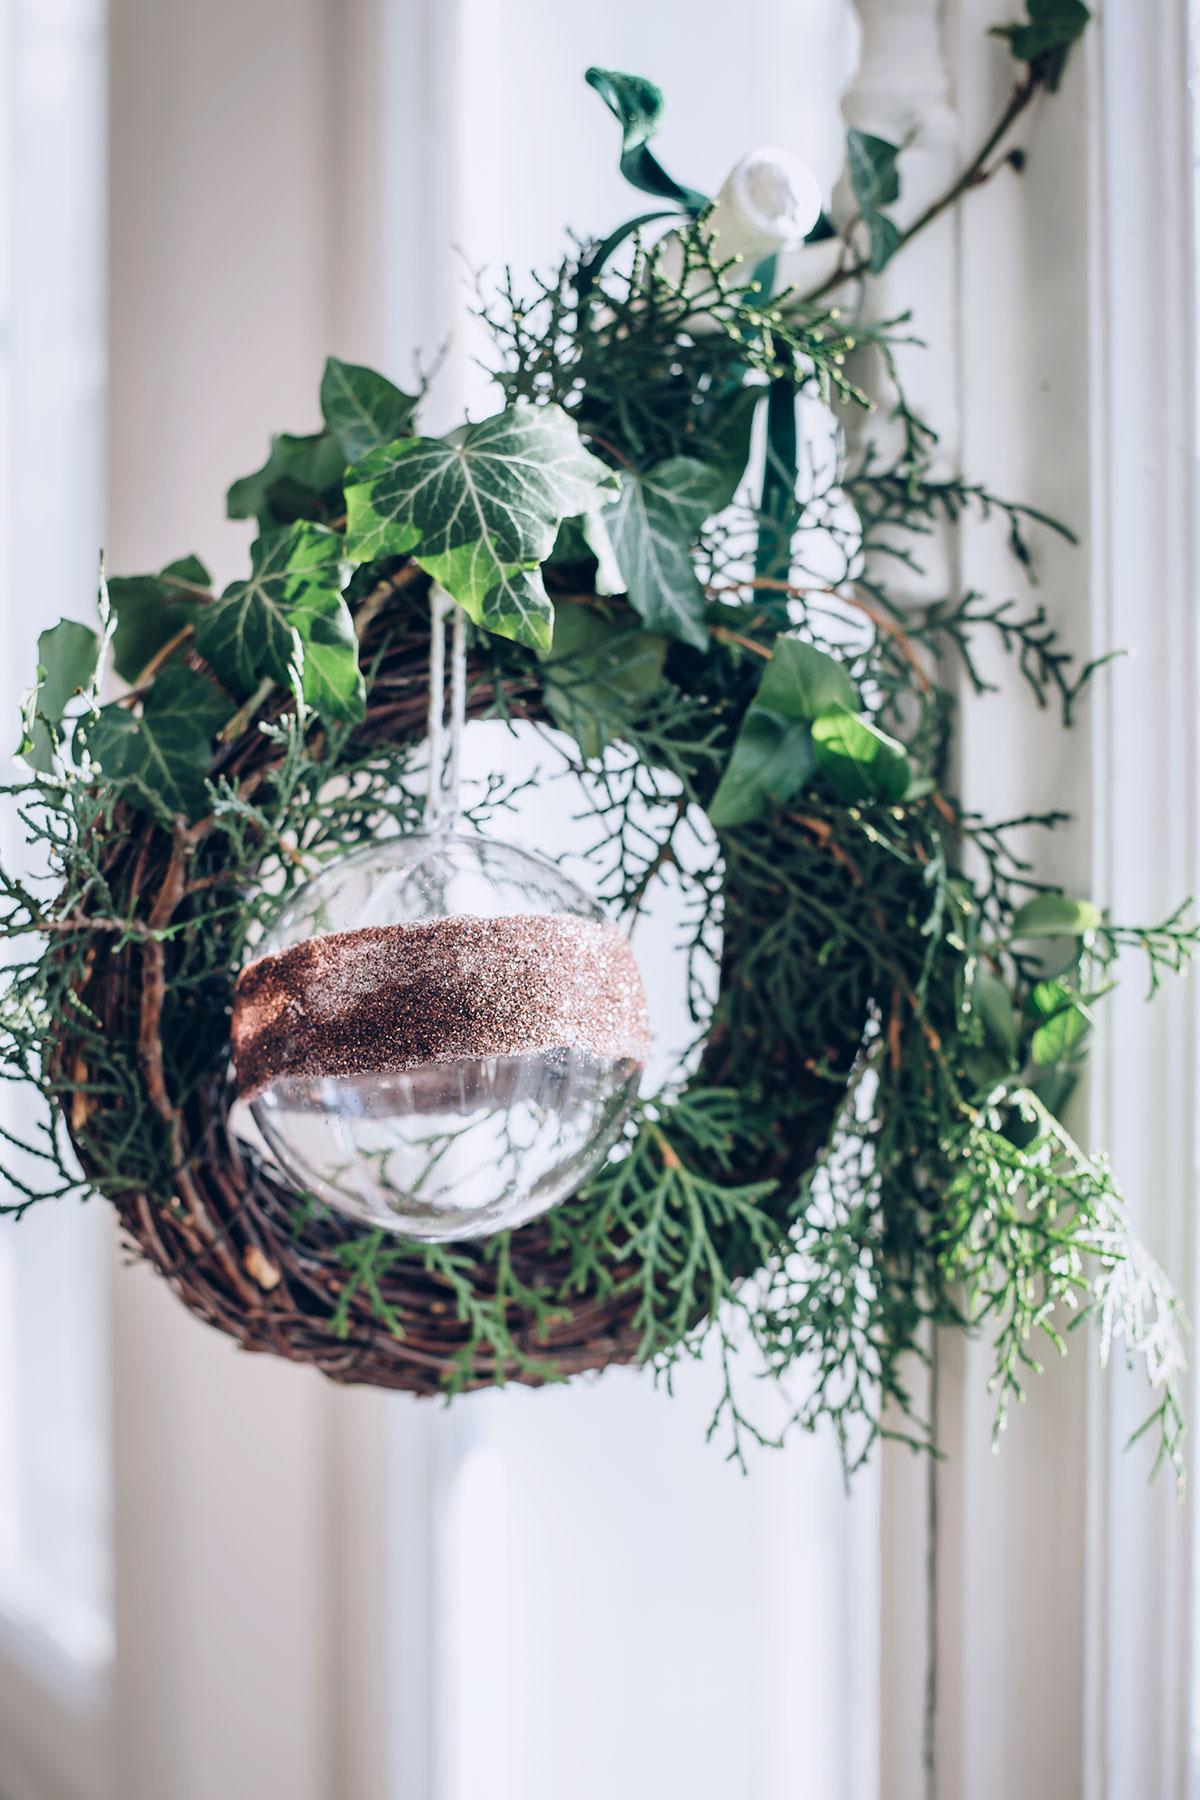
Dipped Glitter Ornaments
Step 1: Decide how much glitter you want on your ornament – one line? the whole thing? half? Then apply Mod Podge to that area with a foam brush.
You can free hand the design or tape off the area that you want to paint for a straighter, neater edge. Get creative with the tape – you could even punch shapes out of it – or paint the entire ornament if you want to cover it all in glitter.
 Step 2: Working over a plate or paper towel, pour glitter onto the glue area. I always forget the plate and end up with glitter everywhere. Sam’s hair even had some.
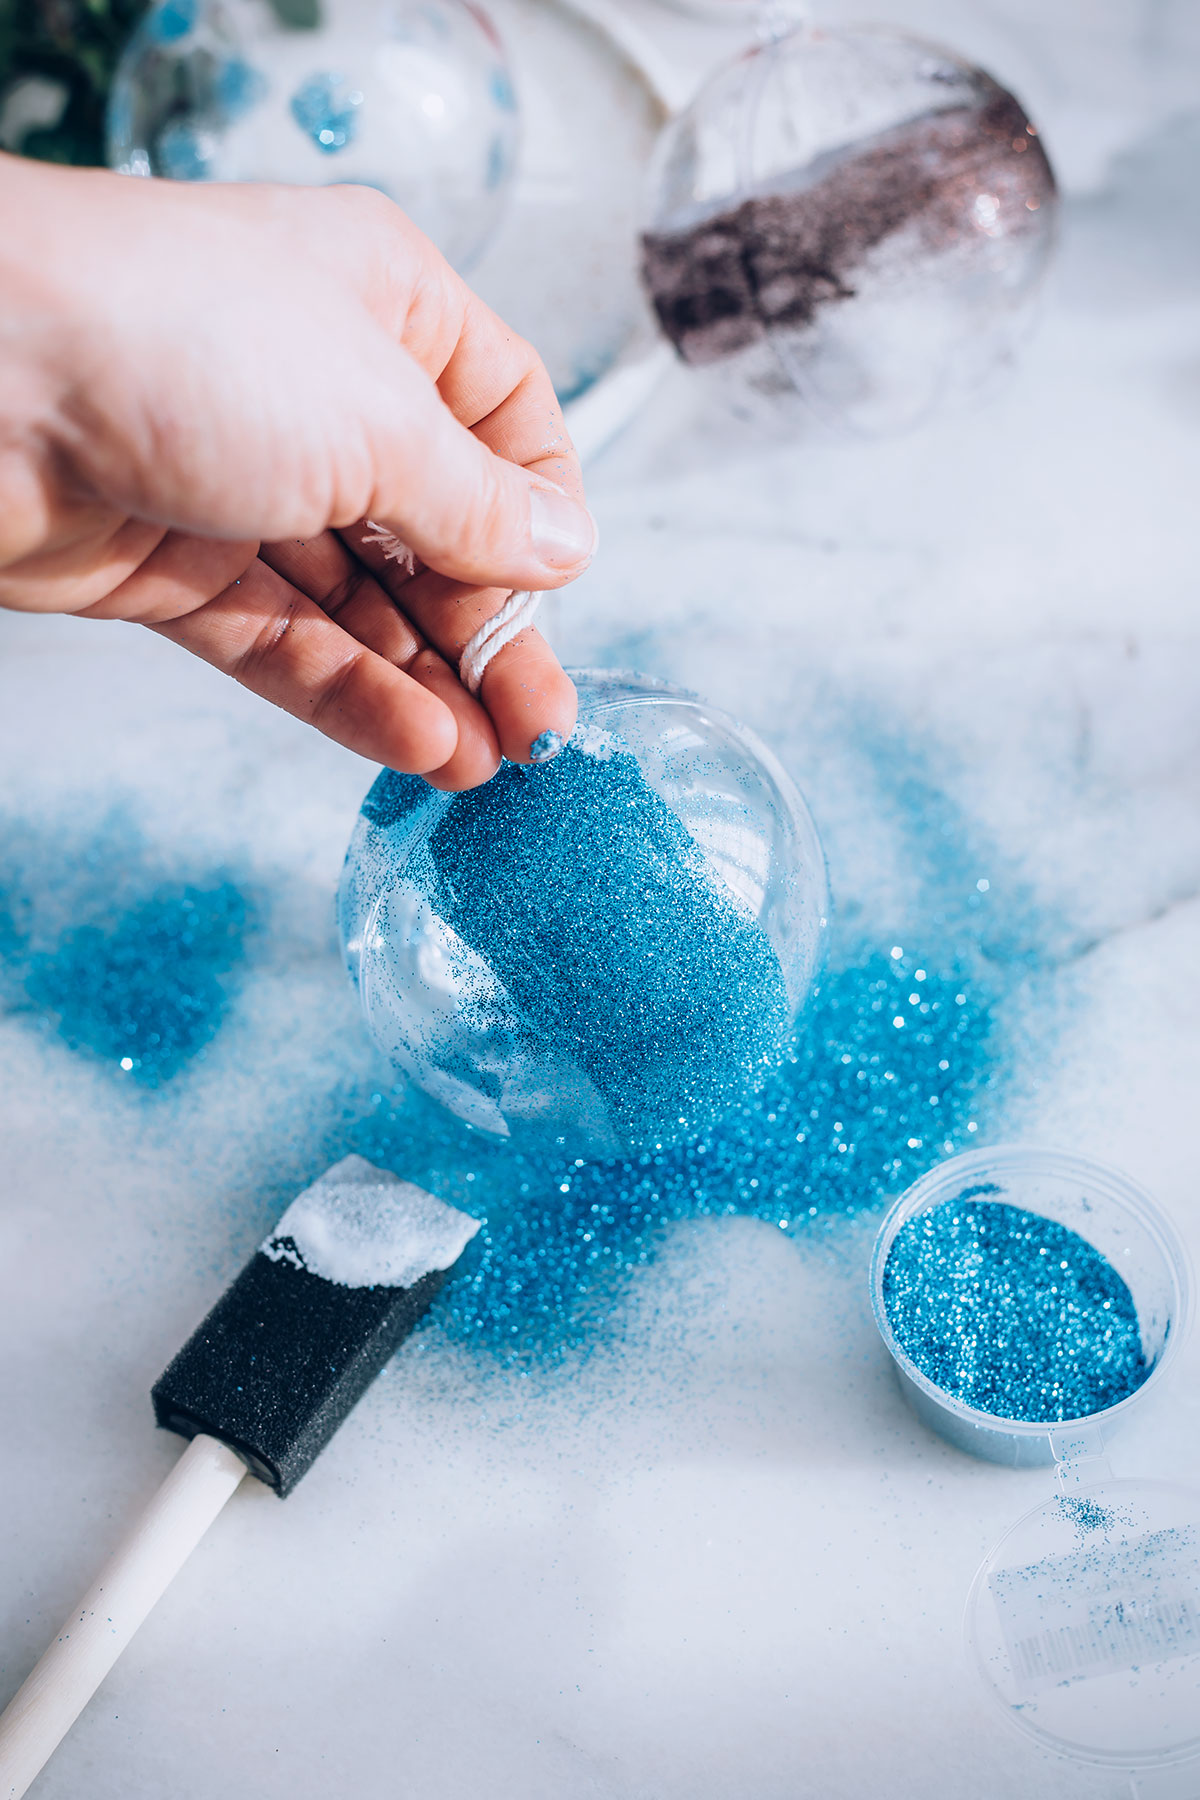 Step 3: Shake off the excess glitter and remove the tape. Let it sit upside down until dry. Once dry the glitter shedding wasn’t too bad, but you can spray with acrylic sealer to make sure.
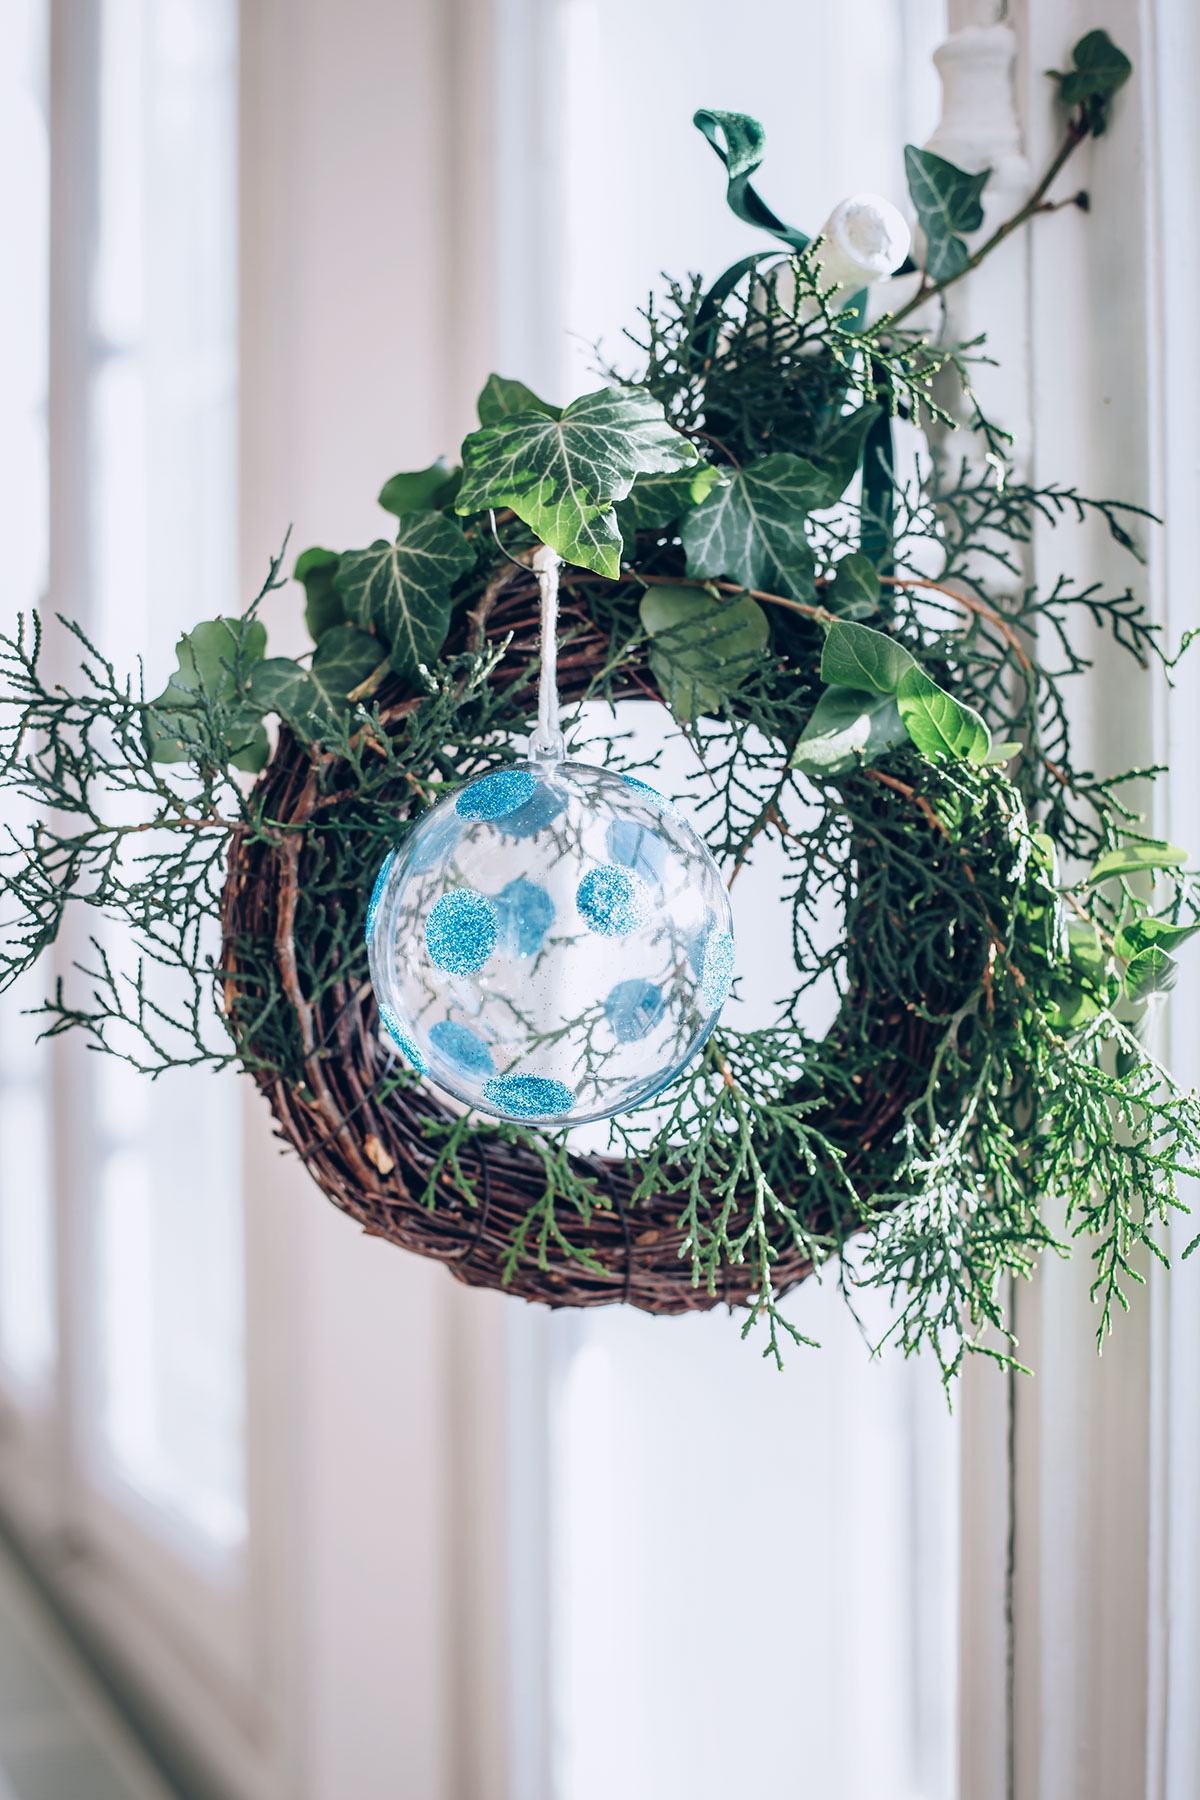
Glitter Polka Dots
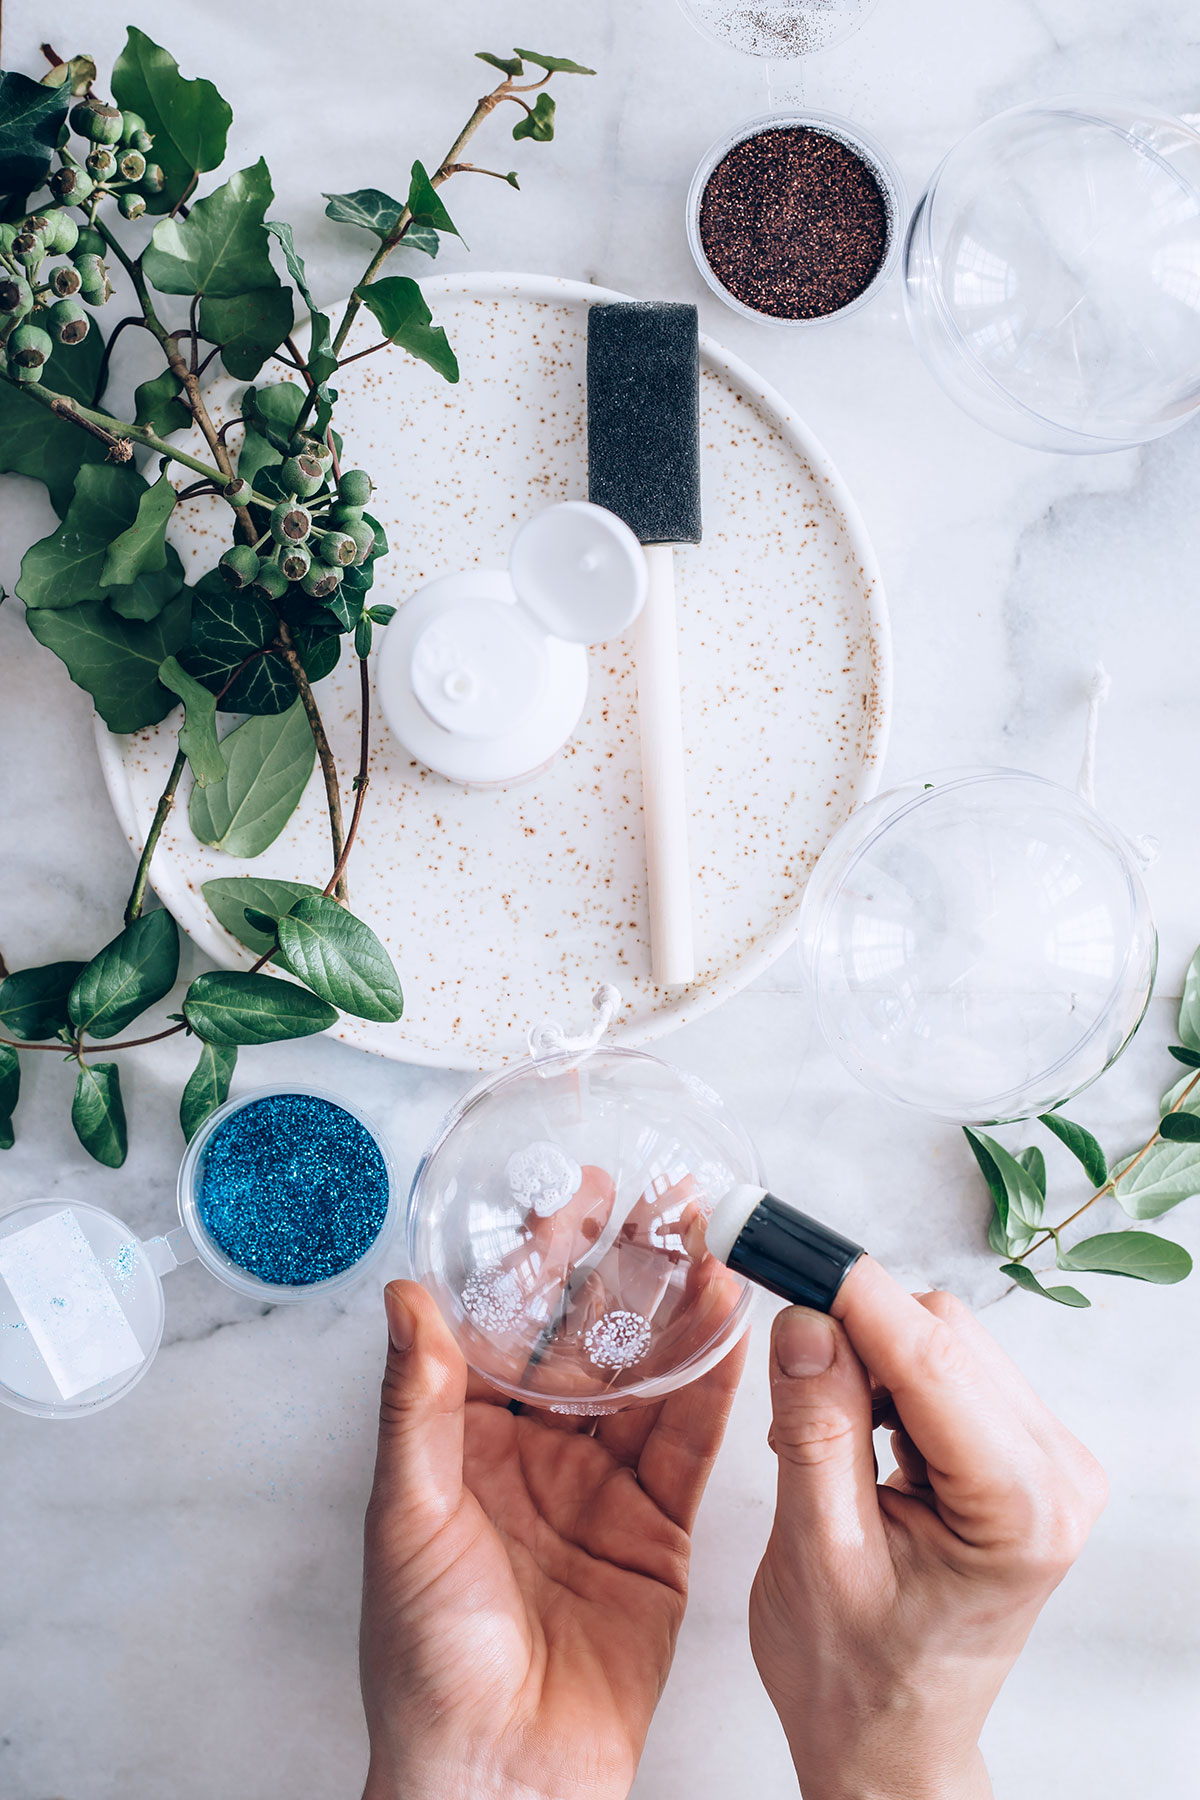 The polka dots are my favorite! Use a round foam brush to apply circles to the ornament. Then pour on your glitter. Shake off the excess – use fingers if needed – and let dry.
 We had so much fun making these – it might be a new tradition! What are your favorite Thanksgiving traditions?

Photos by Ana Stanciu
20
Gifts says
I love this, but I will try to improve on this by incorporating light into the ornaments.
Laura says
Love this my kids just started theirs for their teachers gifts
Mel the Crafty Scientist says
Love your blog and this project – all the gorgeous glitter and shapes and options are so creative and fun! Just wanted to let you know I featured it in my roundup of glass ornament crafts here. Feel free to check it out if you want and hope you like it! : )
-Mel the Crafty Scientist
Sarah @ OneStarryNight says
Absolutely love this idea!
Kimberlee says
Does the glitter come off or loose pieces drop everywhere?
Misy says
Love these!! Especially the polka dots!
Kelly says
I love these! They look so easy! I just bought my first jar of Modge Podge this year and am ready to take the leap into DIY ornaments!
Amy Shaughnessy says
I love this! I have a few clear ornaments sitting around and haven’t really known what to do with them. I love the blue polka dot one.
Amy
Fashion and Beauty Finds
katie says
LOVE your ornaments! I need to make some of my own!!! 🙂
John says
It’s amazing how a little glitter and creativity turn ordinary into extraordinary- Very beautiful and I am a guy. Who said guys can’t be a little sentimental. Using your cricut or silhouette to cut cute holiday images out of cricket vinyl also adds a wonderful dimension. If your followers don’t have a cricut have them check out http://www.facebook.com/cricketvinylsupplies. We are giving away a cricut expression and holiday cricut vinyl pack the end of this month. You may be the lucky winner! Happy holidays.
helen says
these are so beautiful. such an amazing idea for ornaments…thanks so much for sharing!
Claire @ Claire K Creations says
Oh my goodness Christmas and glitter combined – I love it! I’ve got some fake fruit that I’m planning on glittering up this Christmas. Fingers crossed it doesn’t look tacky.
gerbermom says
Tacky? What?! You can never go wrong with glitter! 🙂
Susanna says
Very lovely sis! I am loving your glitter 🙂 I could actually get into crafting these!
gerbermom says
I have some extra ornaments ready to go for a crafternoon 🙂
Kiersten @ Oh My Veggies says
So pretty! I have a thing for glittery Christmas ornaments. If it were socially acceptable, I’d probably keep glittery Christmas ornaments around the house year-round. 🙂
When I was a kid, the day after Thanksgiving was always when we pulled out the Christmas decorations too. I think I was more excited about that than Thanksgiving itself!
gerbermom says
The day after Thanksgiving is the best – joining the masses at the mall, going to see a movie, singing with the new 24/7 Christmas music radio stations, eating leftovers. Love it all!
sherri says
These are so pretty! I’m going to an ornament exchange in a couple of weeks and have been looking for an easy and cute (emphasis on the easy!) ornament to bring. Pinning this!
gerbermom says
Definitely easy – the clean up takes more time than the actual craft, ha! have fun!
Jennifer says
How glittericious!!! I love these and love the colors you went with. Sometimes I regret spending moolah on store bought ornaments and wish I would have just made my own!
gerbermom says
I’ve never tried making ornaments before but it was a hoot – and now I won’t worry so much about the kids breaking ’em!
Jen @ Cuddles and Chaos says
Cute cute cute! I’m working on some fun DIY ornaments too! It’s so addicting.
gerbermom says
Yay, more DIY ornaments! They are definitely addicting!
Erica says
Oh, Stephanie! I love this! I have a strong affinity for all things sparkly. Yet another fun use for mod podge! Also, thanks for the tip on making perfect polka dots with the foam brush. Genius!
I hope you and your family are set for a fantastic Thanksgiving. It’s just going to be me, my husband, my two pups and a turkey this year. I can’t wait! 🙂
gerbermom says
I know, why are sparkles so darn addictive? I think everything looks better with a bit of bling 🙂 Have a fantastic Thanksgiving!
Anne @ Domesblissity says
You’ve always been my go to ‘sparkle arkle’ girl. Love these and the glitter lotion.
Anne xx
gerbermom says
I’ll be your sparkle-arkle girl anytime Anne 🙂
Marie-Eve @aprettynest says
This is so pretty ! Love the result !
My Blog – A Pretty Nest