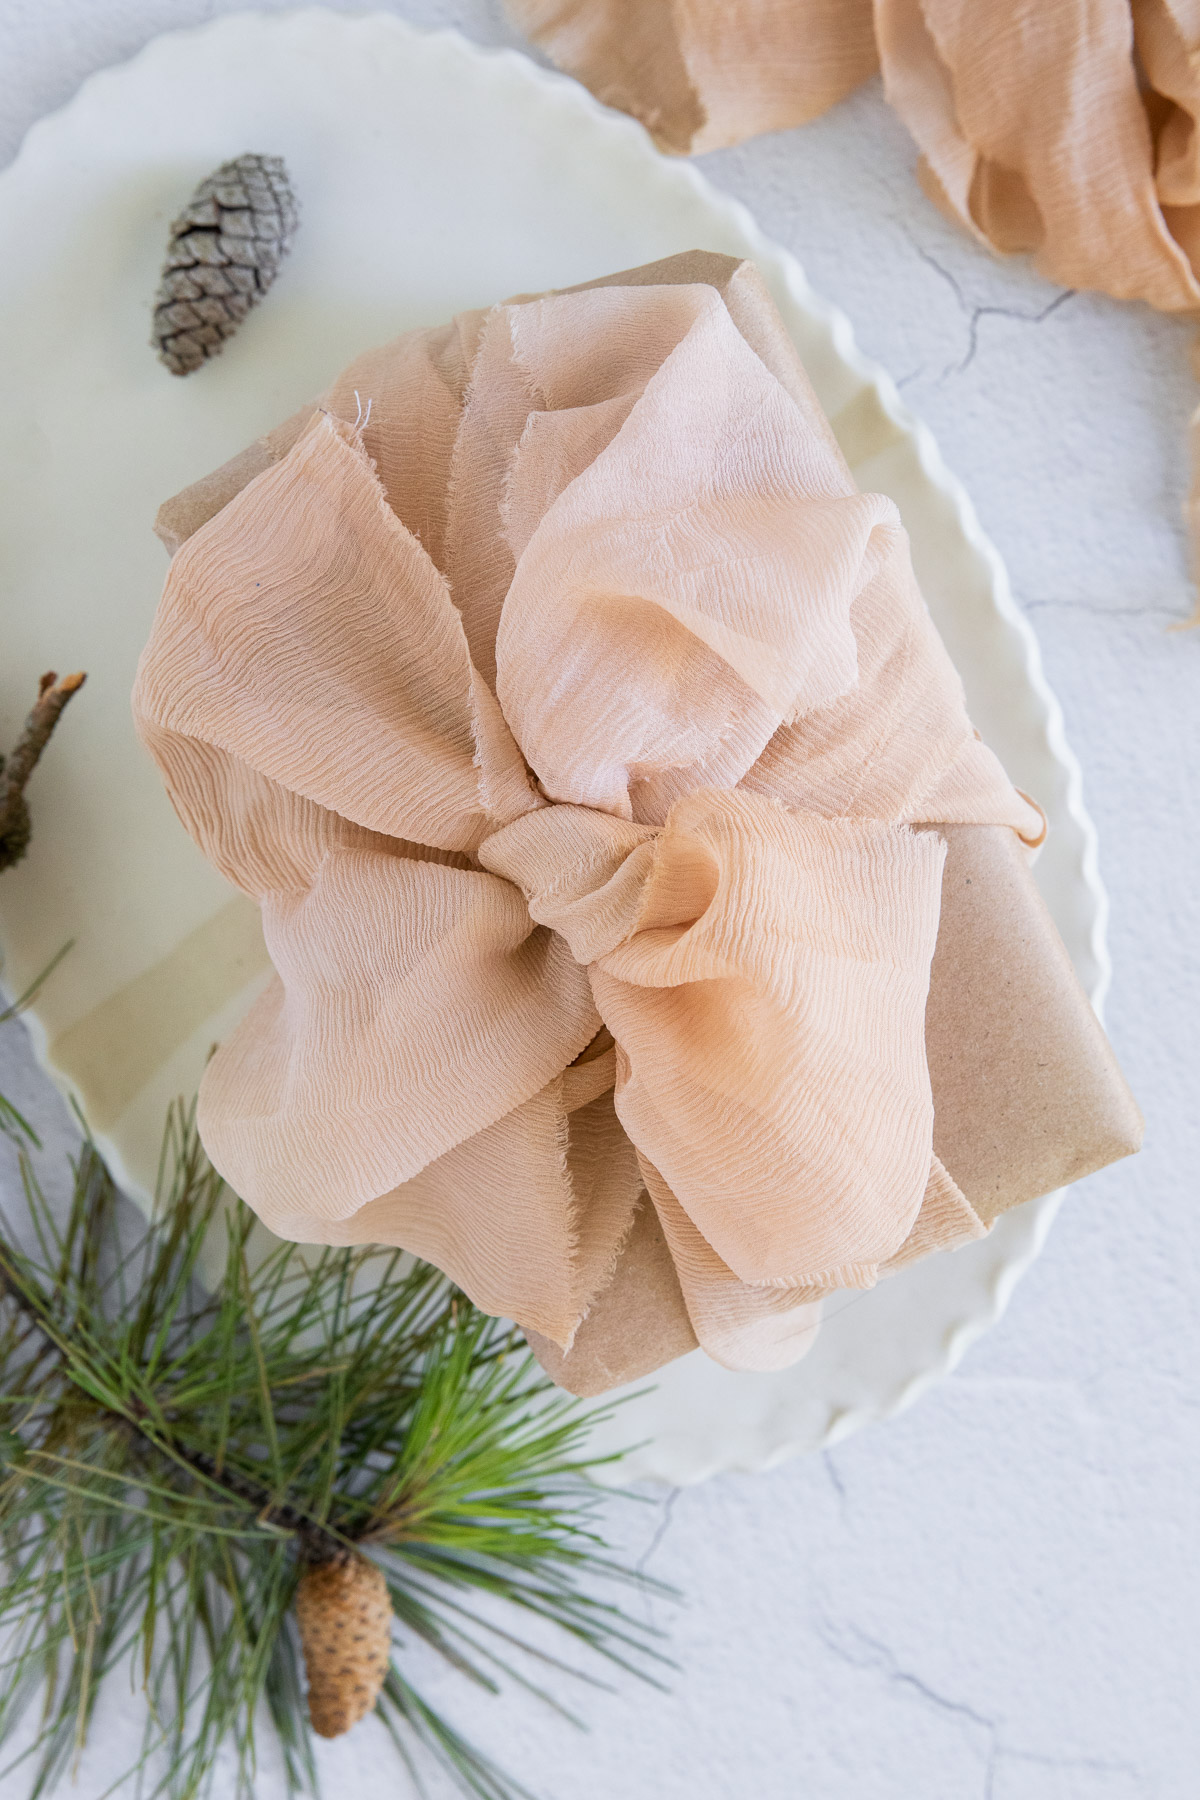
The hardest part of wrapping a gift isn’t the paper; it’s the dreaded bow on top. Those stick-on bows are easy but they don’t really give off the vibe I’m looking for (like Martha Stewart herself did the wrapping, in case you’re wondering). If you’re ready to ditch the sticky, store bought bows, making your own ribbon bows is a great alternative. Here are 5 ways to tie the perfect bow.
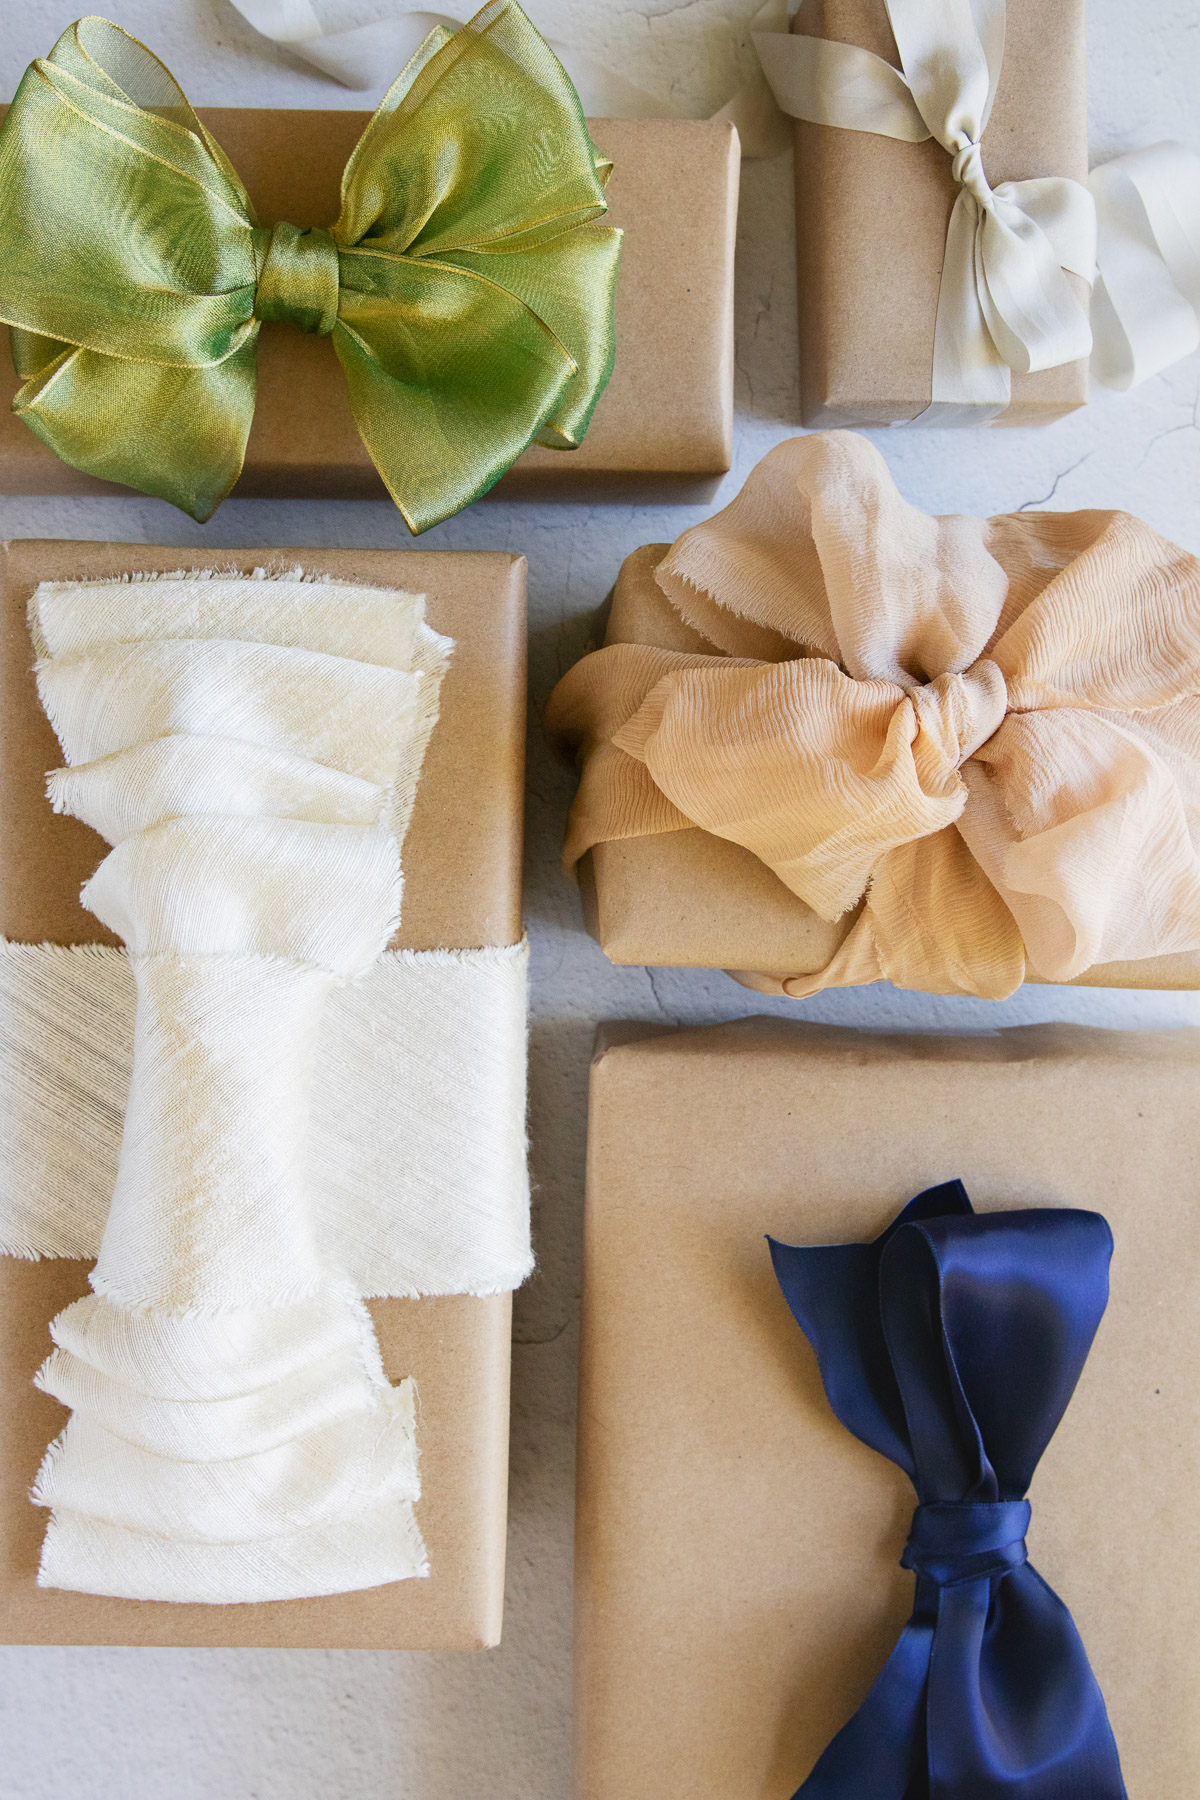
5 Ways to Tie a Bow
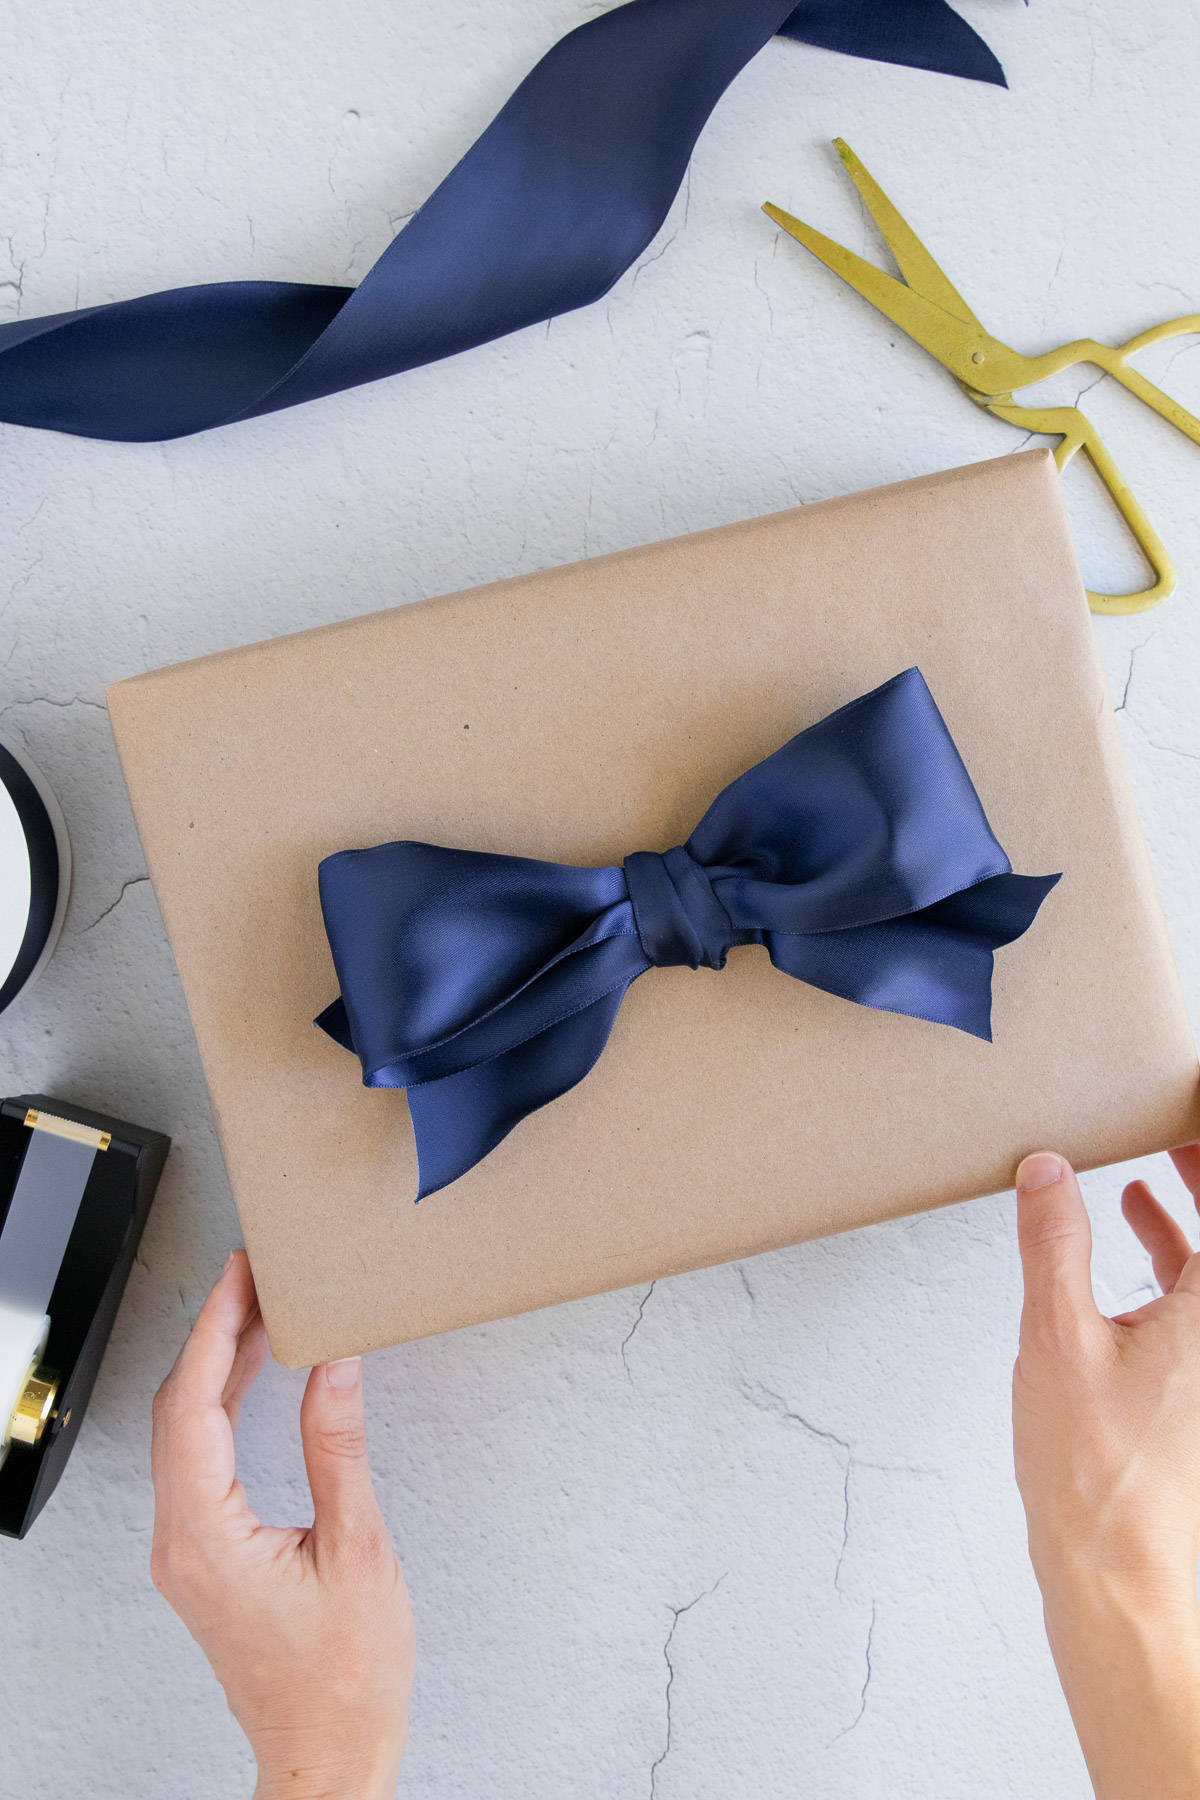
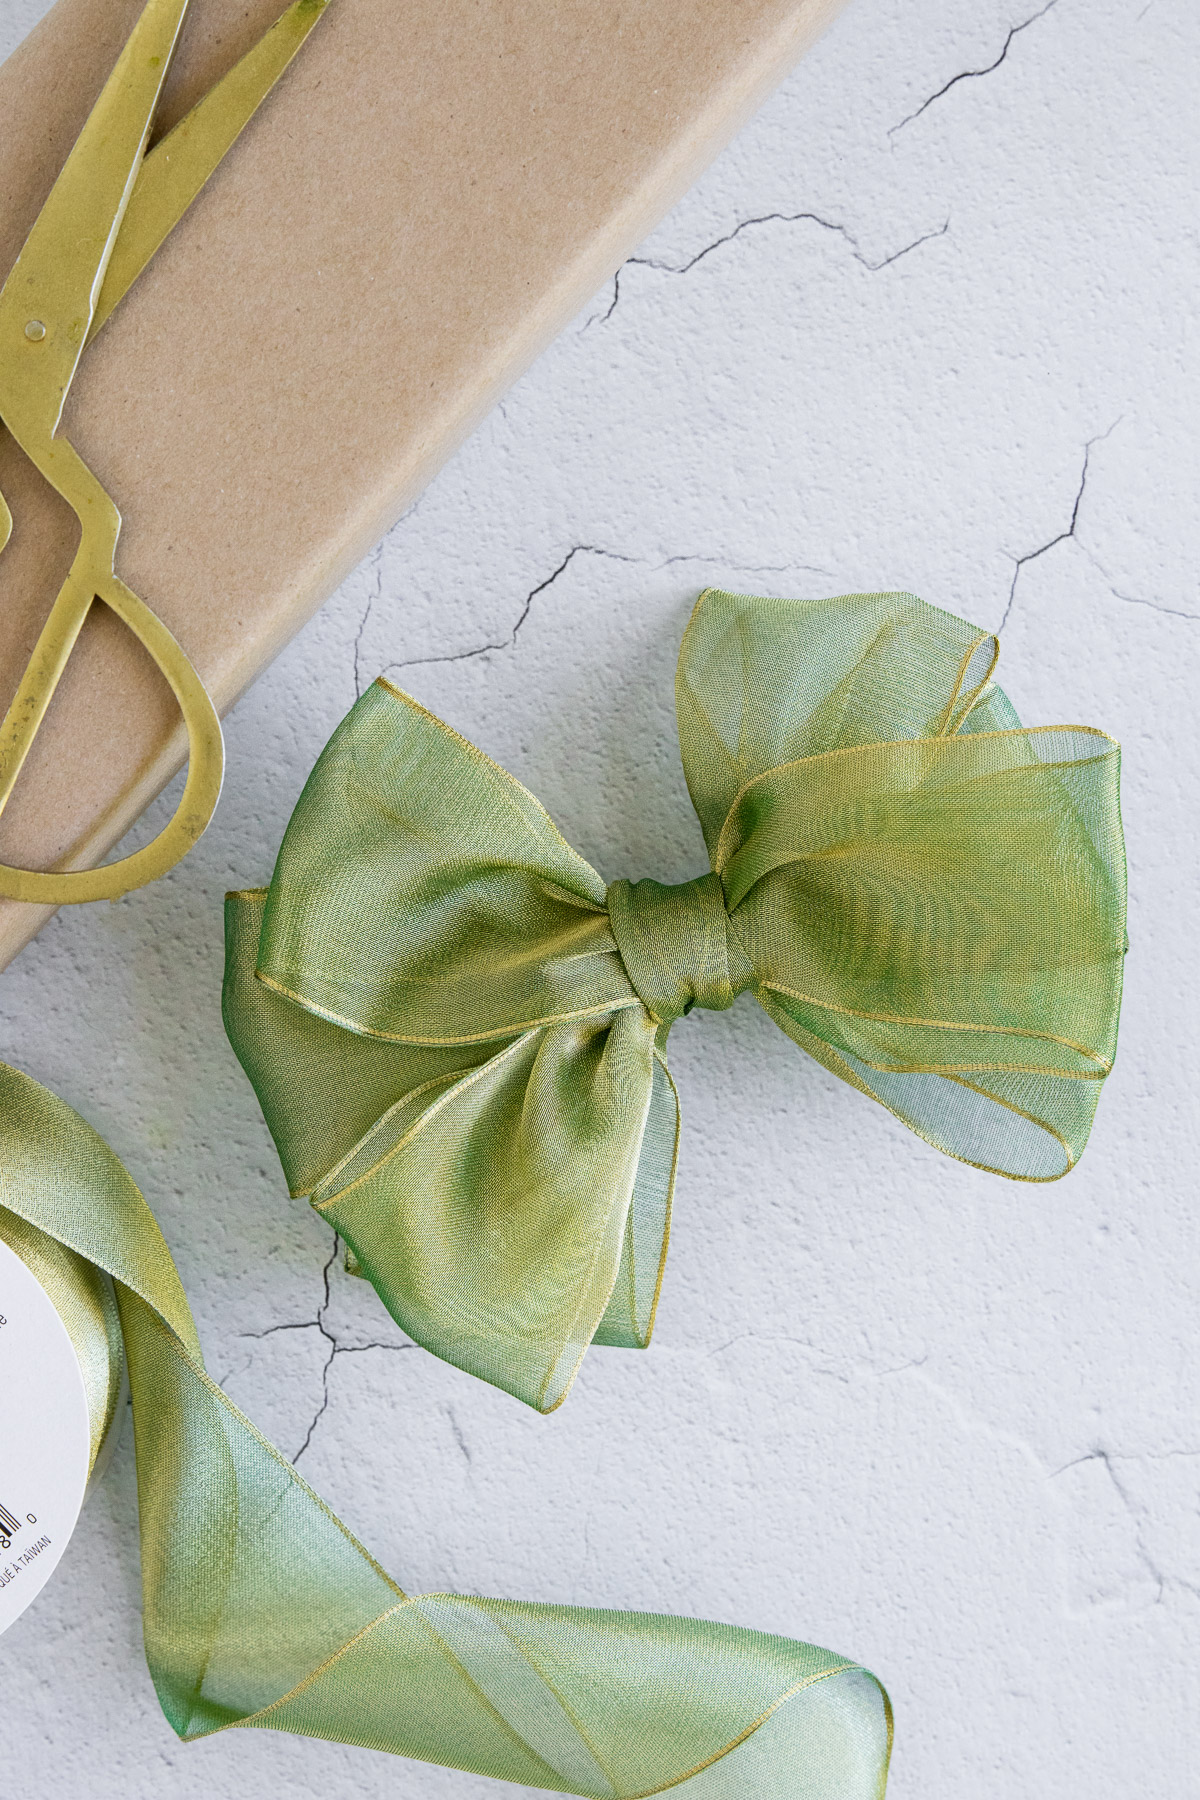
The Simple Bow
I love this bow because it’s easy to tie and it looks simple, but professional. Choose any unwired ribbon that’s about 1-2 inches wide.
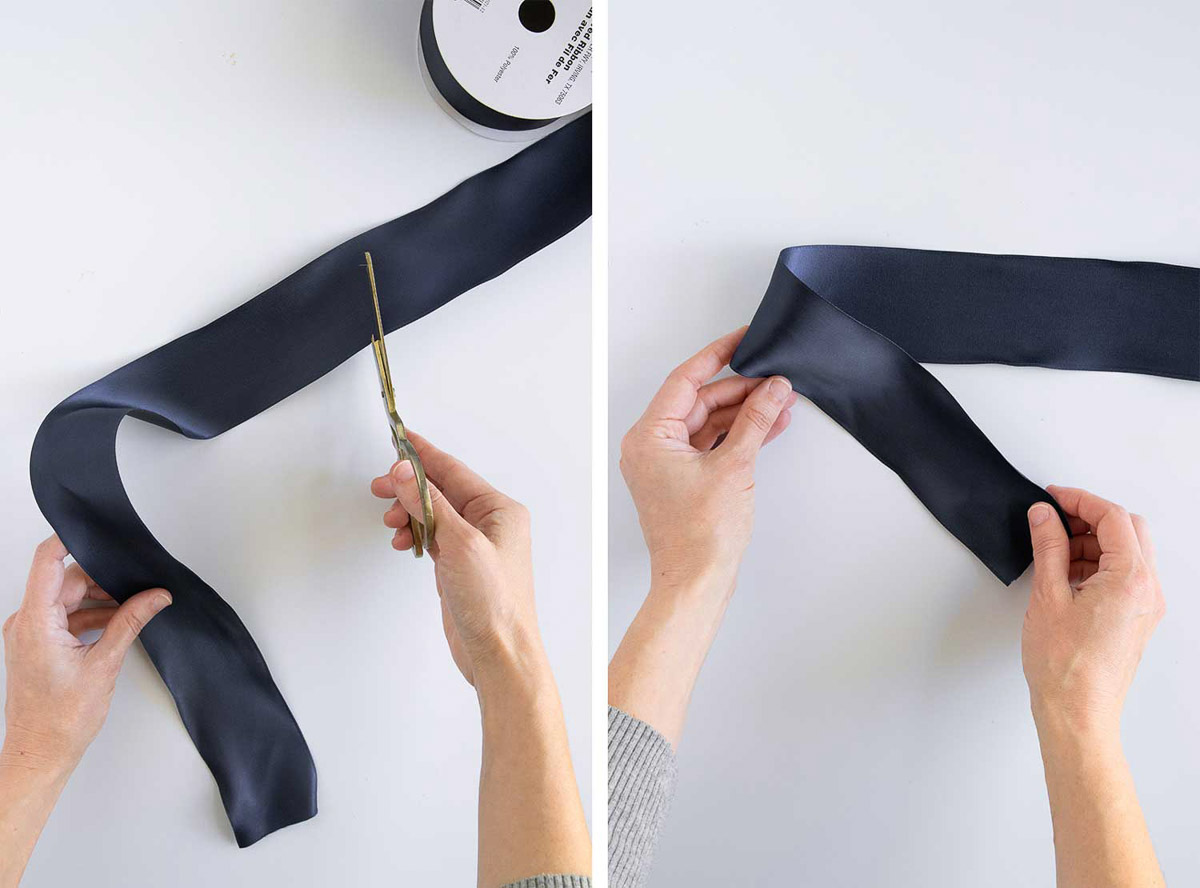
Measure a length of ribbon that’s long enough to wrap around the box once and still have 5-6 inches leftover on either end.
Lay the ribbon on a flat surface and place the box in the center (either orientation is fine).
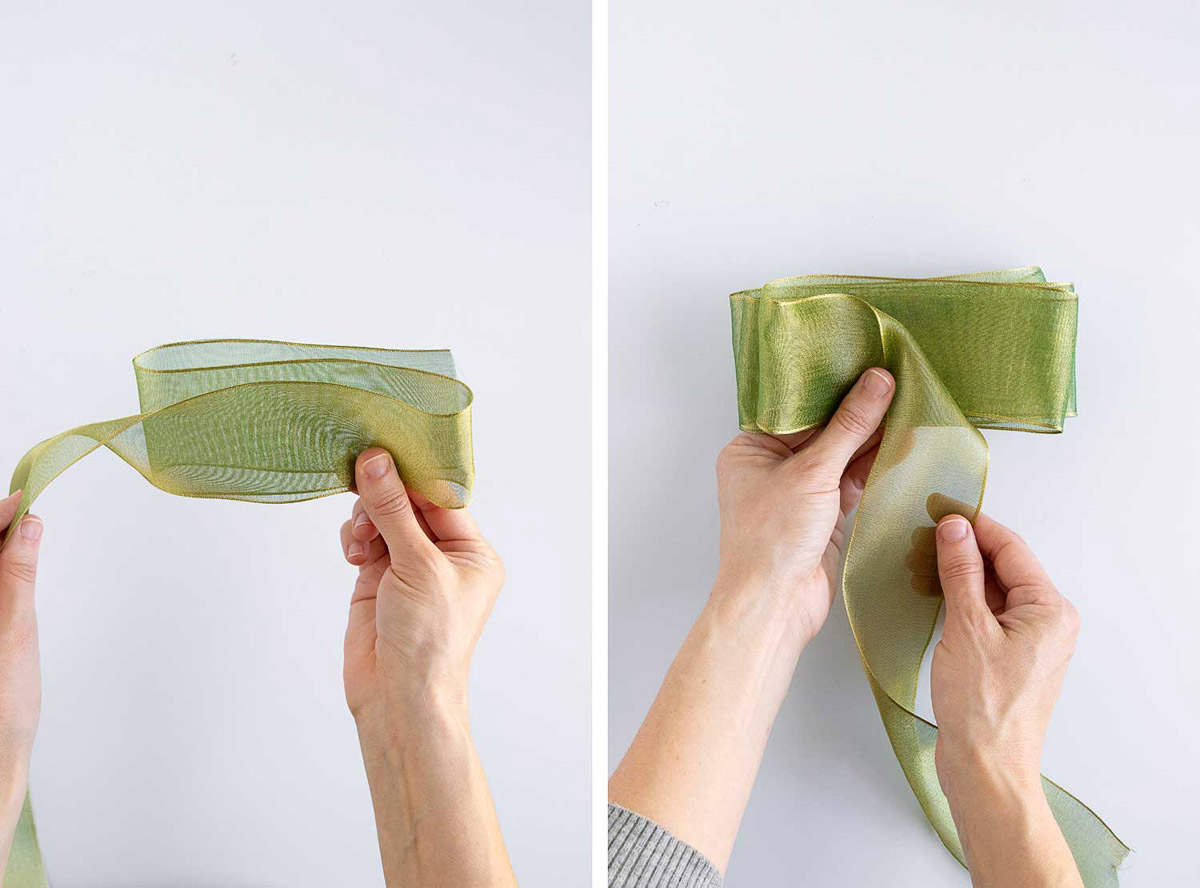
Take the free ends of the ribbon and fold them to create loops. Then bring the loops together at the top of the box.
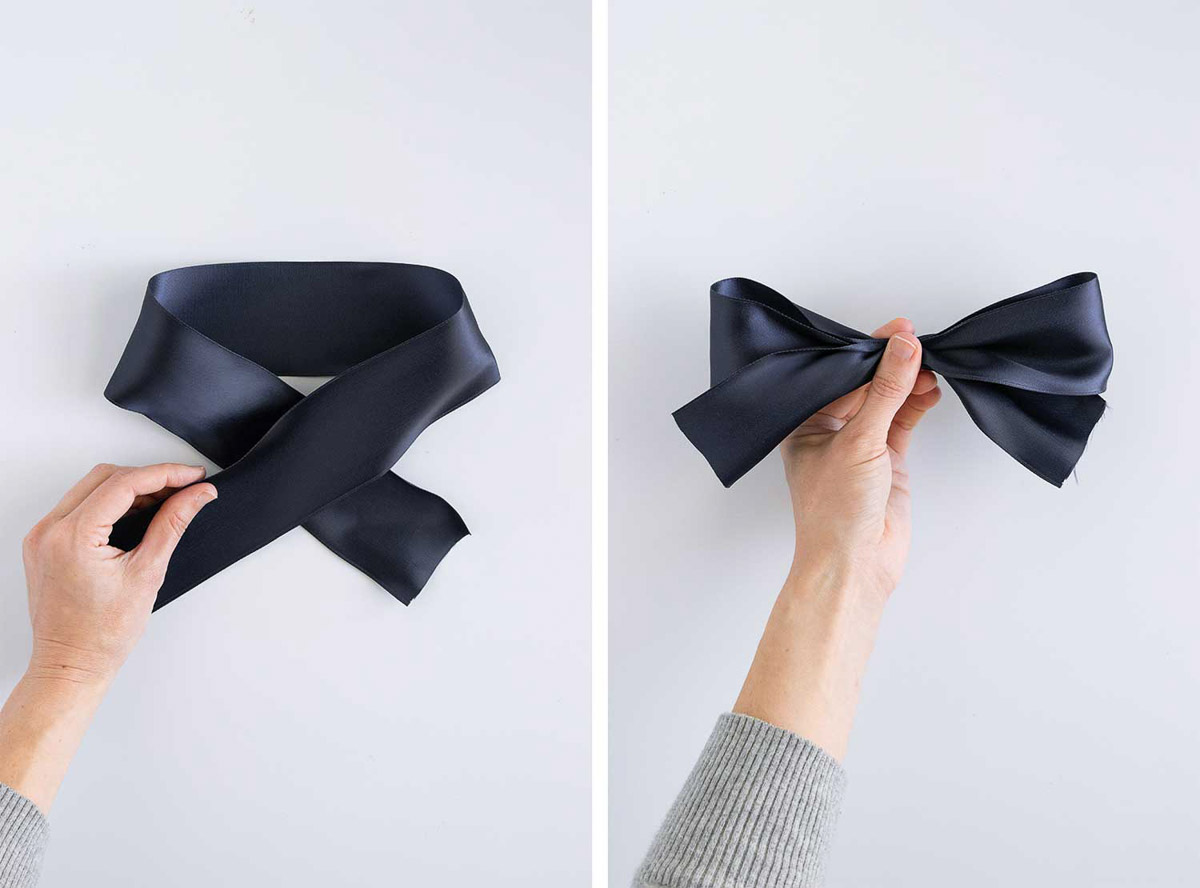
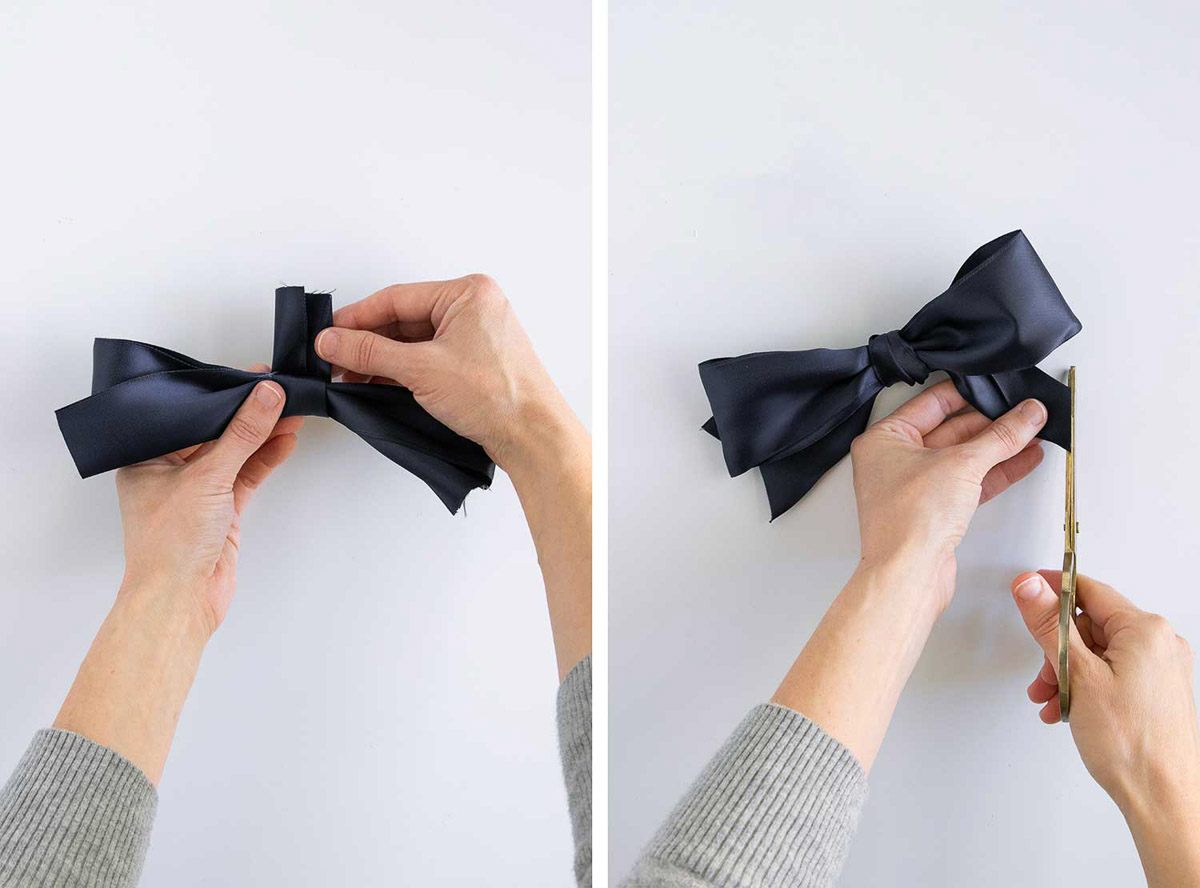
Cross the left loop over the right loop. Then tuck the left under the right loop and pull tight.
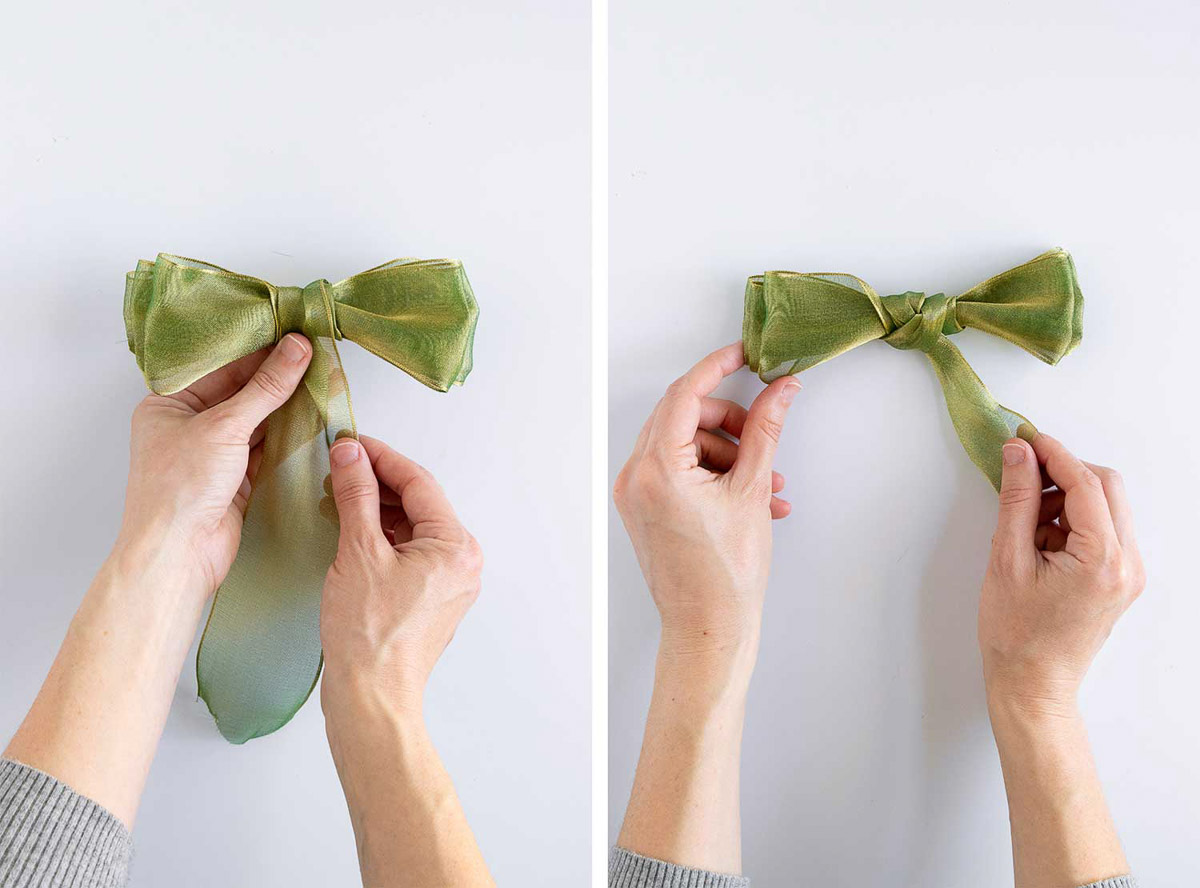
Bring the loops together a second time and loop them over each again, creating a knot.
Pull tightly. Adjust the loops so they’re roughly the same size and shape. Trim the tails to be slightly longer than the loops.
The Flat Bow
There’s not much tying involved with this bow, but you will need some heavy-duty tape to secure everything together. Since this bow has body to it, feel free to use a wider ribbon that’s either wired ribbon or unwired.
Since you need a lot of ribbon for this bow, I find it best not to cut it off the spool until the very end. If it’s too late, make sure to start with a piece of ribbon about 3-4 feet in length.
Lay the ribbon horizontally on a flat surface. Then create four or five staggered layers by folding the ribbon and bringing it back the way it came.
When you’ve made enough layers, hold the ribbon in the center and fold the free end downward at a right angle.
Wrap the free end around the layers 2-3 times. Pull somewhat tightly so it cinches the bow at the center.
Tidy up the bow so both sides are even and everything looks centered.
Now flip the bow upside down and place your box in the center of the tail.
Wrap both ends around the box, placing the cut end underneath the bow. Center the bow on the box and secure everything in place with some heavy duty tape.
The Folded Bow
Use this super simple bow like you would those peel-n-stick gift bows you get during the holidays: just stick it on top! It’s prettier, too, if I do say so myself.
Cut a piece of wired or unwired ribbon (I used wired satin) about 12 inches long. Then cut another piece of ribbon about 4 inches long.
Lay the long ribbon horizontally on the table. Fold the left end downward at a 45-degree angle.
Fold the right end downward at a 45-degree angle, so they overlap in the middle.
Using your hand, gather the ribbon in the center, so it forms a bow.
Wrap the short ribbon several times around the center of the bow. Tuck the tail back under itself and pull it tightly. Cut off any remaining tail so its flush and well hidden.
Tidy up the bow so the sides are even. Then fold each end piece in half and cut at an angle to form an inverted point.
Secure to packages with double sided tape.
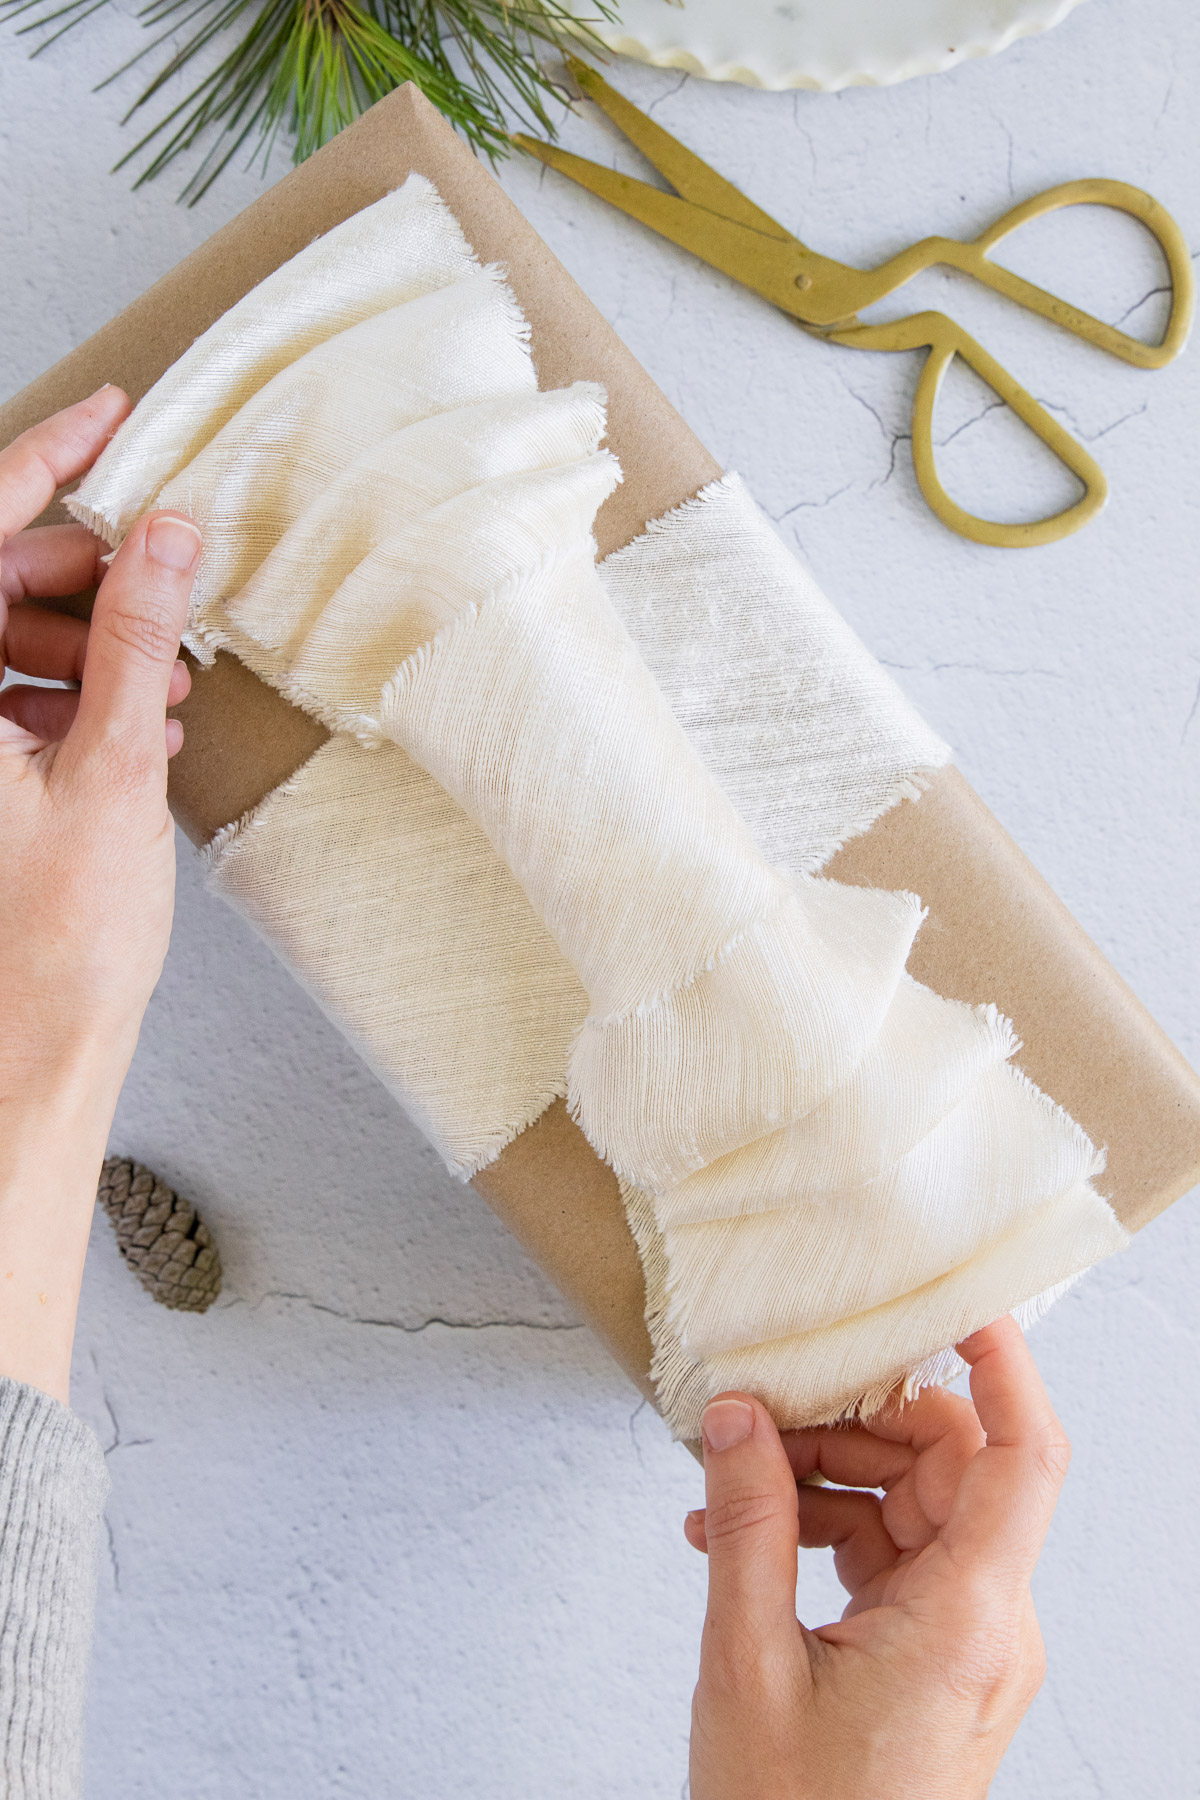
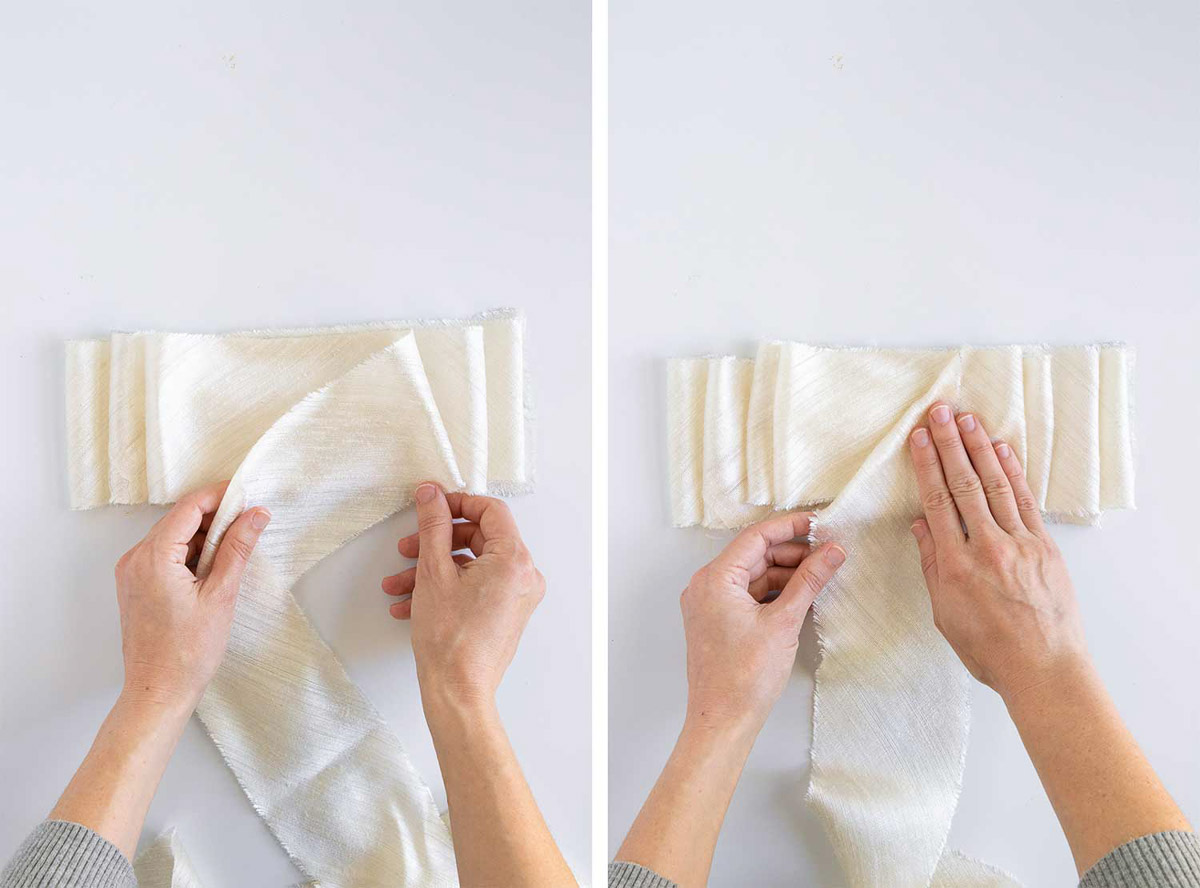
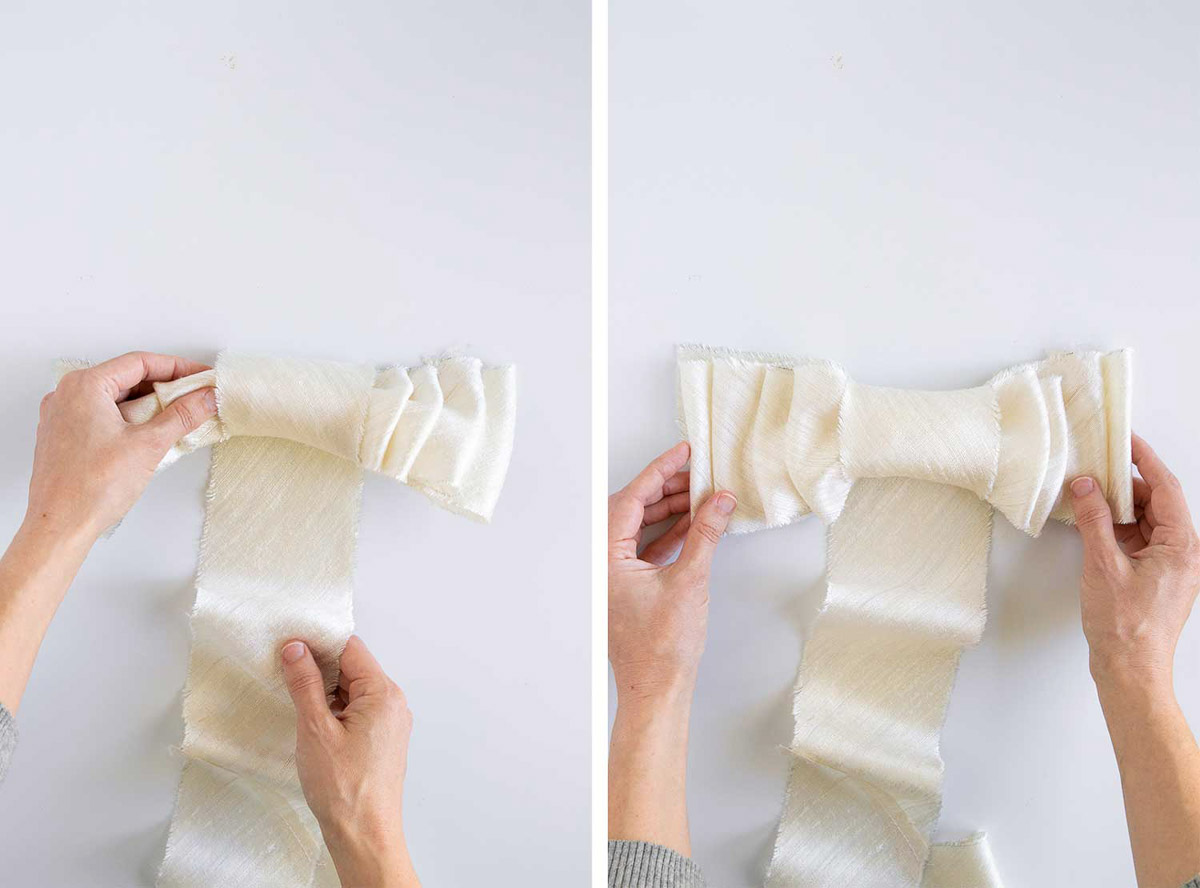
Layered Fancy Bow
Don’t let this bow fool you — it’s not nearly as complicated as it looks. For the fluffiest layers, use 2-inch wide wired ribbon. And feel free to add even more layers, for a high-drama bow.
Cut a piece of ribbon about 36 inches long.
Starting at one end, fold the ribbon back and forth over itself to create layers. Make sure you have as many folded layers on the left side as you do on the right. (I made 4 layers on each side but you can make more. The more layers, the more voluminous the bow will be)
When you’ve made enough layers, hold the ribbon in the center and fold the free end downward at a right angle.
Wrap the loose end several times around the center of the bow.
Tuck the tail back under itself and pull it tightly.
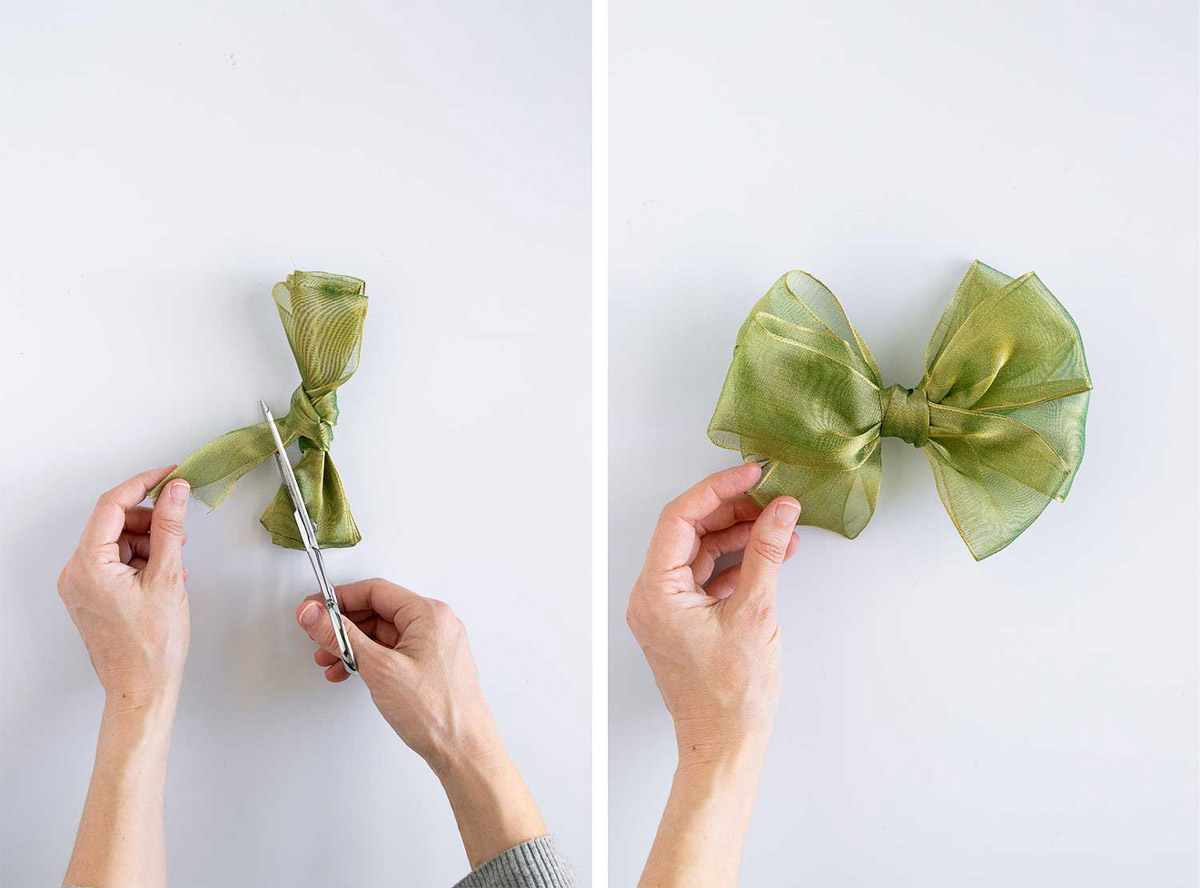
Cut off the tail. Then fluff up the bow by pulling the loops apart and fluffy up each loop.
Secure to packages using double sided tape.
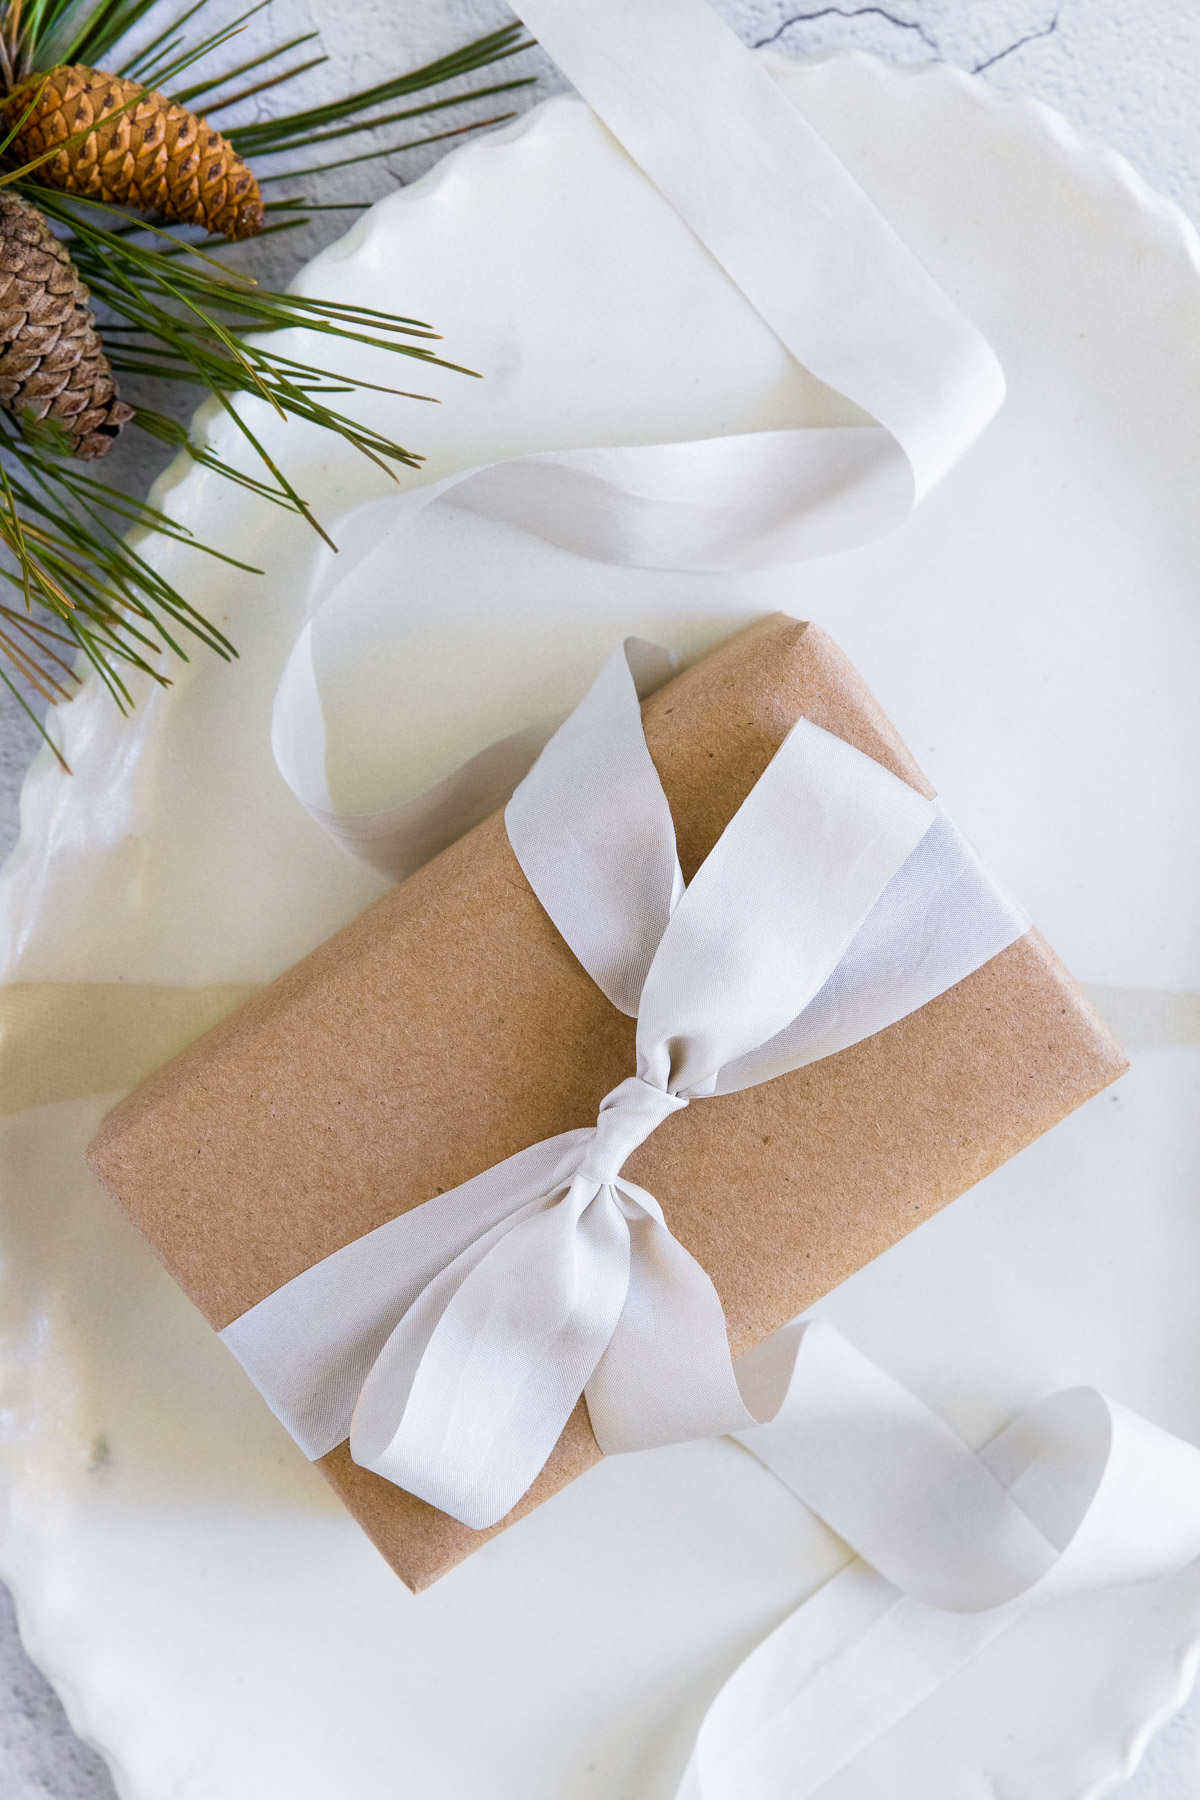
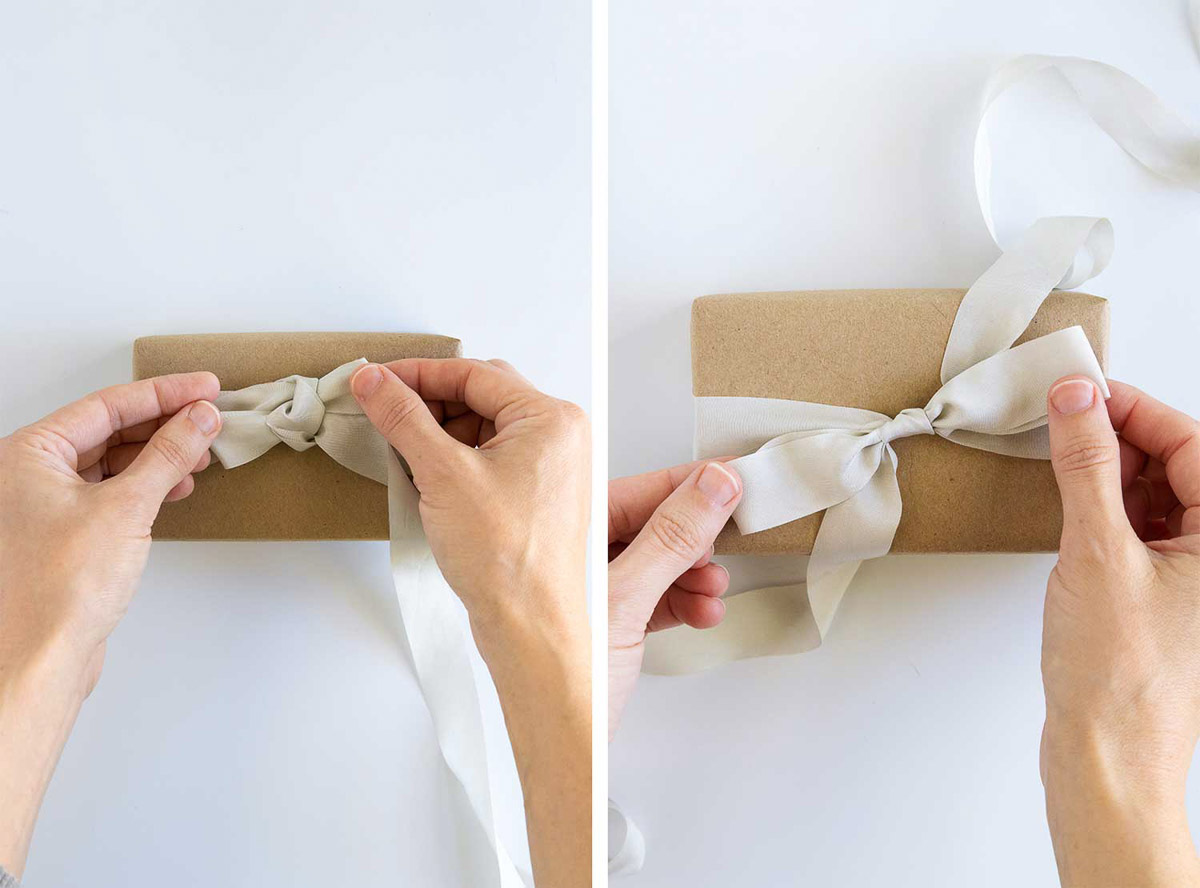
The Tiffany Bow
This bow is named after Tiffany’s, the jewelry store with that famous little blue box and luxe white satin bow. It works best with an oversized, unwired ribbon that drapes beautifully. I used vintage silk ribbon about 3 inches wide, but feel free to use satin, silk, velvet or whatever else you can find.
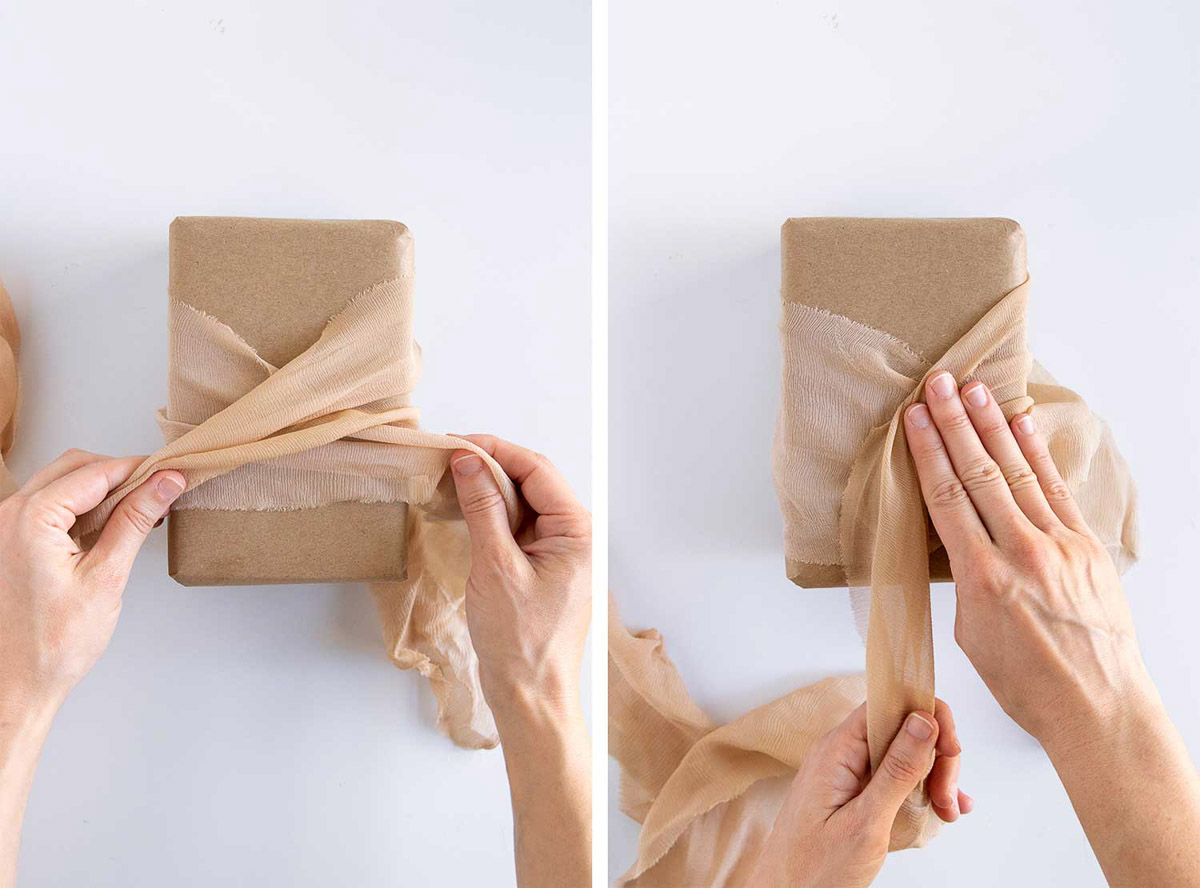
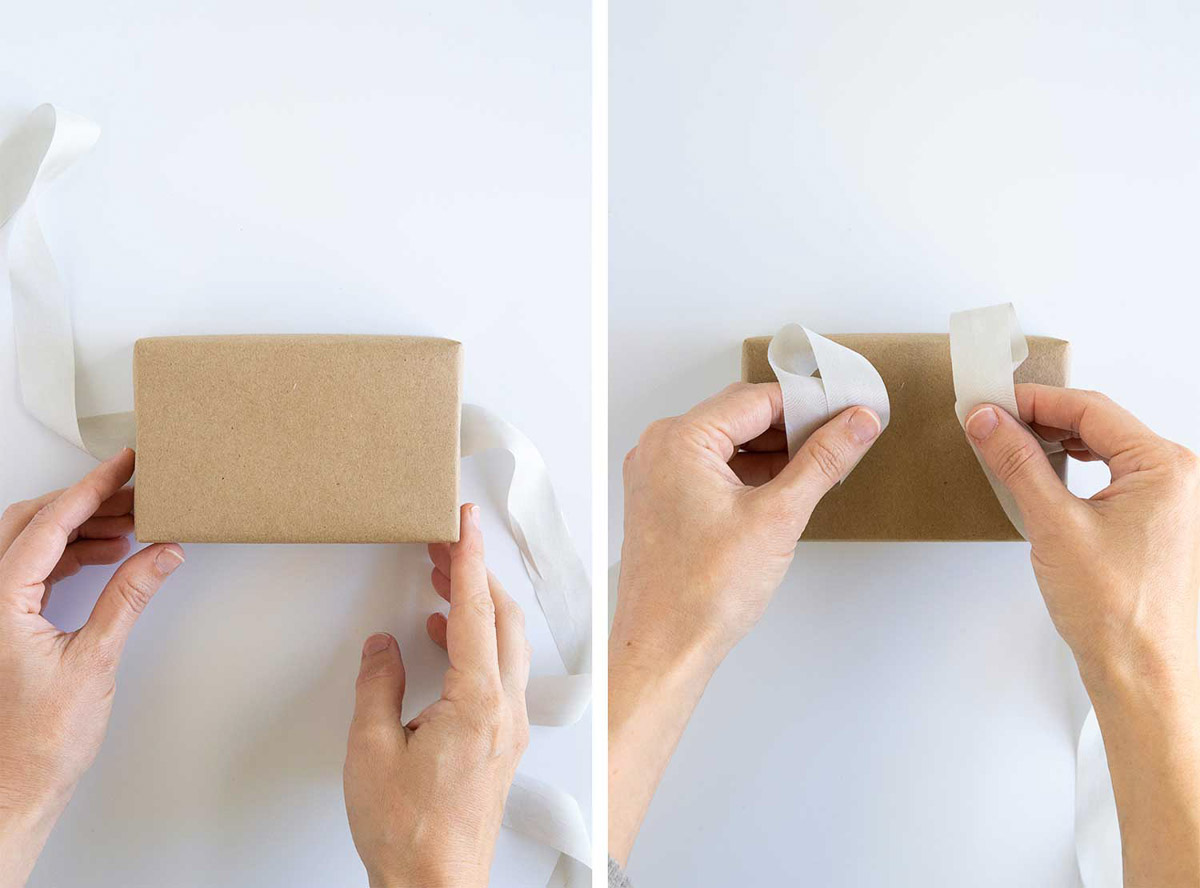
Measure a piece of a ribbon that’s roughly 5 times the length of the longest side of your box (for example, if your box’s longest side is 3-inches, cut a 15-inch piece of ribbon).
Turn your box so the folded ends run vertically. Lay the ribbon horizontally on the table. Set the box off-center on top of the ribbon so 1/3 of the ribbon lies to the left and 2/3 of the ribbon lies to the right.
Bring each side up, crossing the right side (the long side) over the left. Then use your right hand to hold the ribbon at the center and fold the long end down at a right angle.
Wrap the long end underneath the box vertically and bring it over top of the center point.
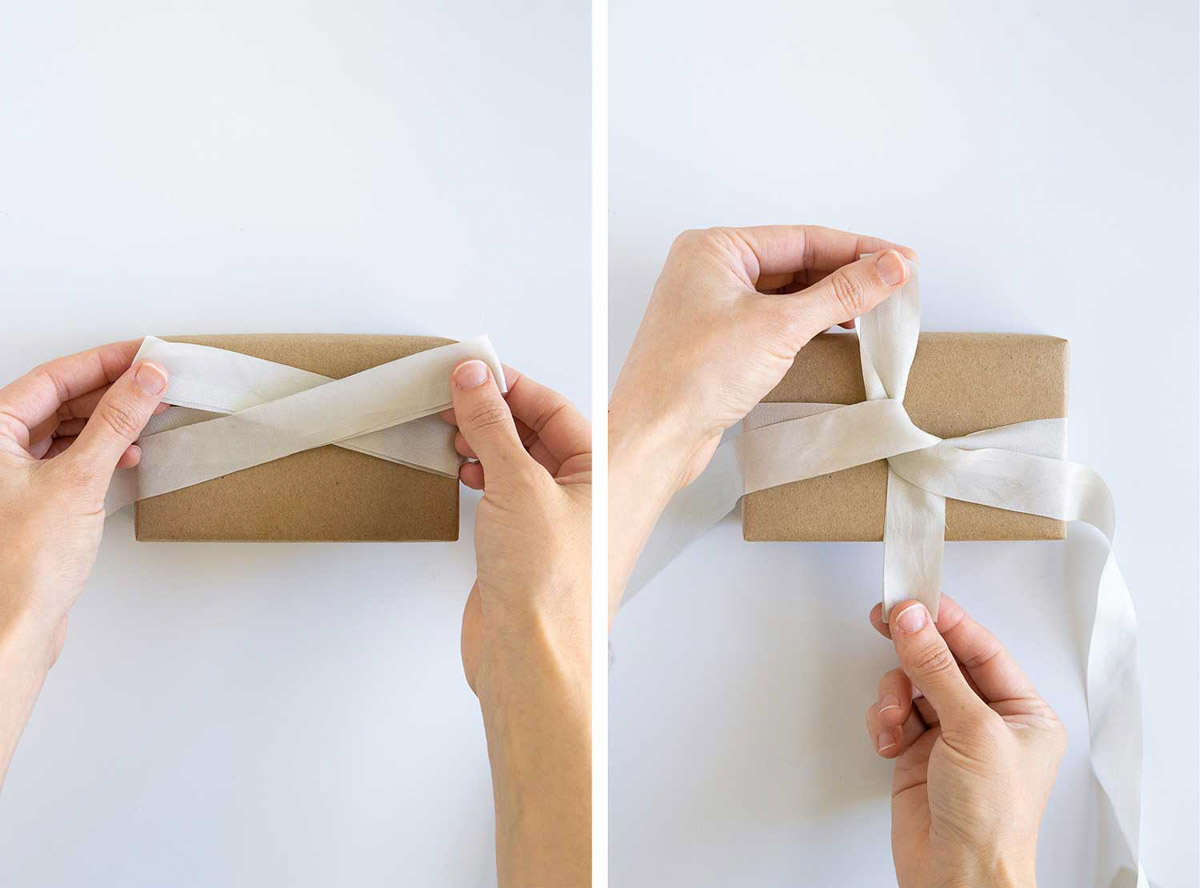
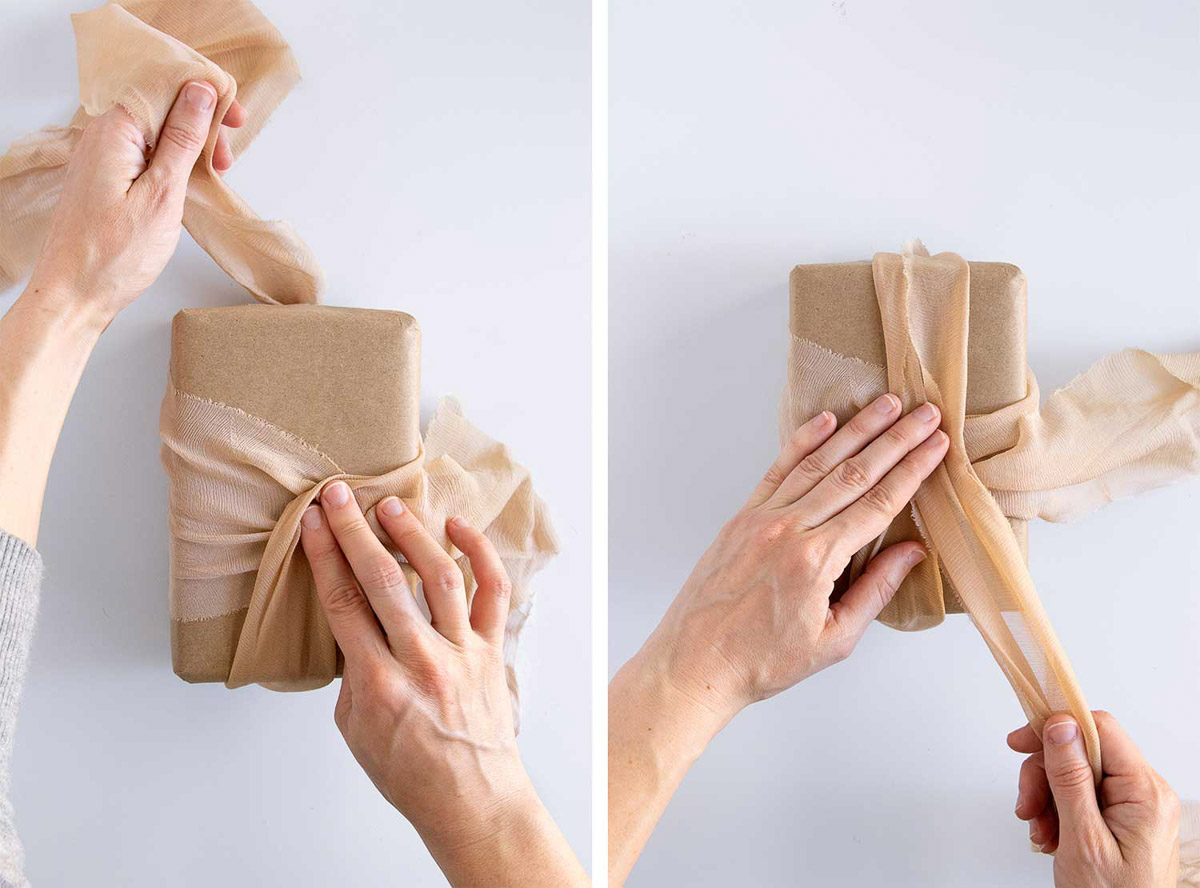
Moving from the bottom right quadrant to the upper left quadrant, tuck the long end underneath all of the ribbon.
Pull tightly and straighten the ribbon as best you can.
Now, turn the box 90 degrees so that the long end comes out of the right top and short end come out at the bottom left.
Create a loop with the bottom left ribbon.
Wrap the upper right ribbon over and around that loop in a counterclockwise direction. This should create another loop for you to tuck that top ribbon through.
Pull the loops into a bow, adjusting the loops so they’re even. Trim the tails on either side so they’re even.
Do you have any other good ways to tie a bow? Do share in the comments!
37
Janine Evans says
I love the flat bow. Every elegant. Can’t wait to start wrapping this Christmas.