• Skip to primary navigation
  • Skip to main content
  • Skip to primary sidebar

Hello Nest

The Art of Making a Home

  • Green Cleaning
    • Air Fresheners
    • Bathroom
    • Bedroom
    • Kitchen
    • Laundry
  • Natural Living
    • Homemade Recipes
    • Essential Oils
    • Plants & Flowers
    • Zero Waste
    • Organizing & Simplifying
  • DIY & Decor
    • Candle Projects
    • Holiday Projects
    • Sewing Projects
  • About
    • Contact
    • Privacy Policy
  • Nav Social Menu

    • Facebook
    • Instagram
    • Pinterest
    • YouTube

A Simple Guide to Drying Your Herbs

3 · Aug 6, 2020 · Stephanie Gerber · 1 Comment

Summertime is coming to a close, which means that despite all your mint mojitos, rosemary marinades, and basil fruit salads, you probably still have a bunch of gorgeous herbs left in your garden that you don’t want to waste.

Don’t worry, no need to toss them or slowly let them fade and freeze as the weather turns chilly! Along with making freezer pesto, drying your herbs is an easy way to enjoy their home-grown flavor all year long.

A-Simple-Guide-To-Drying-Your-Herbs-7

Here’s a list of things you’ll need:

  • twine
  • some paper bags (I used re-purposed paper grocery bags, but you can use lunch sacks as well)
  • tape
  • some of your favorite herbs

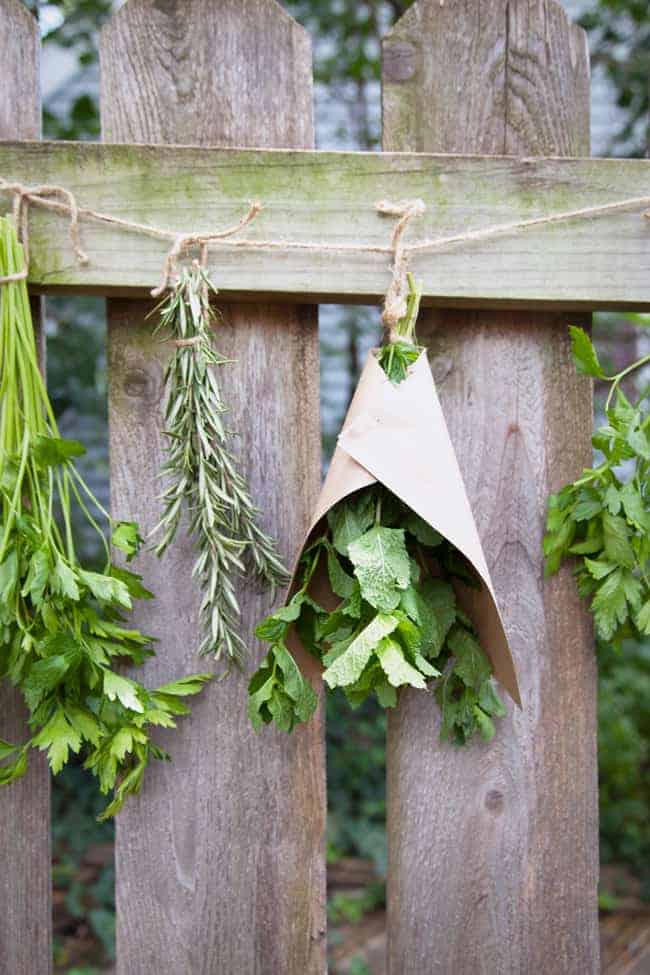
Before you begin, choose a location where you can safely leave your herbs hanging for an extended amount of time. When you’ve found your spot, string up a long piece of twine.

Look for a place that is dry and warm, but has great air circulation so your herbs will dry quickly while keeping bacteria and mold growth at bay. Avoid the kitchen, where steam can add moisture to the air and bold scents can influence the flavor of the herbs.

A Simple Guide to Drying Your Herbs

Okay it’s time to head out to the garden! Cut your herbs mid-morning, after the dew has evaporated but before the plants have spent too much time cooking in the sun.

As you harvest, remove any browned or wilted leaves and gently brush off any dirt and bugs. If the plants are muddy or excessively dirty, rinse them off with fresh water and pat them completely dry.

A Simple Guide to Drying Your Herbs

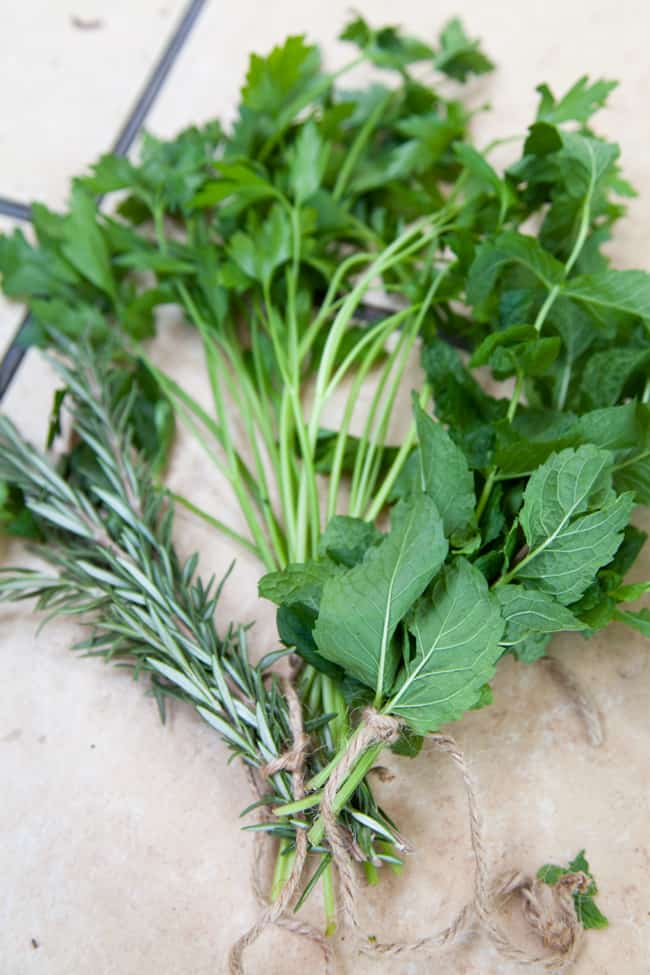
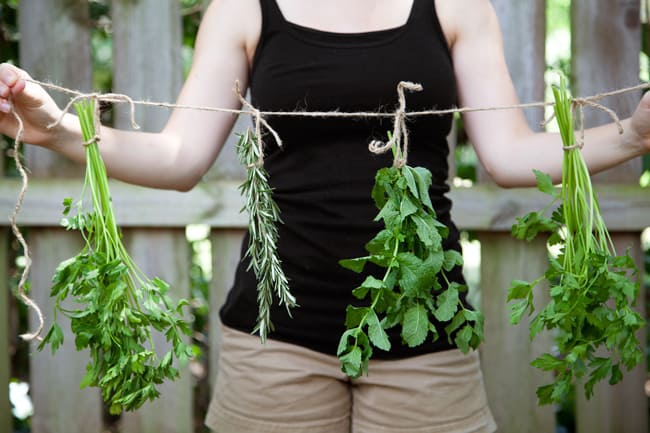
Once you have harvested and cleaned your herbs, gather them in small bunches and bind them together with 8-inch pieces of twine. Hang the herbs upside down by tying the bunches to your long piece of twine, leaving some space between each group.

A Simple Guide to Drying Your Herbs

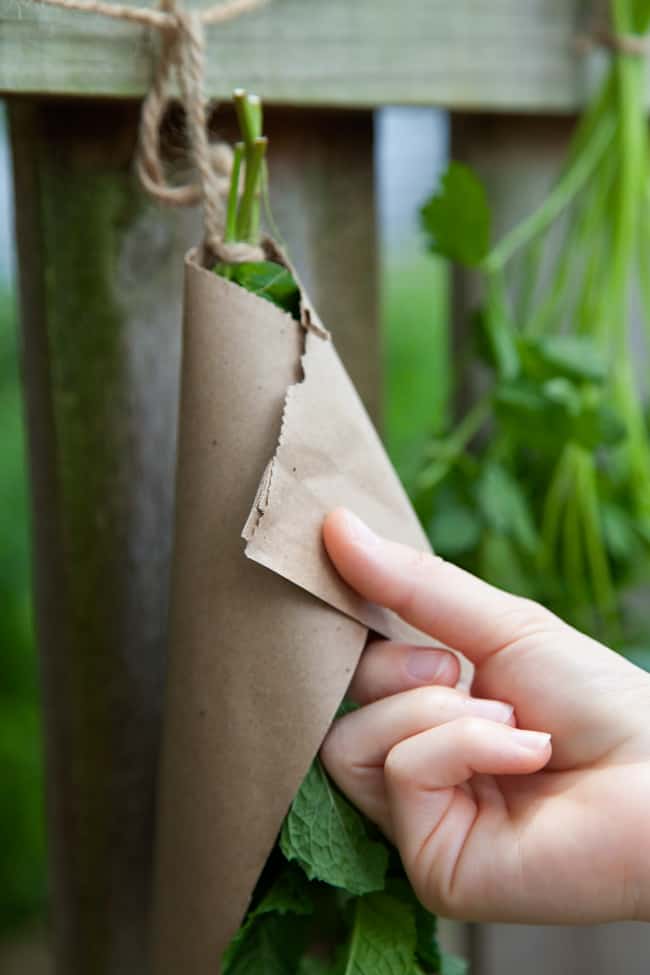
Take a few minutes to cut your paper bags into approximately 10×10 inch squares. Roll them into loose cones around the herbs and secure with tape. This covering will help keep the herbs dry and dust-free.

If you are using small, lunch-sized paper bags, poke a hole in the bottom and string your twine through to leave the herbs hanging inside the bag.

A Simple Guide to Drying Your Herbs

Your work is now done, let time do the rest! Depending on your climate, it may take anywhere from a few days to a few weeks before your herbs are completely dry.

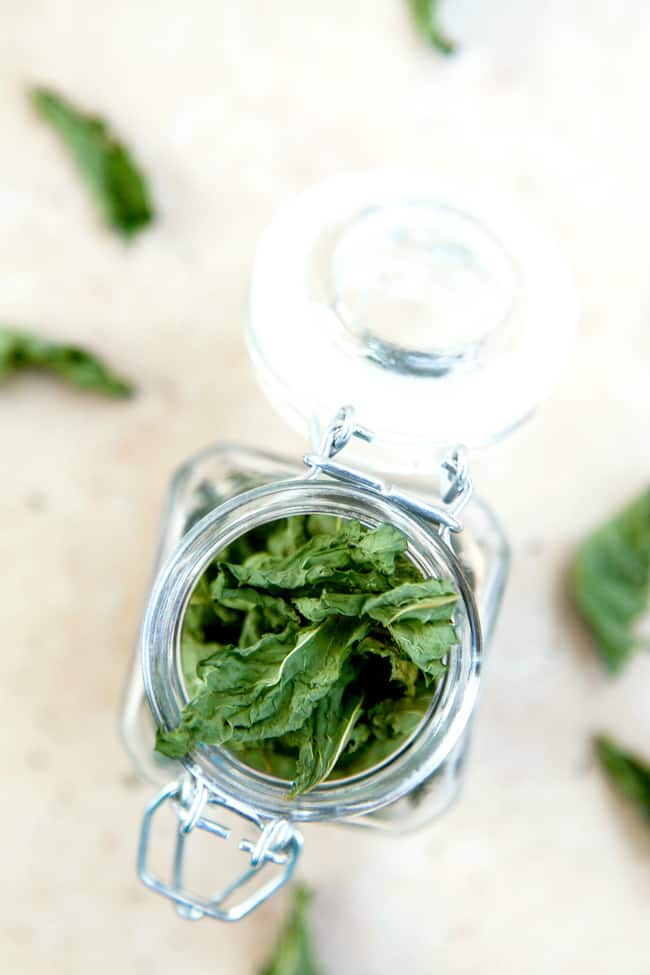
When the leaves easily break or crunch between your fingers, remove them from the stems to chop, crush, powder, or simply leave whole. Store your finished herbs in an airtight container and use them for up to a year.

A Simple Guide to Drying Your Herbs

If you didn’t spring for a garden this year, this method also works great for preserving extra fresh herbs you’ve brought home from the grocery store.

A-Simple-Guide-To-Drying-Your-Herbs-8

3

Share this:

  • Click to share on Facebook (Opens in new window)
  • Click to share on Twitter (Opens in new window)
  • Click to share on Pinterest (Opens in new window)
  • Click to email this to a friend (Opens in new window)

Plants & Flowers DIY garden, drying herbs

More Posts from Plants & Flowers

  • How To Make An Oversize Eucalyptus Wreath

  • Make Your Own Smudge Sticks To Banish Bad Energy

  • How to care for a ZZ plant

    Everything You Need to Know About the ZZ Plant

  • How Often to Water Your House Plants

  • 5 Pet Friendly Plants for Your Home

  • 10 Succulent Plants We Love + How to Care for Them


Reader Interactions

Comments

    Leave a Reply Cancel reply

    This site uses Akismet to reduce spam. Learn how your comment data is processed.

  1. Lillie says

    August 10, 2016 at 4:42 pm

    This is such a great idea! I’ll have to try this with my giant sage bush. Thanks for the information!

    Reply

Primary Sidebar

Get updates + more!

Get the exclusive content you crave straight to your inbox.

Featured DIY

Green Tea, Lemongrass + Ginger Liquid Hand Soap

17 household uses for vinegar - Hello Nest

17 Household Uses For Vinegar

How to orgaHow to organize your fridge - HelloNest.conize your fridge - HelloNest.co

Guide to Refrigerator Storage (Graphic)

DIY Palo Santo Smudge Spray + 5 More Ways To Cleanse Negative Energy

9 Holiday Room Sprays To Make Your Home Feel Festive

More

We are a participant in the Amazon Services LLC Associates Program, an affiliate advertising program designed to provide a means for us to earn fees by linking to Amazon.com and affiliated sites.
  • Contact
  • Privacy Policy
  • Hello Glow
  • Hello Veggie

Copyright © 2021 · Seasoned Pro

loading Cancel
Post was not sent - check your email addresses!
Email check failed, please try again
Sorry, your blog cannot share posts by email.