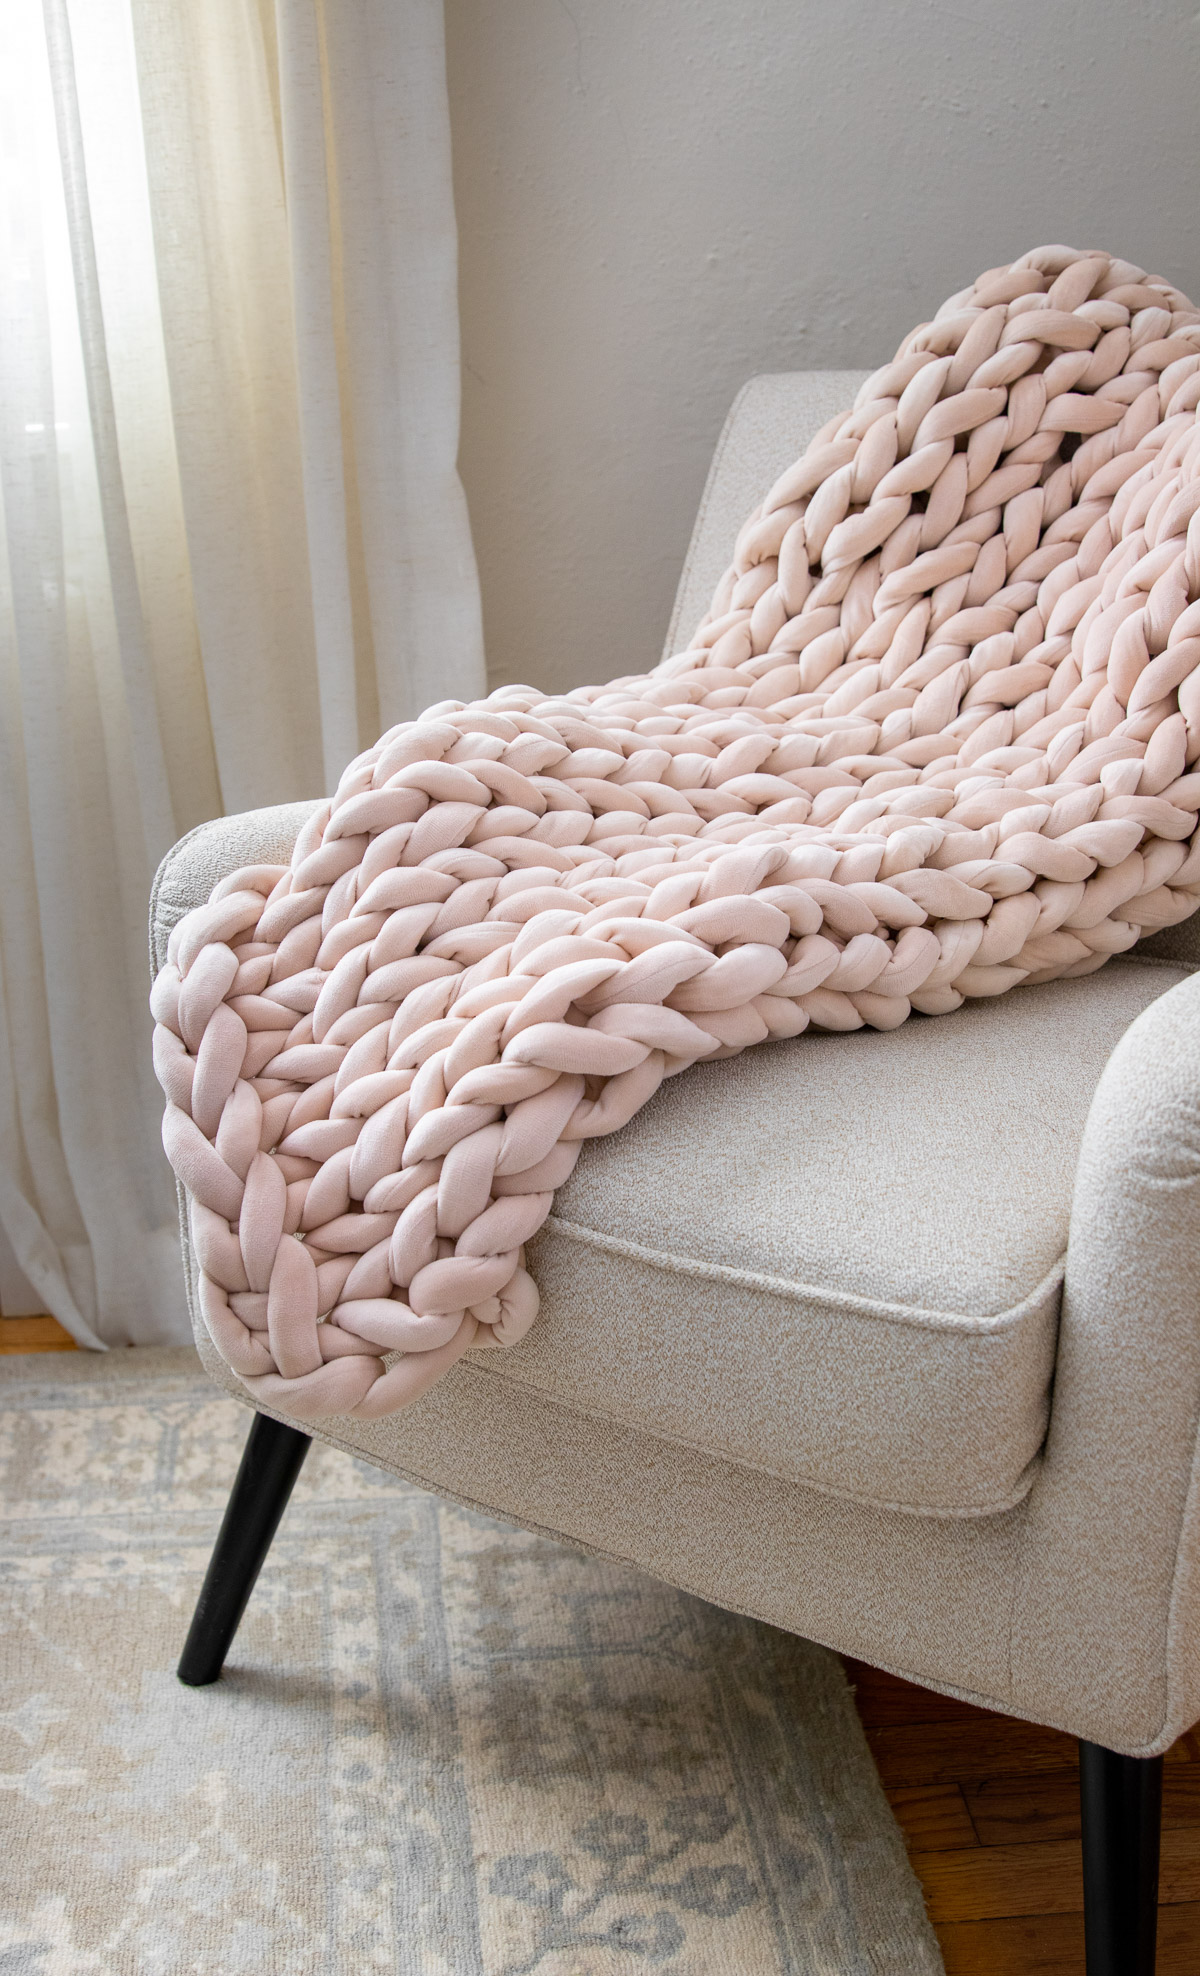
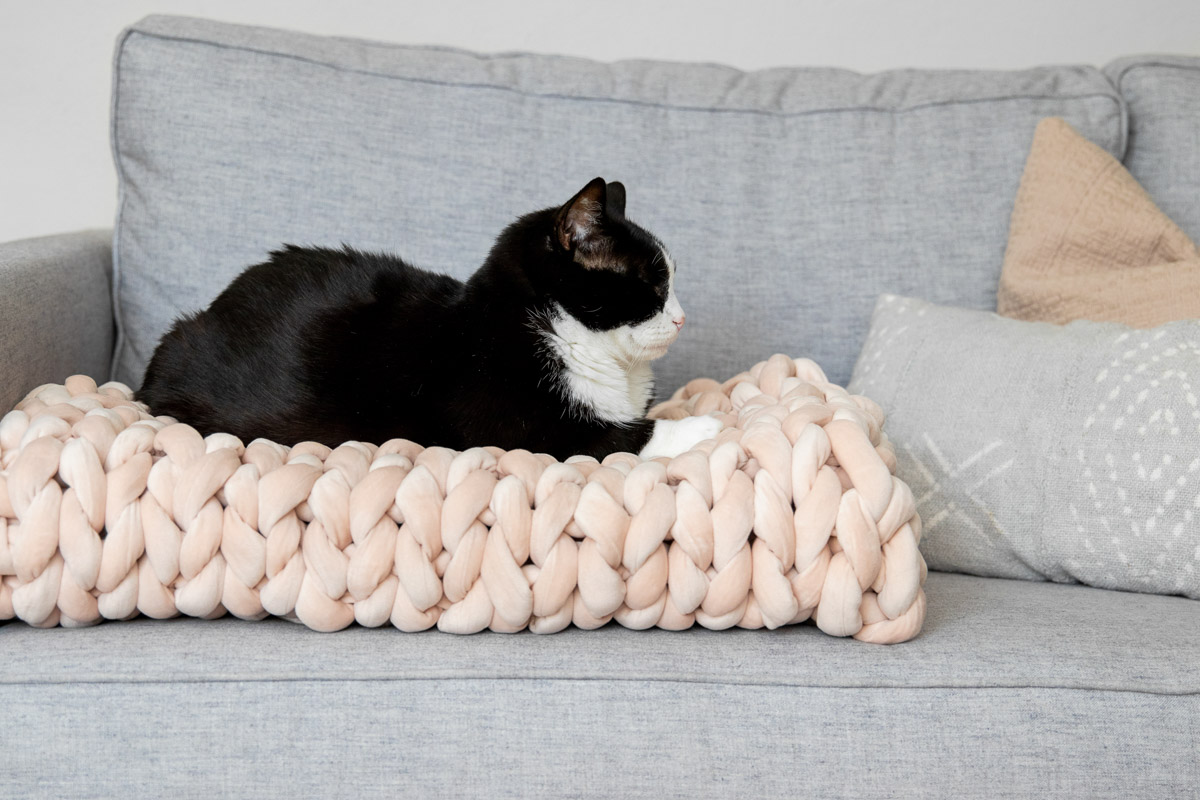
Don’t you love when you come across a home decor idea you can easily make yourself? Anything that involves knitting used to be way out of my league. Not because it was difficult but because it would take months to make and I have the attention span of a gold fish. Then some genius came along and invented arm knitting—and BOOM—a whole new world of easy DIY projects opened up. This easy arm knit blanket clocks in under $60 and takes less than 3 hours to make. Plus, it looks like it’s straight out of a West Elm catalogue. How’s that for a simple + gorgeous DIY?
An Intro to Arm Knitting
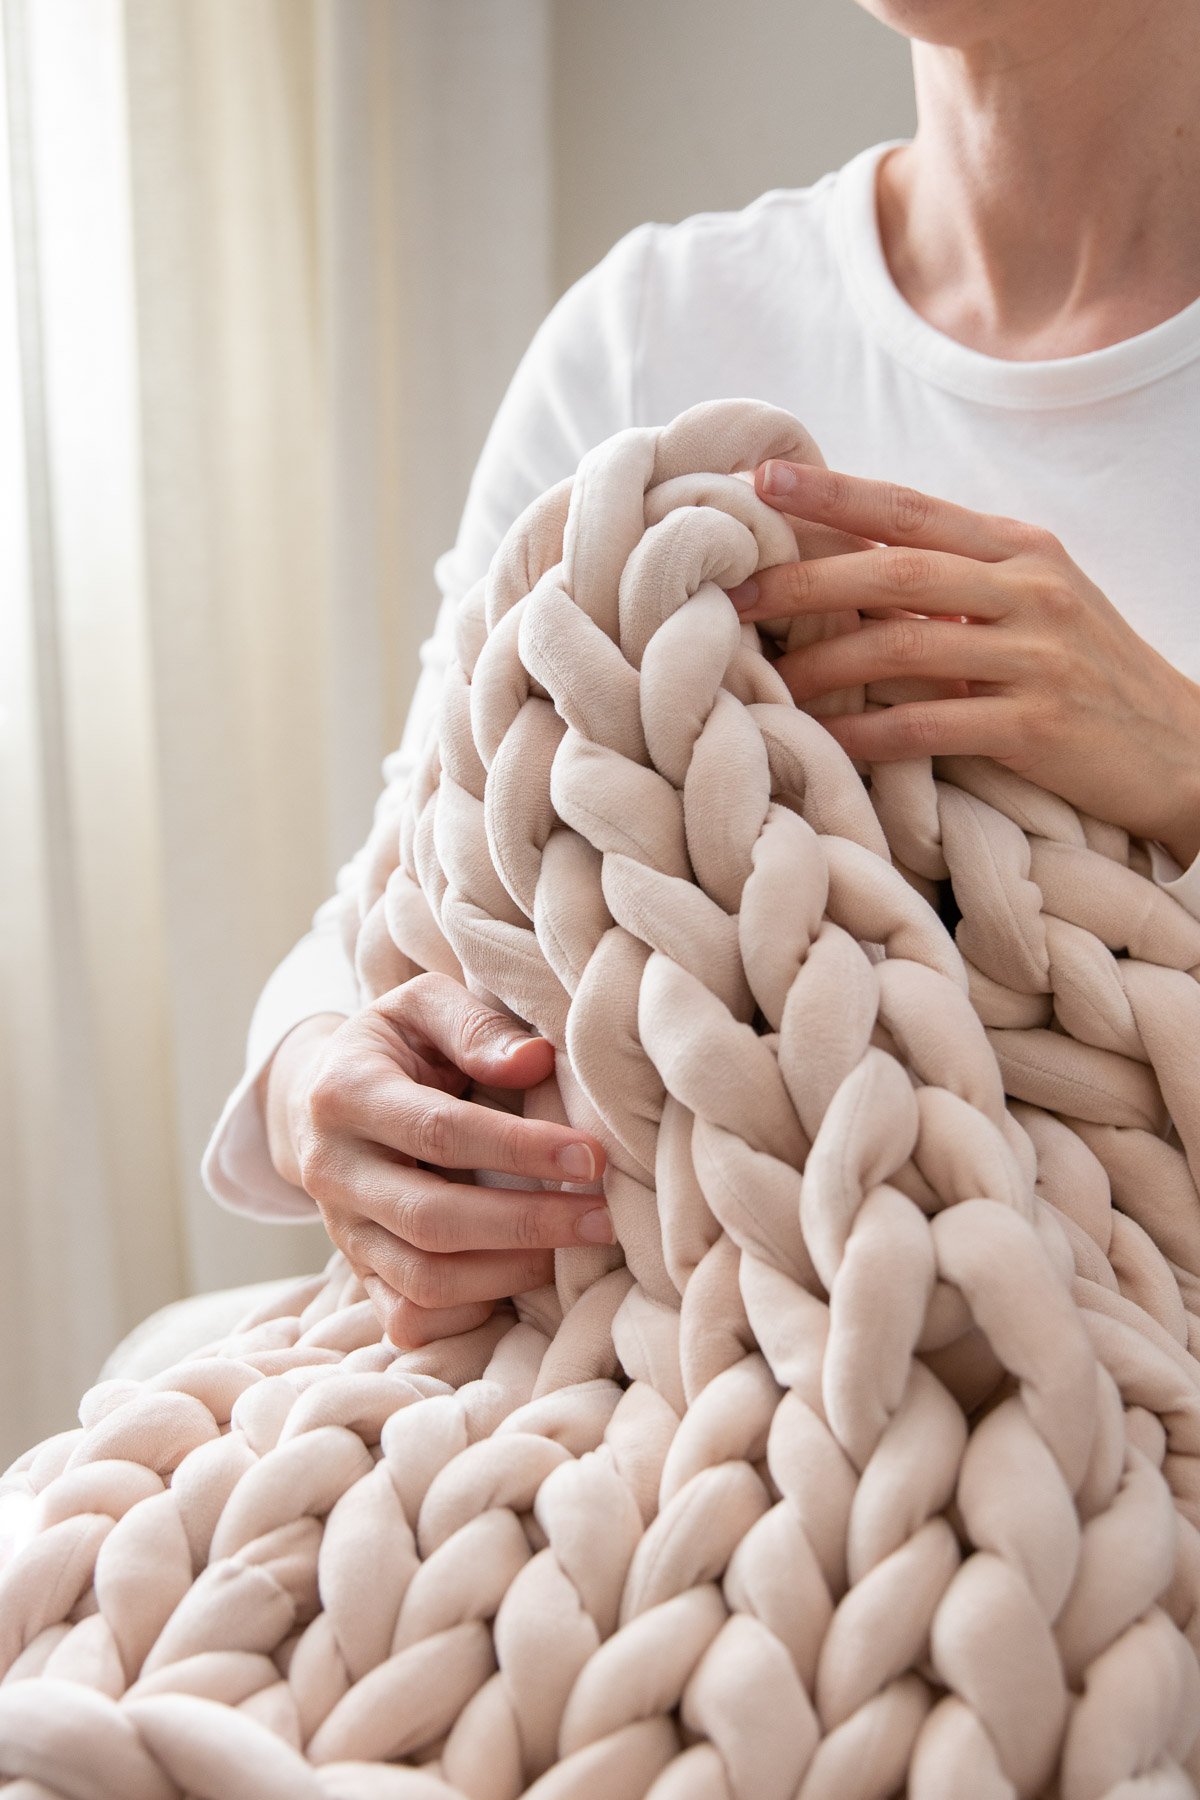
When it comes to arm knitting, the yarn is what makes your project unique — and there are a ton of varieties to choose from. Obviously, 100% wool roving costs more than cotton or chenille fibers. But it’s also easier to work with and looks a little more luxurious than some of the cheaper alternatives. That being said, the yarn you choose should fit into your budget and style, so choose whatever yarn speaks to you.
Where to Buy Yarn for Arm Knitting
Here are some different options that run the gamut from premium to super affordable. You’ll need at least 3-4 skeins of yarn to make a full blanket, so keep that in mind when looking at the price.
- Premium 100% wool
- More affordable merino wool
- Chunky chenille
- Velvet (this is the one I used)
- Cotton
How Much Yarn to Buy
This isn’t what you really want to hear, but it depends. The easiest way to find out is to find some yarn you like and then read the listing description to see how much you need. Most yarns made especially for arm knitting will help you figure it out.
If they don’t tell you, these approximations may help you out. Just remember that different materials have different weights and thicknesses, so you may need more or less than what I recommend here. But if I’ve learned anything over the years, it’s that you’ll probably need more yarn than you think, so it may be worth buying an extra skein or two up front. If you have to go back and buy more later, you may find that the dye lot is different and it doesn’t blend seamlessly into the older yarn, so it’s best to buy it all at the same time.
Small Blanket: Two 3-pound skeins or 125 yards
Large Blanket: Four 3-pound skeins or 250 yards
Extra Large Blanket: Five 3-pound skeins or 300 yards
How to Arm Knit a Blanket
Once you’ve got your yarn, it’s time to start knitting.
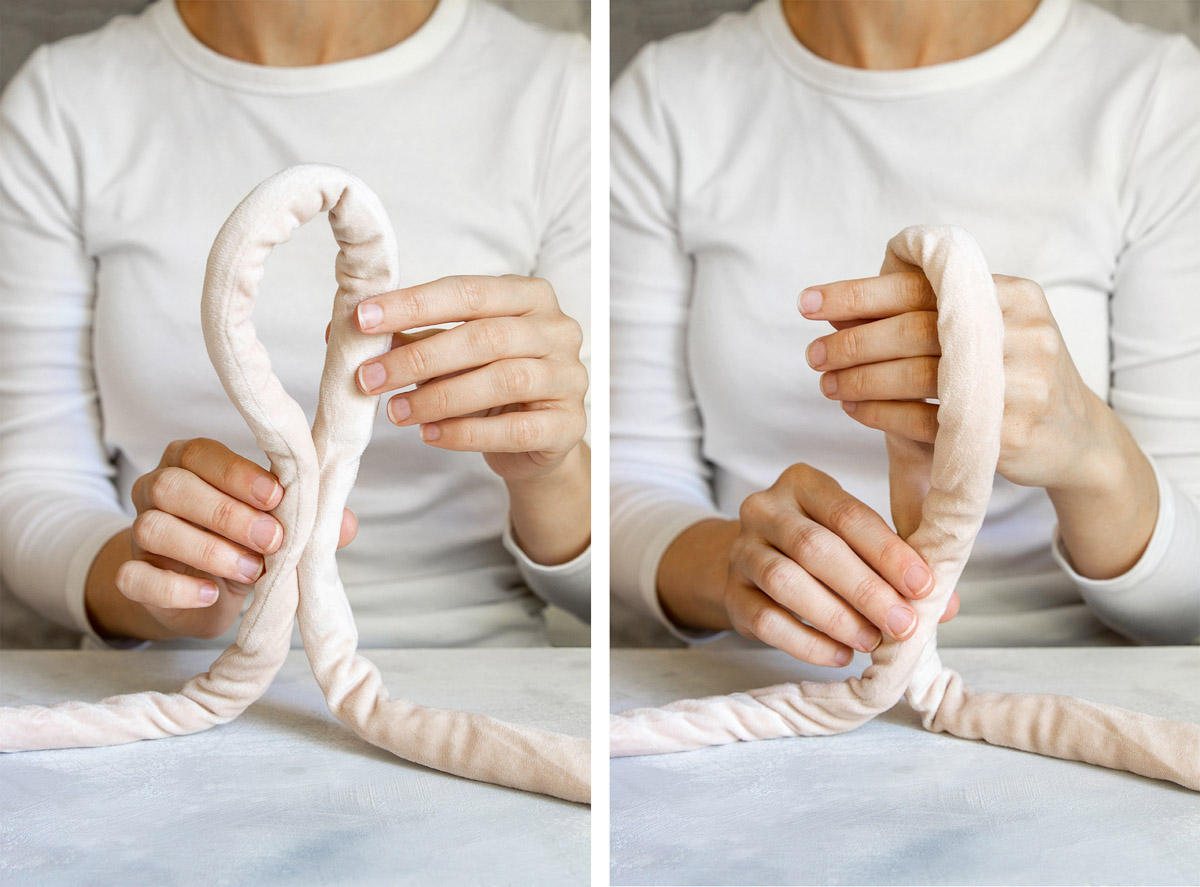
Start by pulling out about 5 feet of yarn. Like when using knitting needles, you’ll want to “cast on” by creating a series of slip knots.
Bring the yarn together and twist it so the tail end crosses over the working yarn (note: the yarn in my photo is twisted backwards—apparently shooting photos while arm knitting is not my strong suit… don’t be like me!)
Place your hand through the loop.
Grab the working yarn (the yarn end that’s still attached to the skein) and pull it back through the loop. Tighten it until you’re left with a slip knot.
Congrats, you’ve cast on your first stitch!
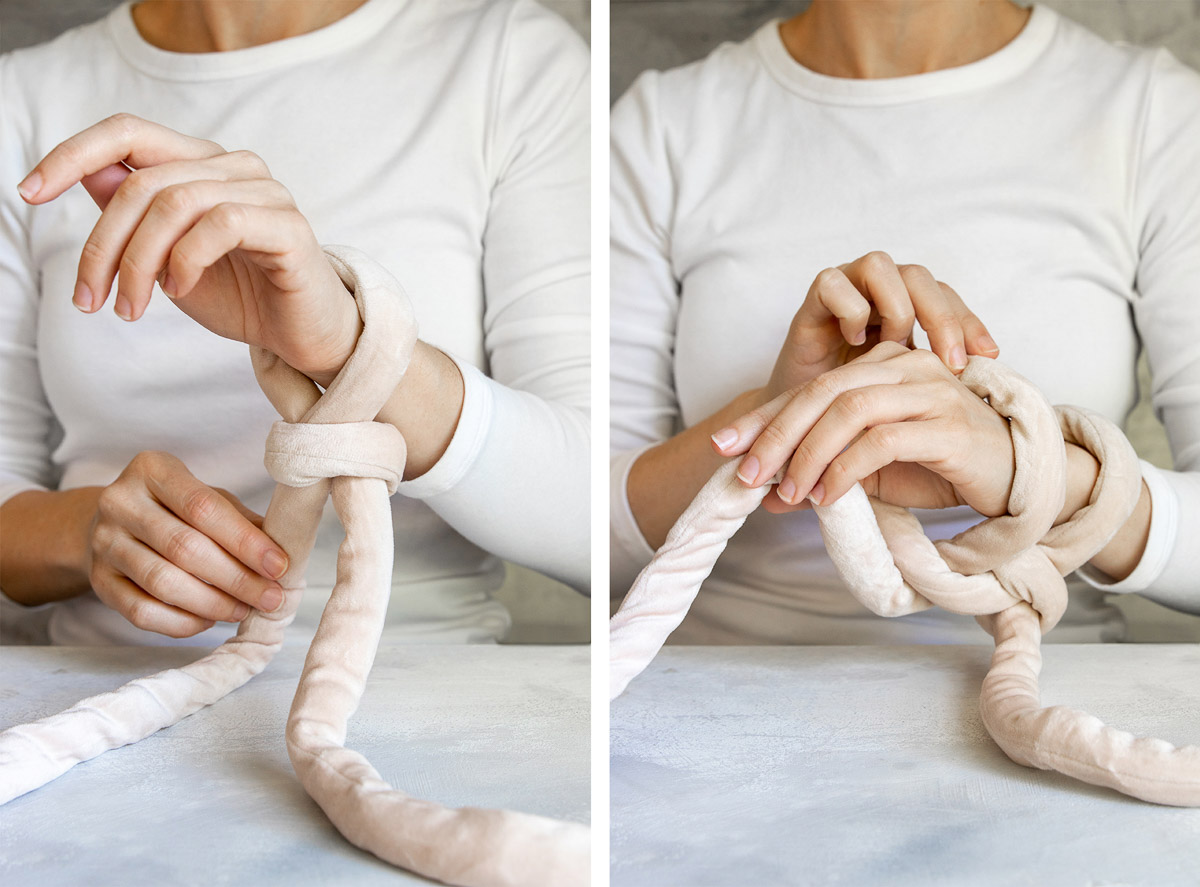
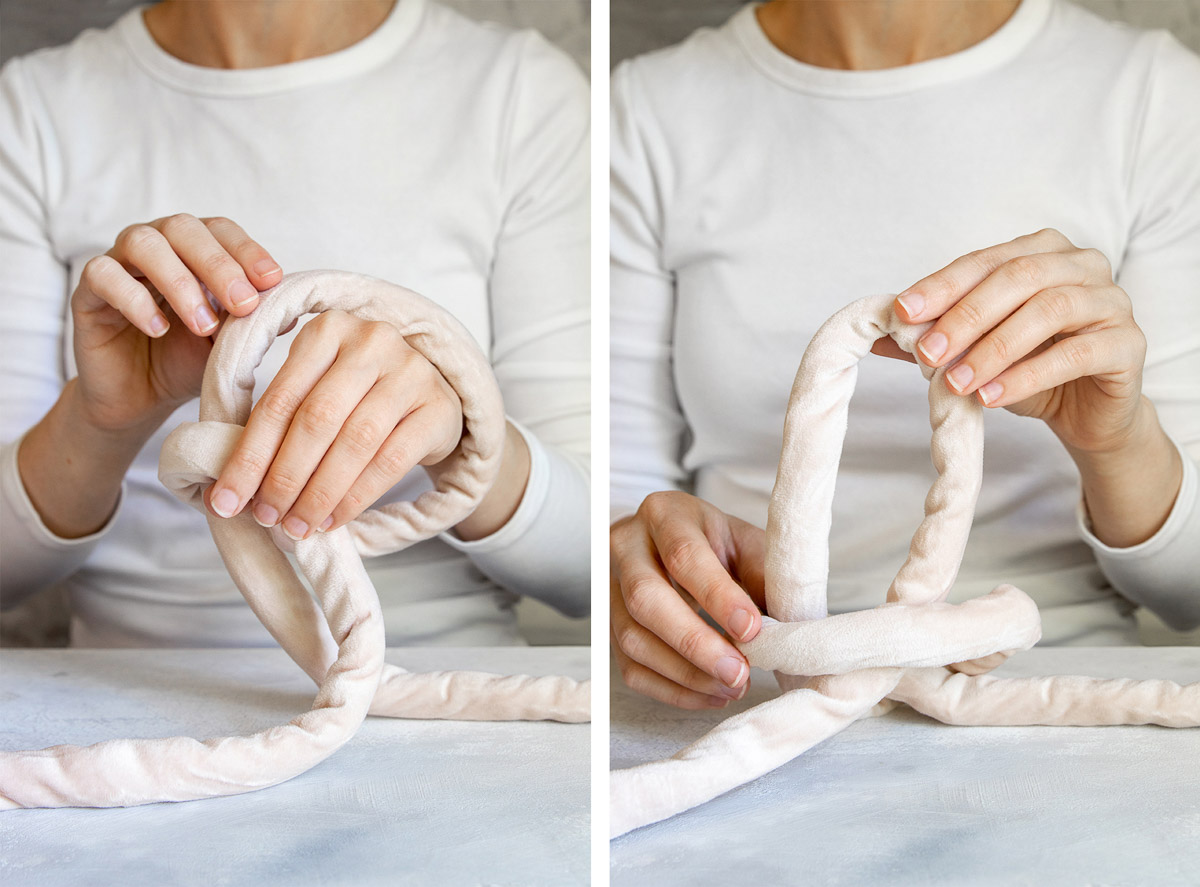
Place the loop around your arm, as if it were a knitting needle.
Continue making slip knots and placing them around your arm until you’ve cast on 13 stitches. The number of stitches you cast determines the size of your blanket. With my yarn, 13 slip knots created a blanket roughly 3 1/2 feet wide, but depending on the weight of your yarn, this could vary. Feel free to cast on more or less, depending on the desired size of your finish project.
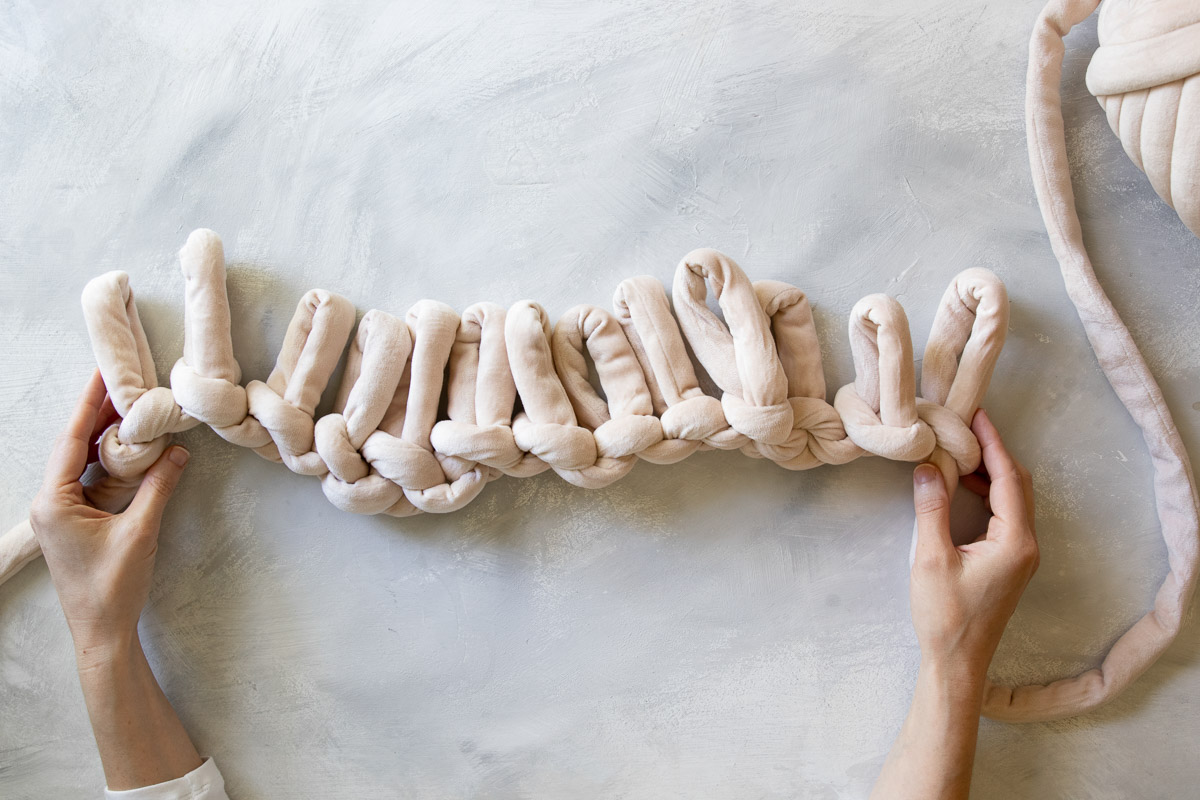
Slip the stitches off your arm and lay them on a flat surface, loops pointing up.
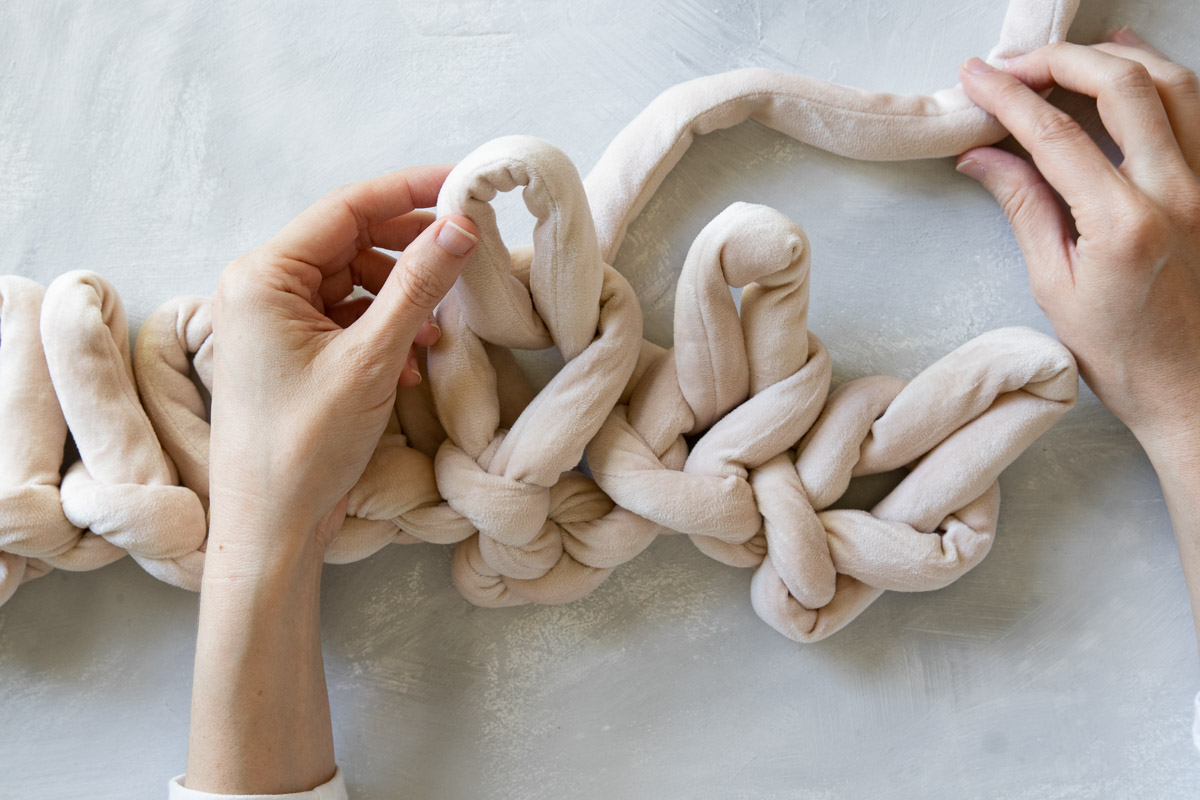
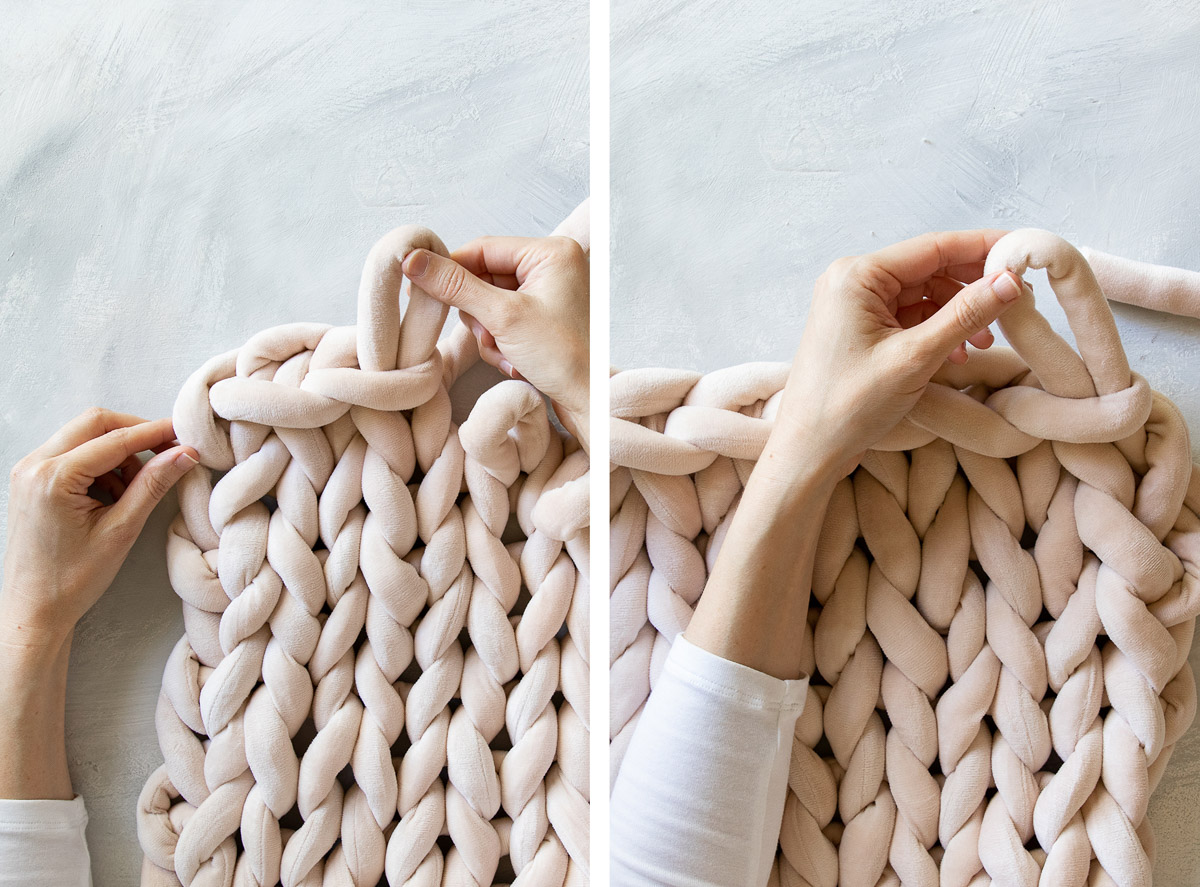
To knit the body of you blanket, you simply want to pull a loop of working yarn through each stitch. Starting on the right and working your way left, pull one loop through each stitch. When you get to the end of the row, start with the loop you just made and work your way back to the right.
Trust me, this will look ugly at first! But as you move along it will start to look like a blanket.

When you reach the end of your first skein of yarn, get to the end of the row, then start working from the fresh skein. When you’re done, you’ll tuck the raw ends into the blanket to hide them and prevent the row from unraveling.
Continue knitting until your blanket reaches the desired length.
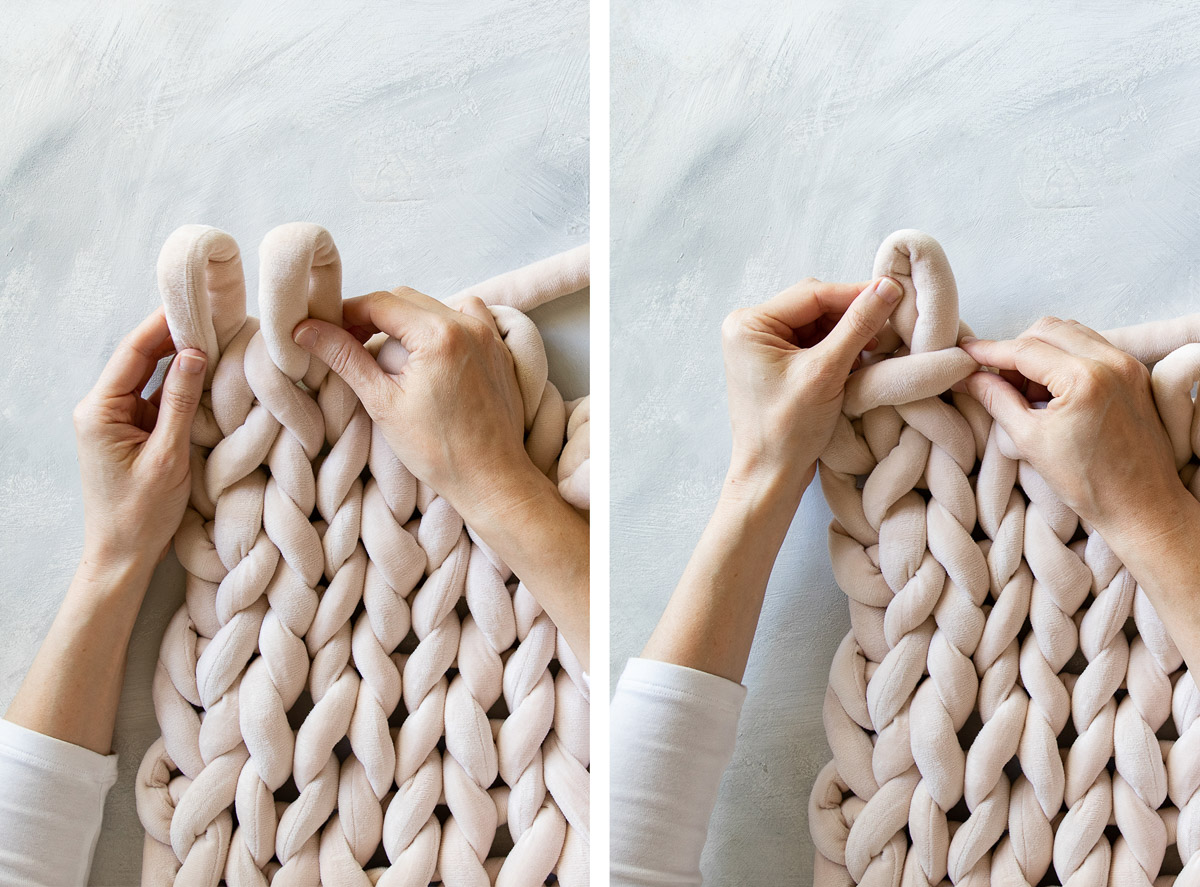
To finish, you’ll need to cast off. To do so, knit your first two stitches as usual.
Take the first loop and slip it over the second loop.
Knit the third stitch. Then take the second loop and slip it over the third loop. Continue the process all down the line until you reach the end of the row and have one stitch remaining.
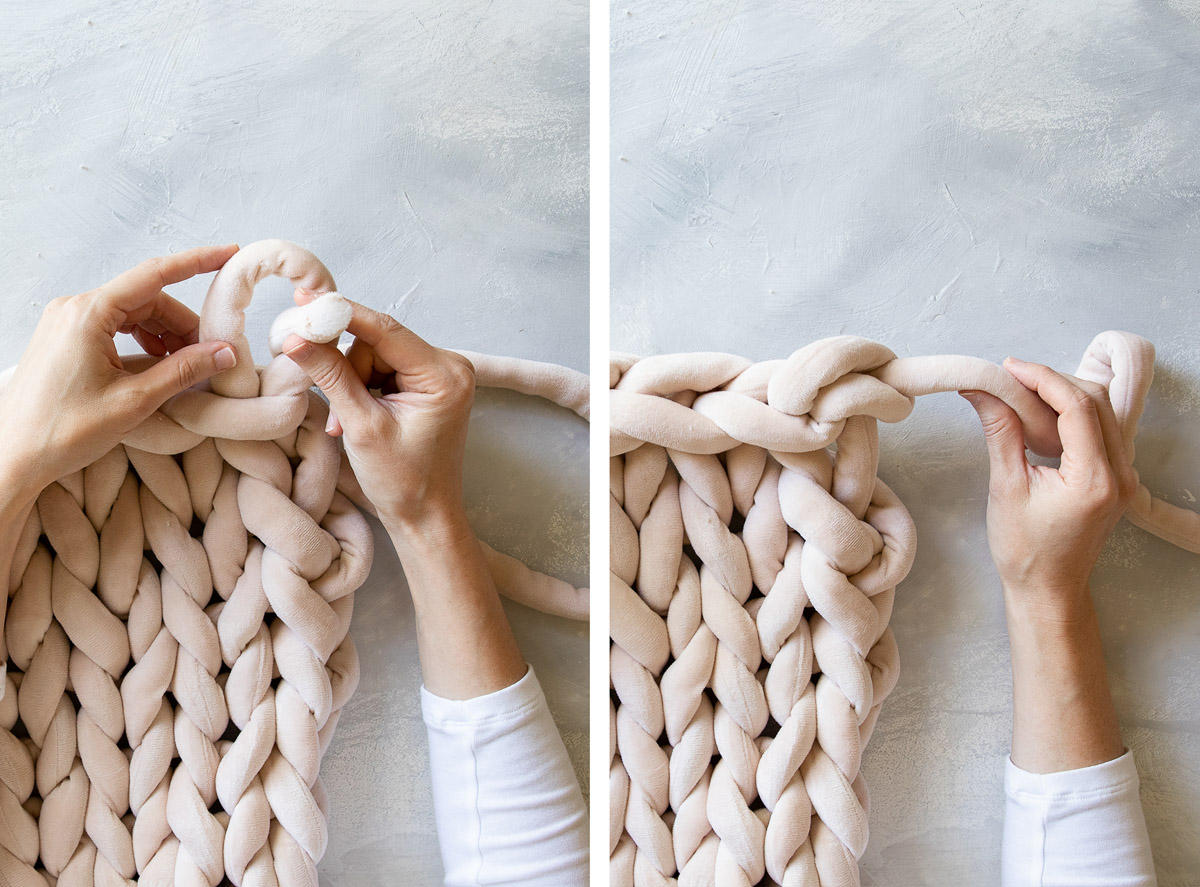
Take the cut tail and pull it through final loop. As best you can, weave the end into the blanket.
Take any remaining loose ends and weave them through your arm knit blanket, making sure to secure them as best you can so they don’t unravel.
Leave a Reply