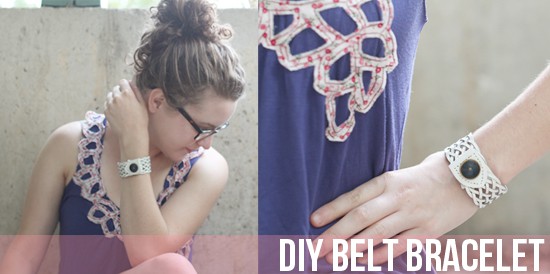
Apparently, I am really into thrift store belts. Did you guys catch my DIY on how to upcycle a belt into a bracelet? Or this one on giving a 90s belt new life? Well, I have another idea to save a 90s belt from the thrift store graveyard. You all remember wearing those thin braided belts, right? When I picked this belt up, I wasn’t sure if it was a moment of nostalgia or DIY vision. Turns out, maybe a little of both.
Click ‘Read more..’ to see how I reworked a 90s braided belt into a fashion-forward bracelet!
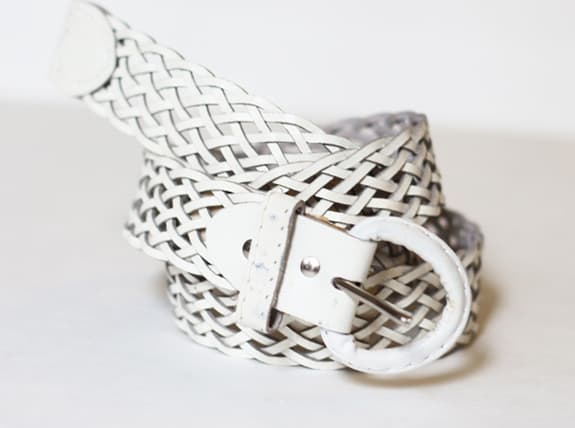
This is it. Just the way you remembered your 90s braided belt, right?
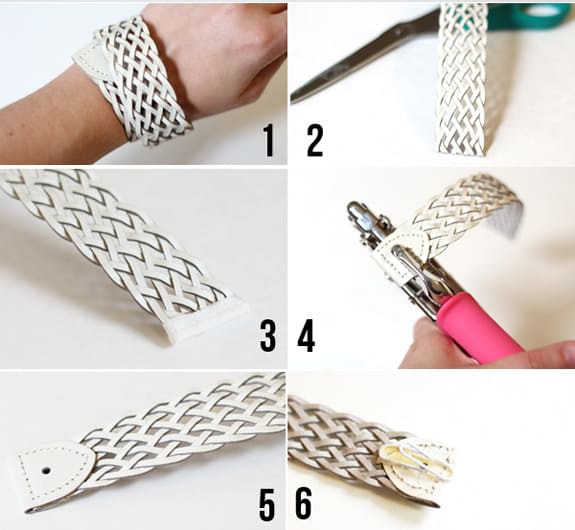
Step 1: Measure the length you want your bracelet.
Step 2: I cut the belt to the length I measured in Step 1. You are working from the finished end of the belt (not the buckle end), as shown in the photos.
Step 3: I finished the loose end of my bracelet with some vintage bias tape I had lying around. You could glue ribbon or a small piece of fabric – anything to hold the braid together and give it a clean look.
Steps 4 & 5 (optional): I used a Crop-a-dile to punch a small hole in the end of the bracelet. If you don’t have a Crop-a-dile or leather punch, a hammer and nail will work to make a hole! I have a very specific use for this hole that I cover in Step 9, which is optional.
Step 6: I used hot glue to attach a paperclip (with the small end bent up) to the underside of my bracelet. There may be more elegant ways to attach a hidden clasp on this bracelet but this works and we all have paperclips!
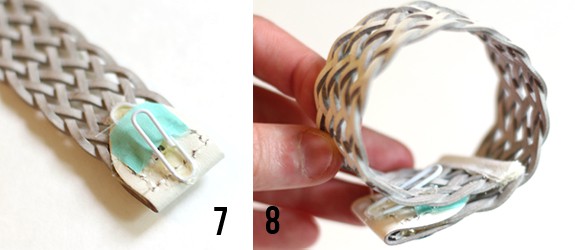
Steps 7 & 8: I covered my paperclip to make it look a little prettier, even though I am the only one who will see it. This is your clasp – see how it slides right through the braided part? You can tighten/loosen it as you like.
Step 9: This is the best part! Decorate the front of your bracelet. I recommended punching a hole in Steps 4 & 5 because it is the perfect way to secure a button shank. I did not even use glue – it’s the perfect, snug fit for my Grandma’s vintage button! You could just glue any decorative item to the front, though.
What do you think? Have you passed up some 90s belts that need a makeover?
0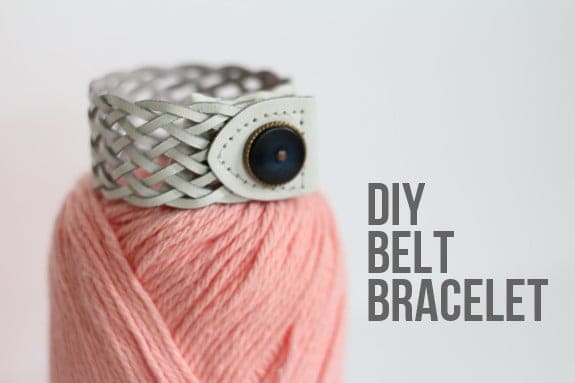
Janet says
Hey! Someone in my Facebook group shared this site
with us so I came to give it a look. I’m definitely loving the information. I’m bookmarking and will
be tweeting this to my followers! Wonderful blog and wonderful design and style.
Scarlet Faith says
Thank you now I know why I bought those belts I have when I saw them at the second hand store. They just spoke to me. I now
know what they were saying….” we would make a beautiful bracelet for your store:)”
You sooo smart:)
Ms. Scarlet Faith
Kim says
Wow, what a great idea! I think that even I may be able to manage this! Hmmm…now to find a belt! Thanks for the inspiration~ following you on FB now! 🙂
Jen says
Brilliant! I must go belt hunting at my local thrift store now!
Bracelet Vintage says
Do you have the complete collection of Bracelet Vintage? You can find it all here!
Miia says
What about the shirt you are wearing, is it a DIY of yours?? Very cute!
Katie (Lemon Jitters) says
I wish it was a DIY, Miia! That’s a good idea for a project…
Vintage Bracelet says
Really interesting.I like this one.
A Touch of Lovely says
What an awesome idea! My husband has a woven 90s belt that’s just been hanging in the closet for forever. I might have to make it mine!
gerbermom says
you do that! especially since he’s not using it anyway. I just love repurposing other people’s stuff!
Mandy Pellegrin says
I love this project! What a great use for that belt!
Kiersten @ Oh My Veggies says
It looks a million times better as a bracelet! I totally had a belt like that too. 🙂
Katie (Lemon Jitters) says
We all had those belts, haha! I agree – I like it much better as a bracelet.
Jennifer says
What a smartie! I never thought of upcycling old belts. Now I know I’m going to be a thrift store belt frenzy!
Katie (Lemon Jitters) says
You and me both! 🙂