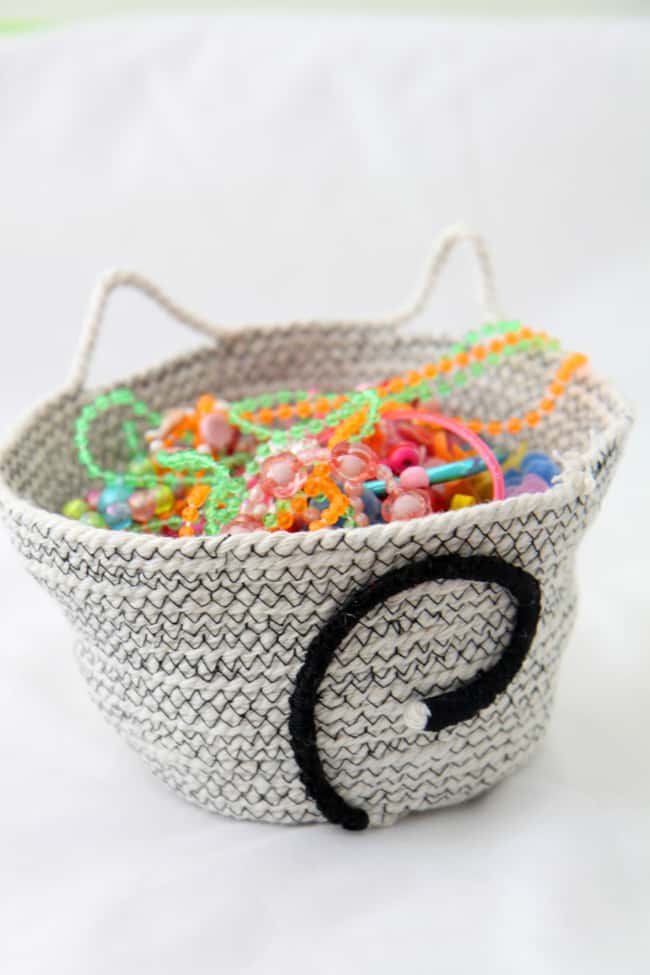
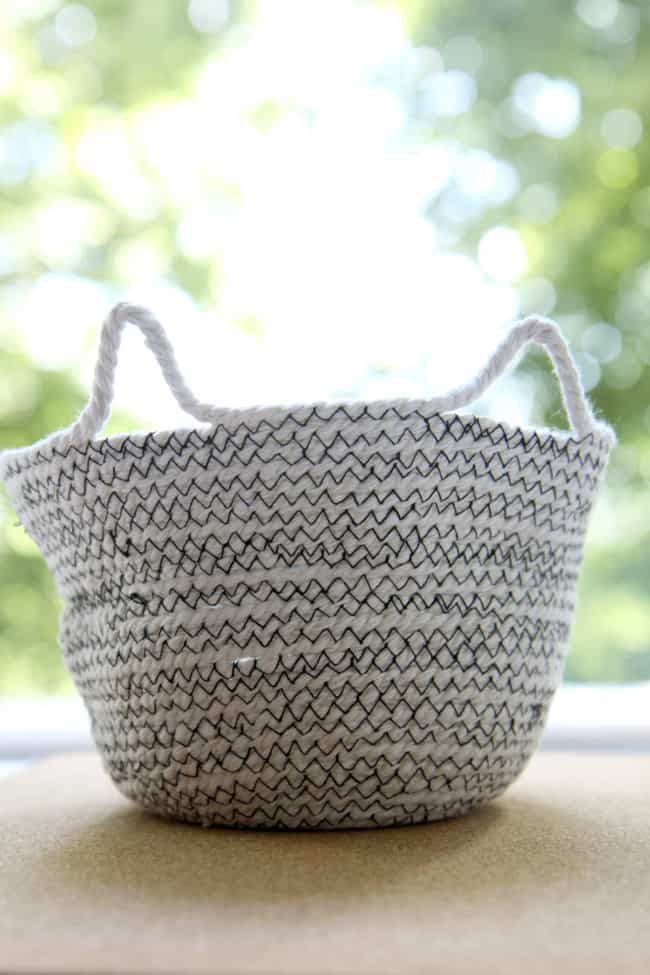
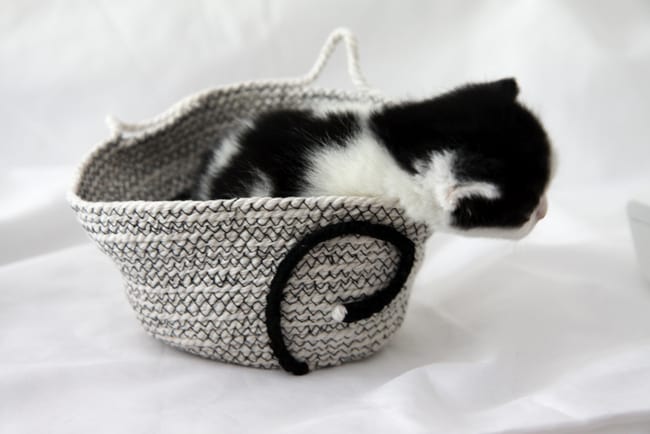
The humble DIY rope basket is so easy to put together. Once you know the technique, you can adapt it to make pots, bowls, coasters, or anything, really. I took a basic rope coil bowl and added a quirky twist by turning it into a cat.

 The possibilities for design customization to suit your own taste (or a gift recipient’s) are endless. Have fun with earthy tones, multiple colors or neon contrasts. You can even add paints or embellishments. For a kid-friendly version, use hand-sewing and then decorate after with bright, colorful spray fabric paints.
Kitty Cat DIY Rope Basket

Supplies needed
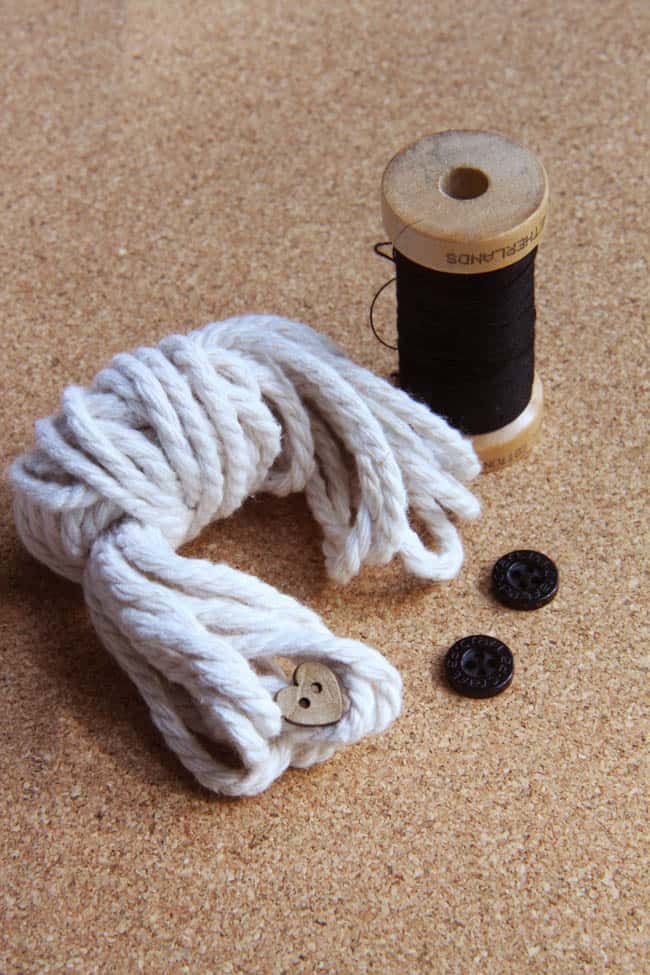
- recycled cotton cord or yarn
- organic cotton sewing thread
- buttons for eyes and nose
- sewing machine and sewing needle
- optional: fabric paints or pens

Step 1
Starting far enough along the length of the cord to leave an end that will eventually form the tail; Form a loop to start the base coil, over the top of this length of cord.
Step 2
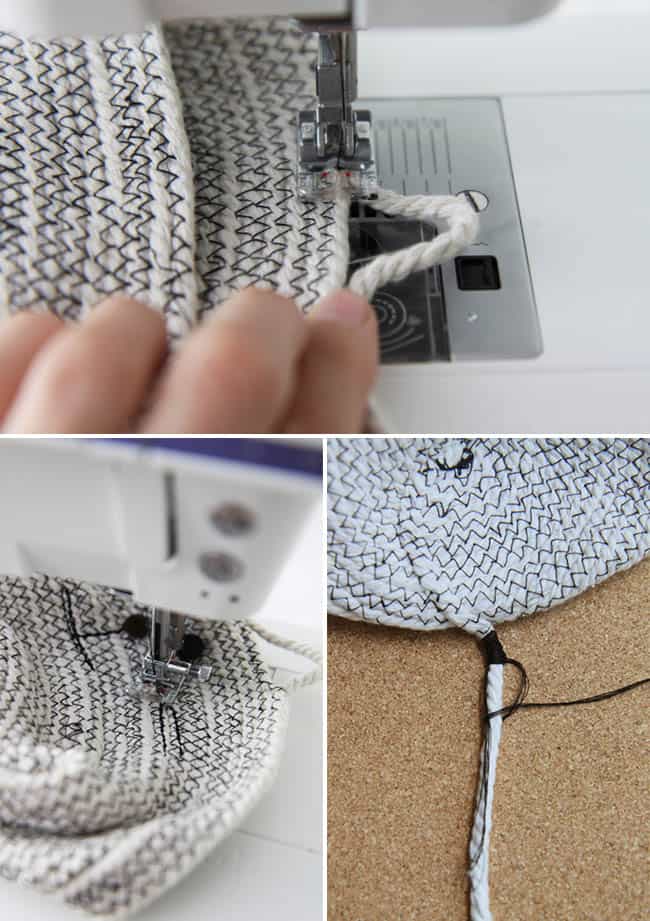
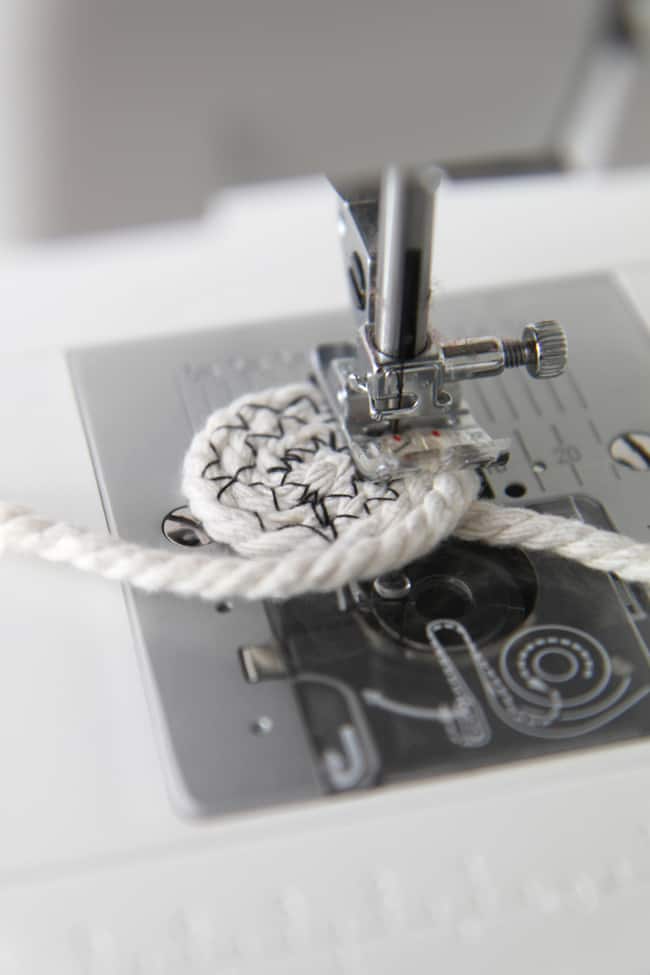
Continue coiling the rope and sewing with a long/wide zig-zag stitch either by hand or by machine, until the base is the diameter you require. You will find it easier to pivot the coil if you raise the presser foot when the needle is still in the inner coil.
Step 3
You can then start to shape the sides by sewing at an angle, creating gently sloping sides, and continue until the desired height of bowl is reached. Pulling slightly on the loose end of the rope will help to form the shape. When you start to shape the sides, hold the tail out of the way so that it isn’t sewn down as previously.
Step 4
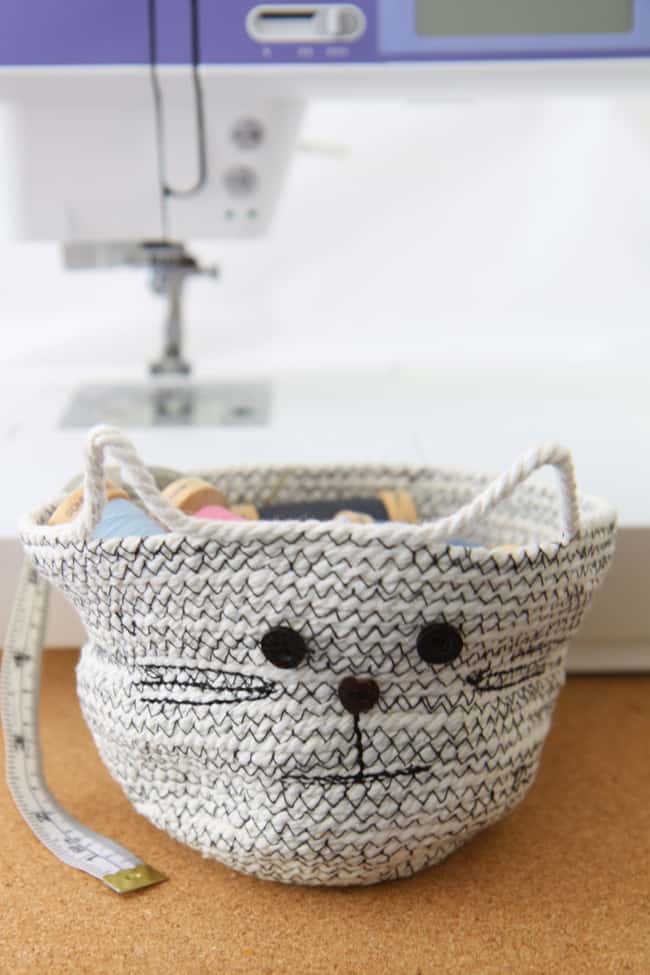
To shape the ears, get to the starting point of the first ear bend the rope into the ear shape, sew along the previous coil and then sew into the second point of the ear. Repeat for second ear and then cut cord after you complete the round.
Step 5
Add buttons for eyes and nose, then embroider the mouth and whiskers.
Step 6
Sew the tail into a slight curve shape on the back of the bowl. If you like you can wrap the tail first with thread or yarn.
Gail says
I’ve made one from this pattern and now ready to do one a friend requested! Just love it
John Whistler says
can’t stand how adorable your cat looks. God if only I can sew, I’m too accident prone. I tried to hand stitch a shirt once and ended up in the ER when the needle went through my thumb.
ruth croft says
” I LOVE YOUR CRAFTS “
Katie @ 24 Carrot Life says
This is THE cutest DIY I have seen in a while. Pinned! I don’t have a cat but this is a great alternative to a regular basket. I just came across your blog through Pinterest and can’t wait to make lots of items, including the jewelry clay plates that you posted recently!
gina says
Adorable! Pinned.
deb m says
This is the MOST ADORABLE thing I have ever seen! I’m not clear in how to shape the bowl. does it just kind of naturally become a bowl shape. I am fostering 5 kittens right now and want this bowl to take pics!!!!!!
Anya says
What a delightful project! I am overwhelmed by the cuteness. I see cat baskets in my future….and perhaps a kitten too…. 😉 Many thanks! You made my day!
Phillip || SouthernFATTY.com says
Now I’m gonna have to learn to use a sewing machine, I guess… How cute!