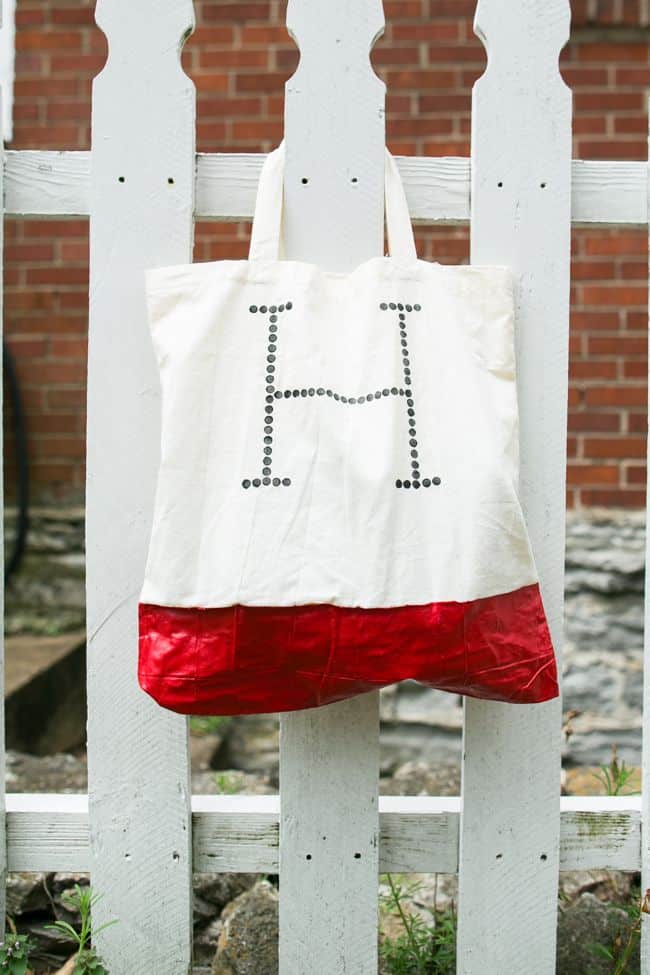
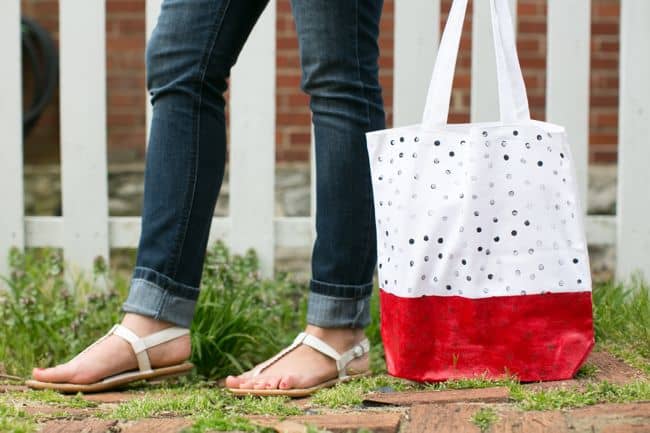
The H-Man got a new school bag. After seeing these West Elm totes I thought the dotted initial would be perfect since he points out every “H” he sees and says “H for Henry!” One letter down, 25 to go….
And after waiting – no joke – two months for my Plasti Dip to arrive, I finally got to try it out. And it was worth the wait because this stuff is the coolest. Yes, it stinks like crazy so don’t use it indoors. But it makes a thick, rubber-like coating on the bottom of the tote bag so it can stand up to more wear and tear.
It is the cutest thing to watch Henry carry his little bag. Now he is ready for all kinds of adventures!
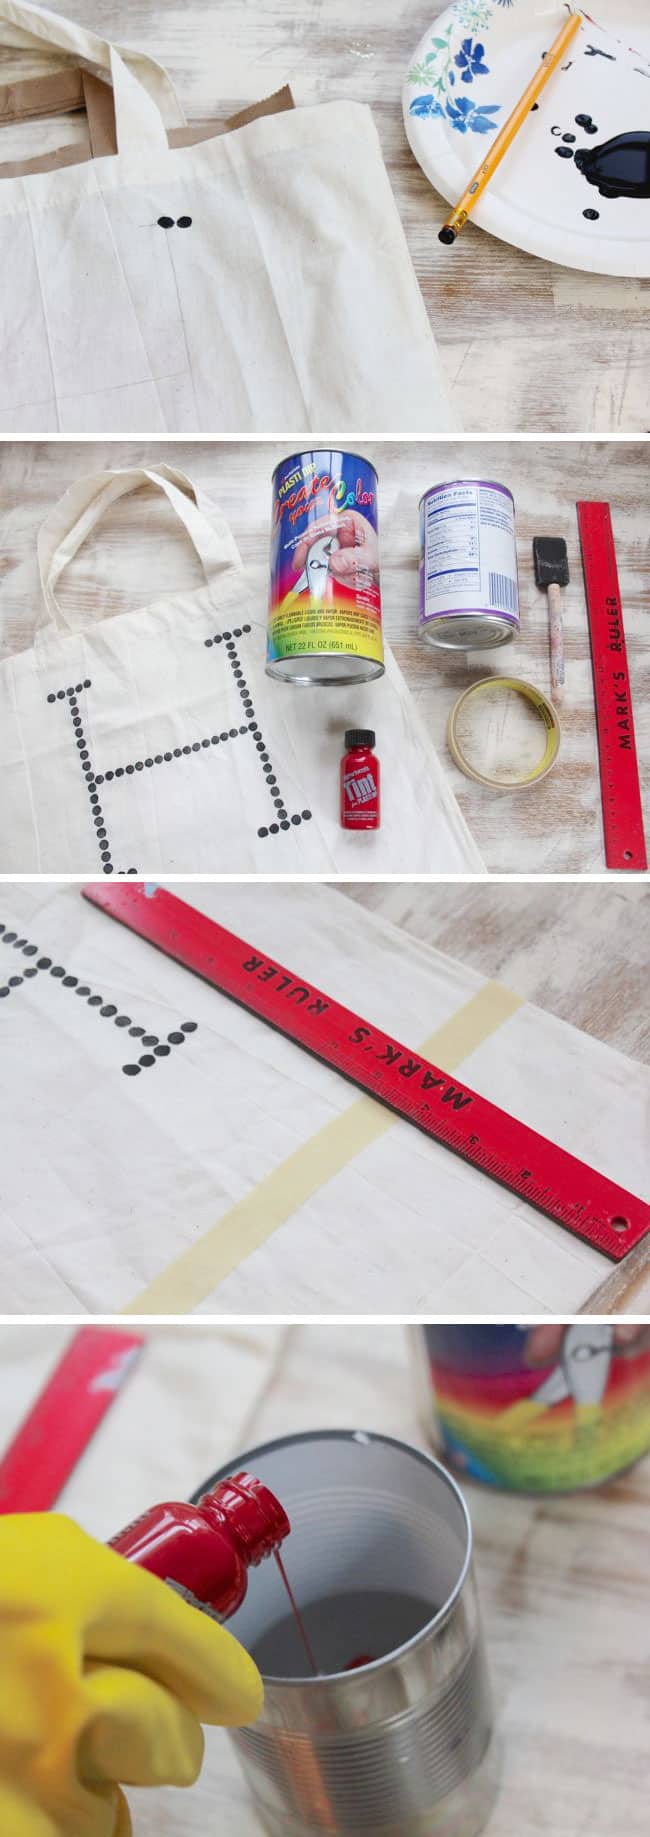
To make your own West Elm inspired totes, you will need:
- A plain tote bag. Hobby Lobby has a cheap one that I love because the handles are longer. However it is pretty thin so it might not last as long.
- Fabric paint.
- Pencil with eraser.
- Plasti Dip, metal can and disposable paint brush.
- Tape and ruler.
First, draw the initial lightly on the tote with a pencil. You could also draw the letter on paper and slide it inside the bag if it’s thin enough to see through. Dip the pencil eraser into the paint and outline the letter with dots. Make sure to put something inside the bag so the paint doesn’t seep through.
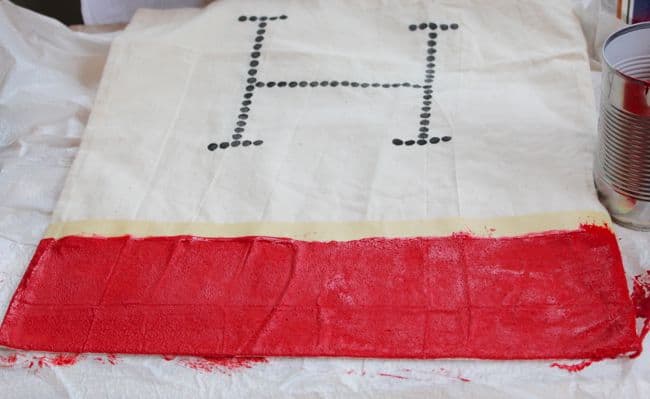
When the paint is dry, tape off the bottom of your tote. Mix the color of Plasti Dip you want to use in a metal can. (Note: don’t use a plastic container.) Then paint the bottom of the tote. Let it dry about 30 minutes and add another coat. Keep adding coats of paint until you have the thickness you want. Three or 4 coats is probably good.
And remember these 26 ways to jazz up a tote bag? It got me all inspired, and I couldn’t resist adding some color to my new tote.
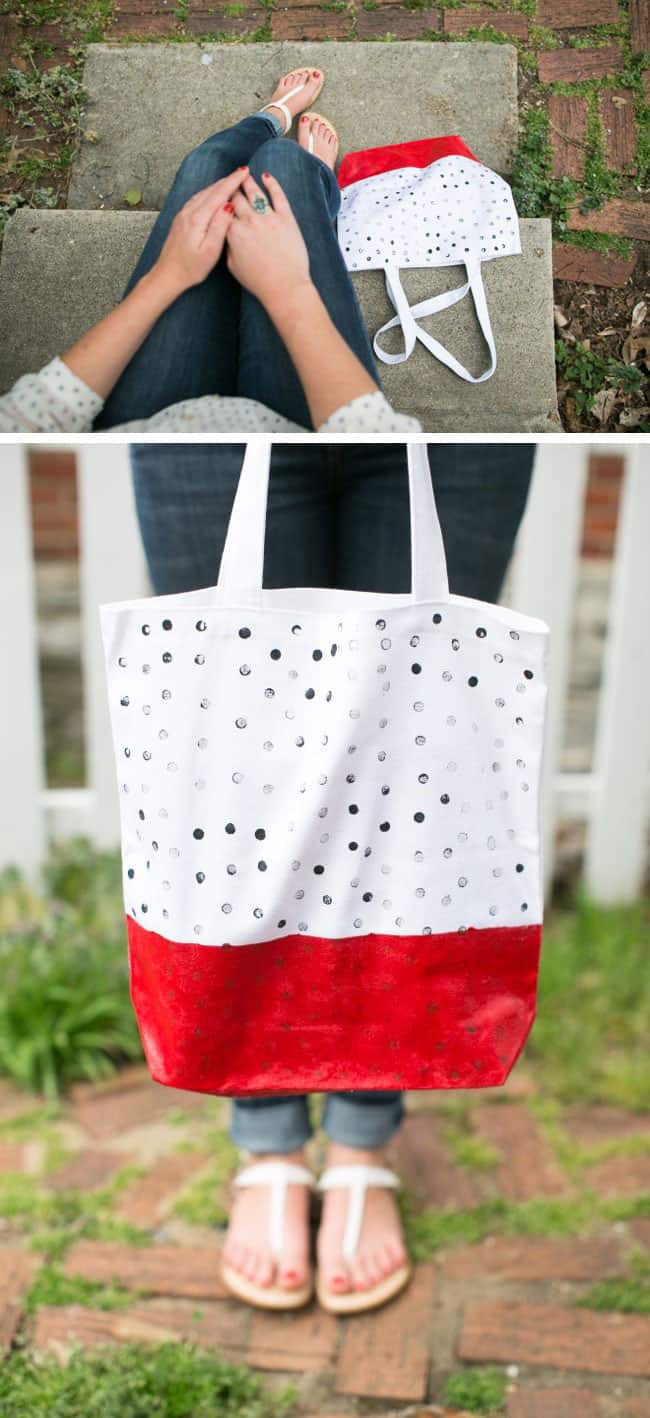
Nothing says summer like a new tote bag. Perfect for end-of-school picnics and afternoons at the park.
What’s your favorite thing to carry in the summer? Let me know if you’ve decorated any tote bags!


Plasti Dip International says
Rad project! Thanks for using Plasti Dip. We’re launching a new website to showcase our passionate (possibly rabid) fans. Or as we call them, Dip Heads. Would you be wiling to let us use your image? We’ll give you a shout out, and you could be in line for prizes in the future!
Stephanie Gerber says
Sure, that would be great! We’re a proud Dip Head too, ha! 🙂
Kathln says
We added this to one of our latest round up for Mother’s Day. thanks for letting us use an image!
Roth
Inspire Me Heather says
Your dipped totes turned out beautiful, love the polka dots too!
Jessica says
I love his 502 shirt, represent Louisville!
gerbermom says
I’m so glad you noticed that! I just love that shirt – it’s sooo soft. Got it at the Louisville Originals store. We’ve been wearing it forever and I’m glad I can pass it down to Sam now that it’s getting too small 🙂
katherine says
I really love both of them! He makes it so so so cute though – carrying it! I thoght it was a HUGE bag, then I realized he was not an adult! I’m silly lol. I decorate totes a lot – I have a few DIY ones piles in my closet.
Deb Frank says
I never heard of this stuff. Now I’m educated! very cute projects!
Shannon at MadiganMade says
Adorable! The polka dots are cute! I just started playing around with Plastidip, too! (on a tote, go figure!) I tried the spray kind. I think I might need to try the paint in a can next. It looks like it would waste less paint. Love how the dots peek through the paint on the fabric. Cute!
gerbermom says
I didn’t realize there was a spray paint kind! I wish I could have actually dipped the tote into the paint – I did with a really small bag and the texture was super cool.
Elisa @ Fancyfreeme.com says
I’ve never heard of Plasti Dip. It’s pretty ingenious though! I love what you did with the bag!
Jen @ Eat. Sleep. MAKE. says
Fun! I’ve seen a ton of projects using Plasti Dip and have been considering using it myself. I wouldn’t have thought to use it on a tote!
gerbermom says
You should try it! It kinda makes a mess but it’s fun 🙂