• Skip to primary navigation
  • Skip to main content
  • Skip to primary sidebar

Hello Nest

The Art of Making a Home

  • Green Cleaning
    • Air Fresheners
    • Bathroom
    • Bedroom
    • Kitchen
    • Laundry
  • Natural Living
    • Homemade Recipes
    • Essential Oils
    • Plants & Flowers
    • Zero Waste
    • Organizing & Simplifying
  • DIY & Decor
    • Candle Projects
    • Holiday Projects
    • Sewing Projects
  • About
    • Contact
    • Privacy Policy
  • Nav Social Menu

    • Facebook
    • Instagram
    • Pinterest
    • YouTube

DIY No Sew Beach Bag

1 · May 20, 2013 · Stephanie Gerber · 13 Comments

No Sew DIY Beach Tote Tutorial

Buying a new swimsuit is like an annual rite of humiliation. Having just had a baby, I completely avoided getting anywhere near a bathing suit or the pool last summer. This year I’ve vowed not to be so lame. (Thanks to Elsie’s recommendation, I got this one from ModCloth and love it.)

Because who cares about my tummy, really? The kids sure don’t. And I’ve decided to stop letting embarrassment keep me from having fun with them in the pool. We have epic plans for splashing and swimming next weekend and I can’t wait.

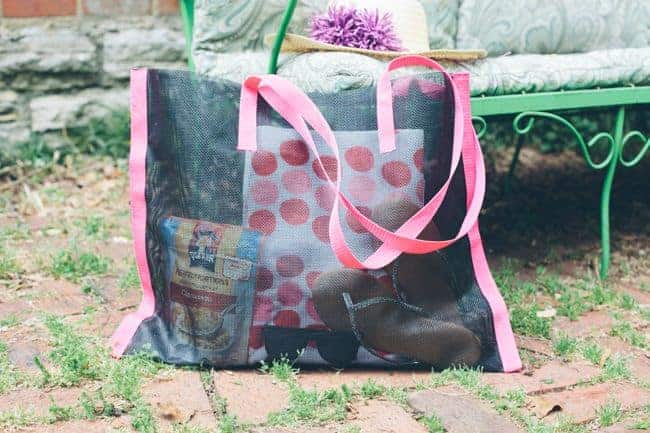
And what goes great with a new suit? A no sew beach tote of course.

See also
Slow Cooker Chicken + White Beans with Kale Pesto

No Sew DIY Beach Bag

Beach Bag tutorial

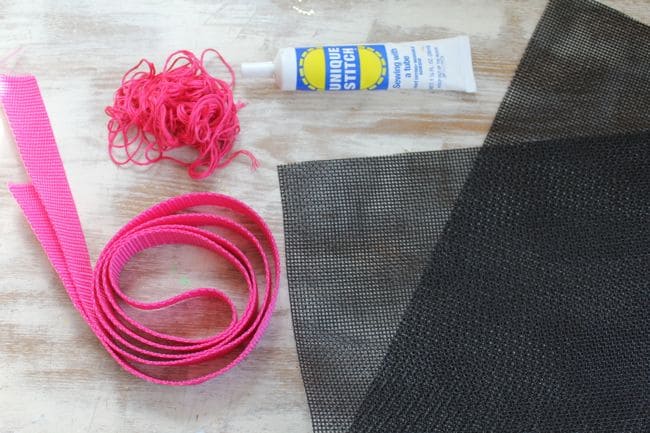
Supplies:

  • 1 yard window screening fabric – mine came from JoAnn’s in the home fabric area
  • 4 yards pink trim
  • Liquid Stitch
  • Needle and pink embroidery thread
  • Clamps

No Sew DIY Beach bag
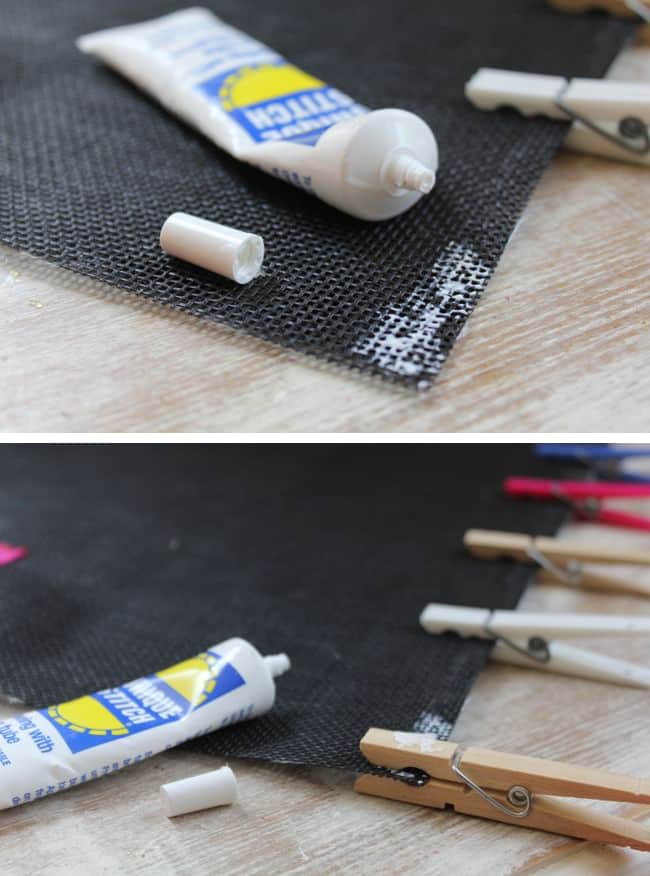
Fold the screen fabric in half and cut the width to 24 inches. You will end up with a piece of screen that’s 36 inches x 24 inches. Liberally apply Liquid Stitch to the edges of the bag and clamp. Let dry completely.

Beach bag diy
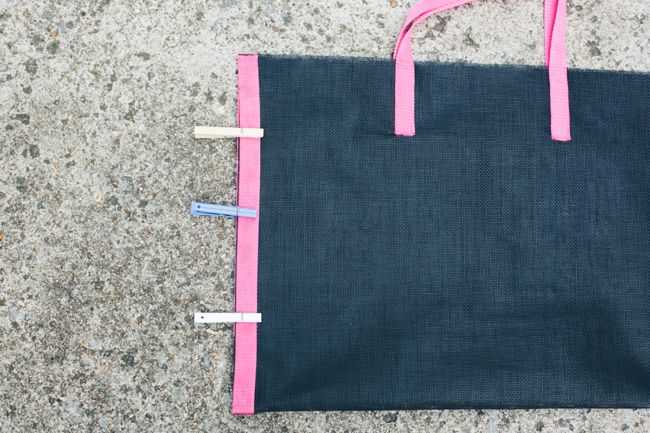
Cut two pieces of pink trim the length of the sides of bag, folding it around at the bottom. Again apply Liquid Stitch and clamp until completely dry.DIY Beach Bag

See also
Mad for Plaid! 3 No Sew DIY Accessories from 1 Yard of Fabric

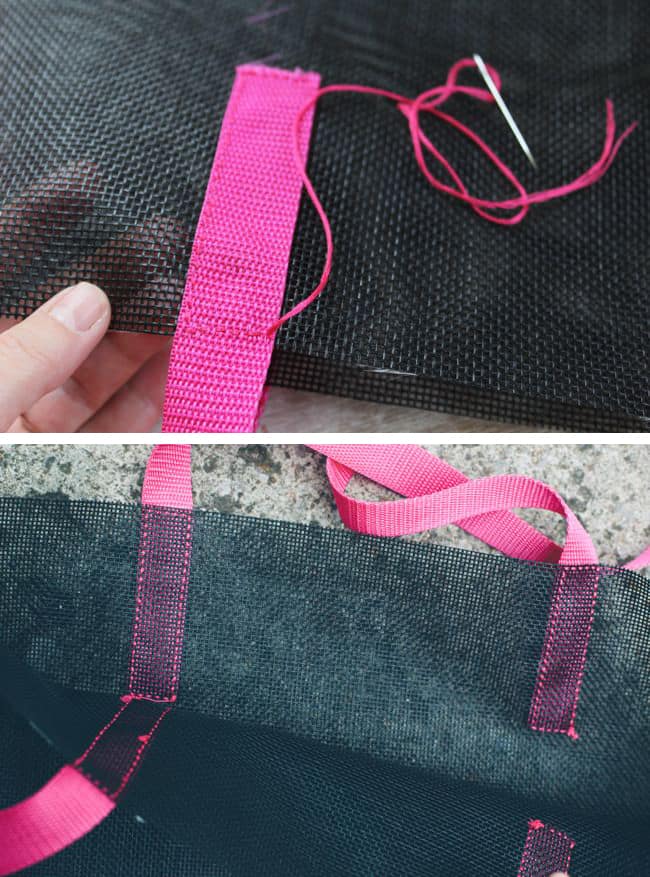
Cut two 40-inch pieces of pink trim for the handles. Pin in place 7.5 inches from the outside edge of the bag on each side. The trim should extend 4 inches down onto the bag. Sew in place with running stitch using embroidery thread.

Now I am ready for summer adventures! What exciting things do you have planned for the next few months?

How to Make a Beach Bag | Hello Glow

1

Share this:

  • Click to share on Facebook (Opens in new window)
  • Click to share on Twitter (Opens in new window)
  • Click to share on Pinterest (Opens in new window)
  • Click to email this to a friend (Opens in new window)
See also
Roasted Maple Bacon Brussels Sprouts Recipe

Uncategorized beach bag, beach tote, diy beach bag, DIY tote, diy tote bag, how to make a beach bag, liquid stitch, mesh, mesh beach bag, no sew, screen fabric, see through bag

More Posts from Uncategorized

  • 5-Ingredient Vegan Cheese Dip

  • These Greens and Mushroom Stuffed Shells Are the Perfect Freezer Meal

  • 3 Gorgeous Veggie Popsicles (Yes, Veggie) to Beat the Heat

  • This Sweet + Spicy Stir-Fry Makes Meatless Monday a Breeze

  • Gluten-Free Butternut Squash and Apple Crumble with Whipped Coconut Cream

  • The Perfect Grain-Free Paleo Pumpkin Pie


Reader Interactions

Comments

    Leave a Reply Cancel reply

    This site uses Akismet to reduce spam. Learn how your comment data is processed.

  1. katherine says

    May 20, 2013 at 9:11 am

    This is such a good idea – I love all the no sew on your blog! Even if I know how, sometimes I dont wanna get out the machine.

    Reply
    • gerbermom says

      May 20, 2013 at 10:56 pm

      Someday I’m going to force myself to bust out that sewing machine! Someday…. 🙂

      Reply
  2. [email protected]'s Recipes says

    May 20, 2013 at 11:26 am

    Gosh…this is selfmade? You are my inspiration!

    Reply
  3. Nikki | The Ginger Diaries says

    May 20, 2013 at 12:39 pm

    You make it sound so easy! I love the result! ^^ x

    Reply
    • gerbermom says

      May 20, 2013 at 10:56 pm

      It totally is easy – you just glue it! How awesome is that?

      Reply
  4. Susanna says

    May 20, 2013 at 2:09 pm

    very cute, looking forward to seeing the new suit! 🙂

    Reply
    • gerbermom says

      May 20, 2013 at 10:57 pm

      And I can’t wait to see your little pregger belly! 🙂

      Reply
  5. helen says

    May 20, 2013 at 3:56 pm

    so cool! love the sweet and simple tutorial!

    Reply
  6. Claire @ Claire K Creations says

    May 20, 2013 at 9:53 pm

    Seriously where do you come up with these ideas?! That’s brilliant!

    Reply
    • gerbermom says

      May 20, 2013 at 10:59 pm

      I say the same thing about your recipes! I wish I had the talent to come up with yummy food like that!

      Reply
  7. Mary Colaiuda says

    September 15, 2013 at 8:57 am

    Hola !!! me encantan todas las manualidades que presentan. Saludos !!!!

    Reply
  8. Lu Ann says

    September 26, 2013 at 12:24 pm

    Very nice tute! This project lends itself nicely to those of us who DO sew. One suggestion: sew on your handles BEFORE glueing the bag together. It’s much easier to do flat and eliminates the other side of the bag (and handle) from getting in the way. Love your bright color choice!

    Reply
    • gerbermom says

      September 30, 2013 at 1:48 pm

      Excellent tip Lu Ann!

      Reply

Primary Sidebar

Get updates + more!

Get the exclusive content you crave straight to your inbox.

Featured DIY

The Best Way To Clean Mirrors (No More Streaks!)

How to clean workout equipment

Your Workout Gear Is Filthy! Here’s How to Clean It

5 Homemade Drain Cleaners That Actually Work

How to Make an All-Natural Dusting Spray

4 Spring Scents for Essential Oil Air Fresheners

More

We are a participant in the Amazon Services LLC Associates Program, an affiliate advertising program designed to provide a means for us to earn fees by linking to Amazon.com and affiliated sites.
  • Contact
  • Privacy Policy
  • Hello Glow
  • Hello Veggie

Copyright © 2022 · Seasoned Pro

loading Cancel
Post was not sent - check your email addresses!
Email check failed, please try again
Sorry, your blog cannot share posts by email.