As my husband likes to remind me, I’m slowly turning into a crazy plant lady. Along with my mason jar garden, I’m always bringing home stray, unloved plants and nurturing them back to health. Or stocking up on houseplants at the hardware store whenever I find a great deal (which is, um, all the time).
The only thing stopping me from filling every nook and cranny with greenery is my wallet, which doesn’t always support my plant-buying habit. But I recently learned of another way I can scratch the itch without spending any more money: grow plants from cuttings.
Growing from cuttings is one of the easiest and most-used methods of growing plants from ones you already have. A lot of plants will grow roots just from a small clipping. And some will even root in water (no potting soil or root hormone required), which happens to be my go-to method of propagation when I don’t want to buy fancy supplies. I love that it’s inexpensive and pretty fun, if you’re a plant geek like me.
Here’s how to take a cutting and grow your own plants for free.
How to Grow Plants from Cuttings
There are a bunch of different plant propagation methods, and while not all methods work for all plants, my motto is the simpler the better. The method you select should depend on the type of plant you wish to re-grow and the amount of time, effort and money you want to invest.
Google can be a big help in learning about different methods and when you might want to use each of them. Personally, I always use the water propagation method because it only requires two things: a plant and water. Obviously, once your plant has grown roots and is ready to be potted you’ll need a pot and some soil, but otherwise you can get started with this method today.
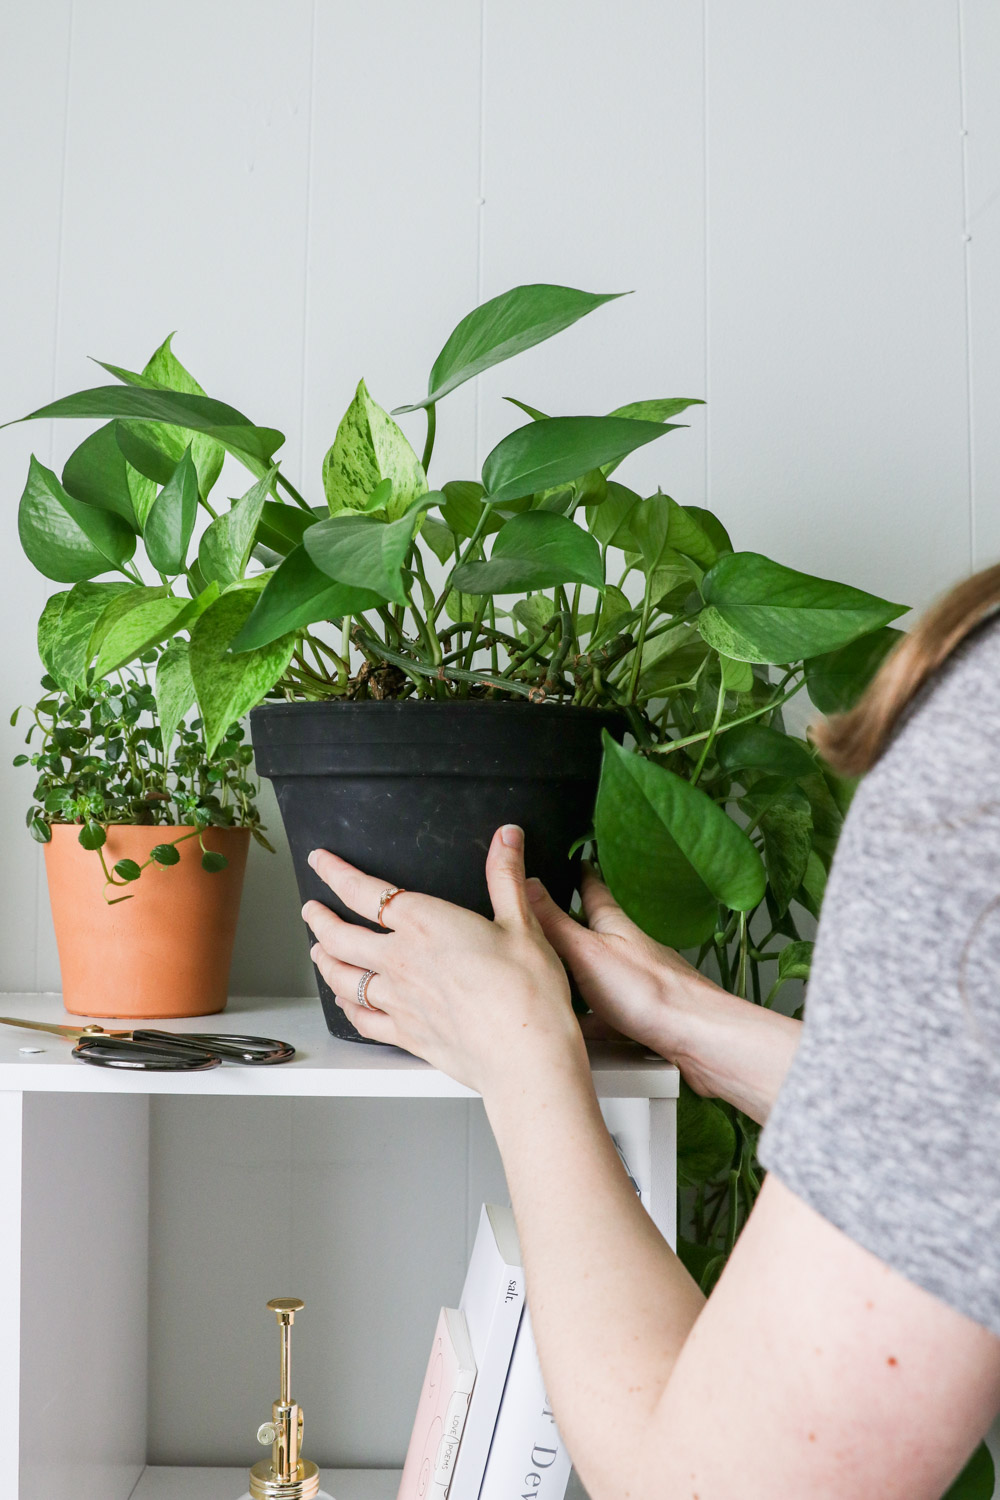
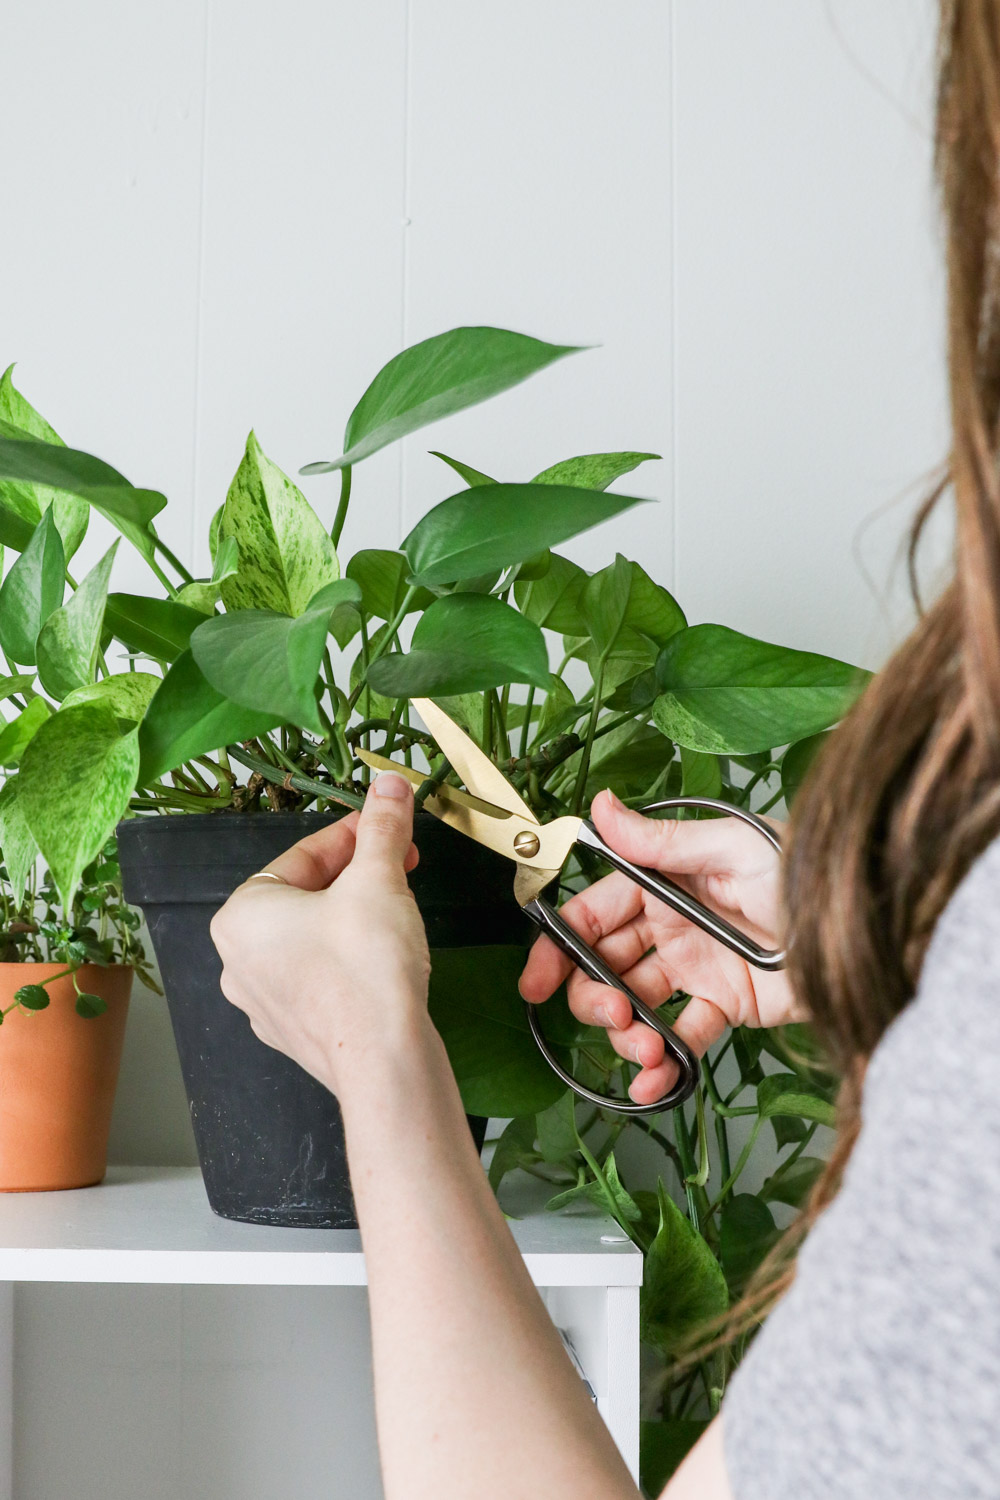
To start, you need to select a healthy plant to take a cutting from (this is called the ‘mother plant’). House plants with non-woody stems are easiest to propagate. Pothos plants, like the one seen here, are perfect for cuttings. The low maintenance houseplant can survive even in low light places like the bathroom. Plus they grow fast!
The mother plant should also be fully established and large enough for you to remove one or two small stems without killing it. And when selecting stems, always look for a healthy one absent of flower buds, disease and insects.
Ideally, though, you’ll want a stem with 1 or 2 nodes on it. You’ll typically find nodes where the stem branches into two or where leaves are located. (See where the stems branch off in the picture below? That’s the node.) Not all cuttings need to have nodes, but most of them do, so always look for one on your plant or vine if you can.
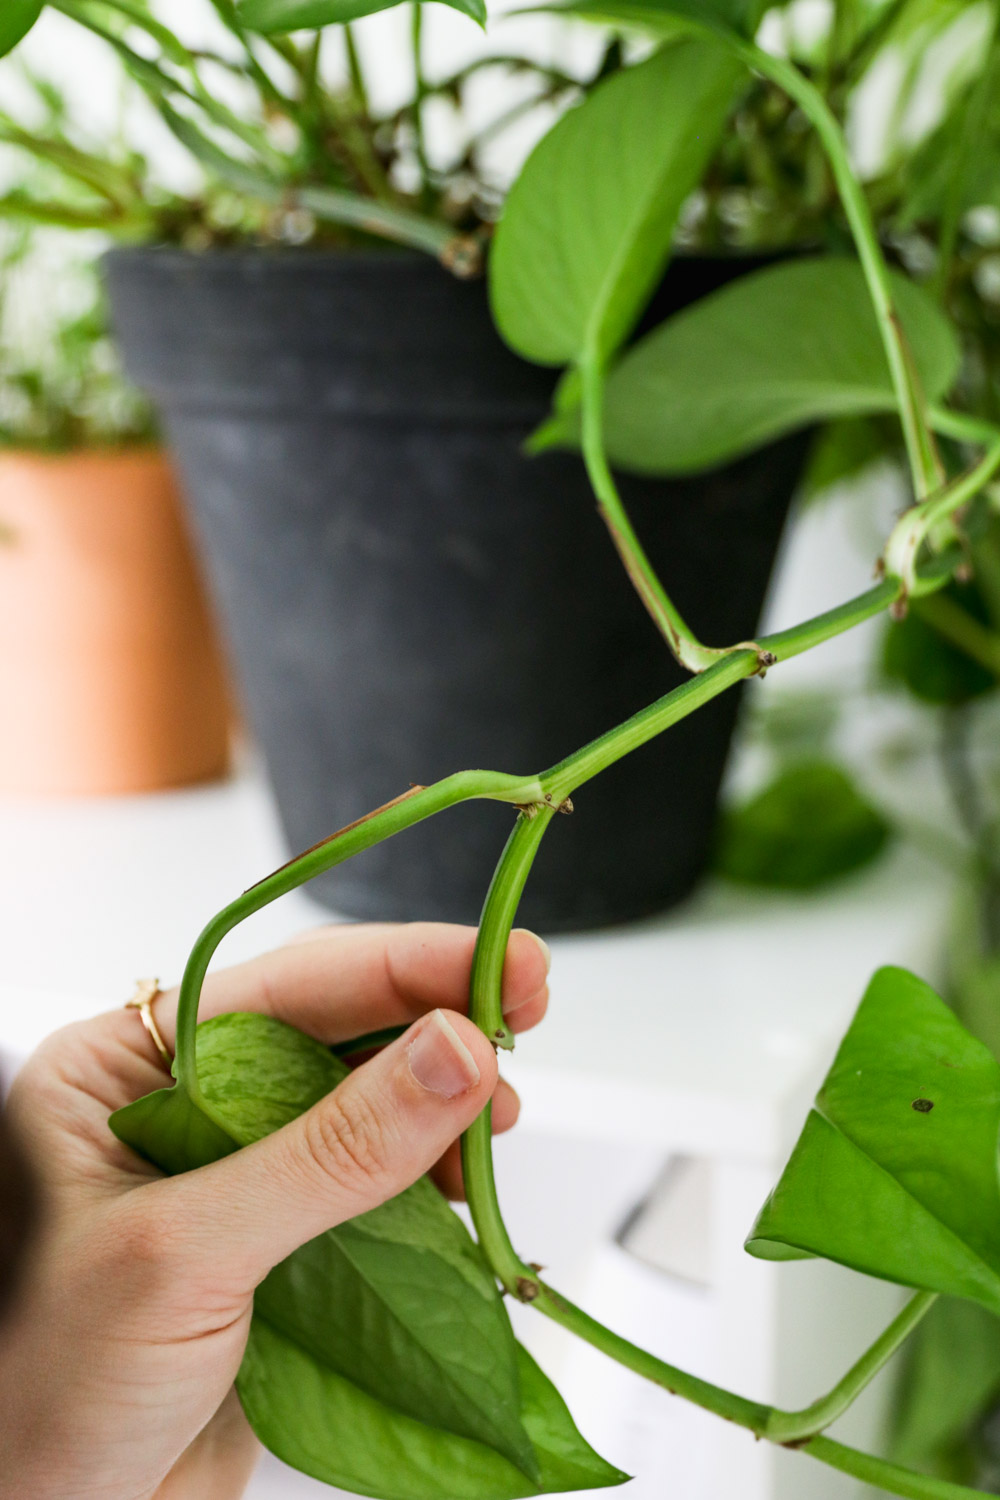
Using scissors or a sharp knife, make a clean cut at a 45-degree angle about 1/4-inch below the node.
Stick the end of your cutting in a clean glass. Poor enough room temperature water to cover the node, then set it in a window with bright indirect sunlight.
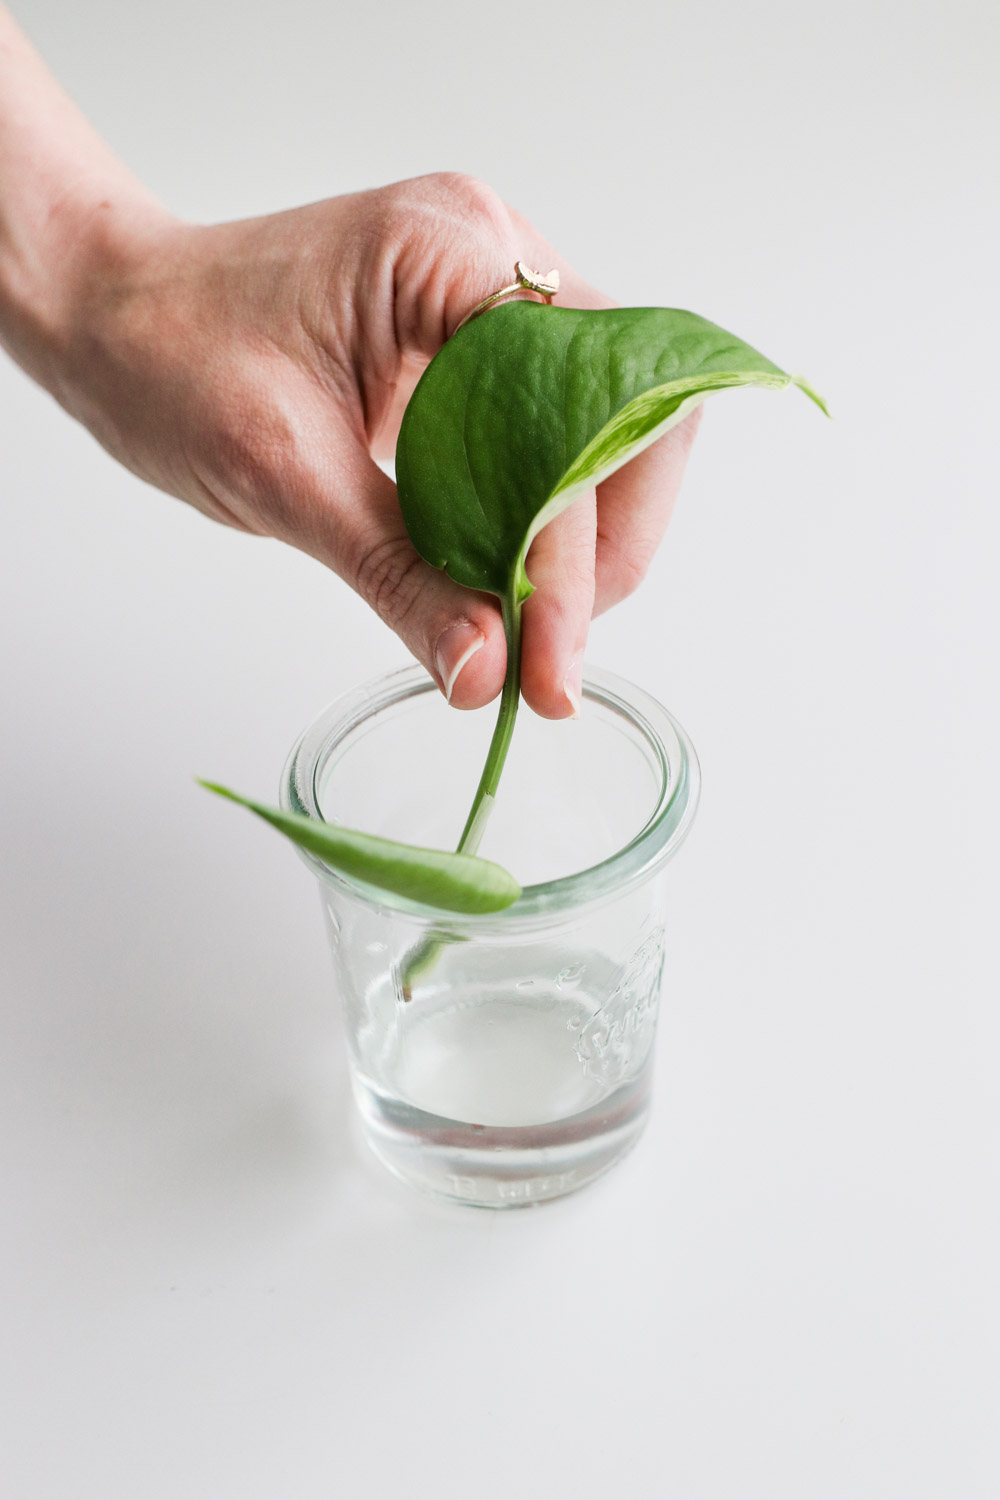
It can take anywhere from a week to several months for roots to grow, so you need serious patience. No growth isn’t always a bad sign, and as long as your stem is still alive, there’s a chance it could sprout roots. It just depends on the plant and the growing conditions.
Be sure to freshen the water every 3-5 days with new room temperature water and give the node a gentle rub with your fingers to get rid of any slimy buildup. Then just wait and watch for signs of roots!
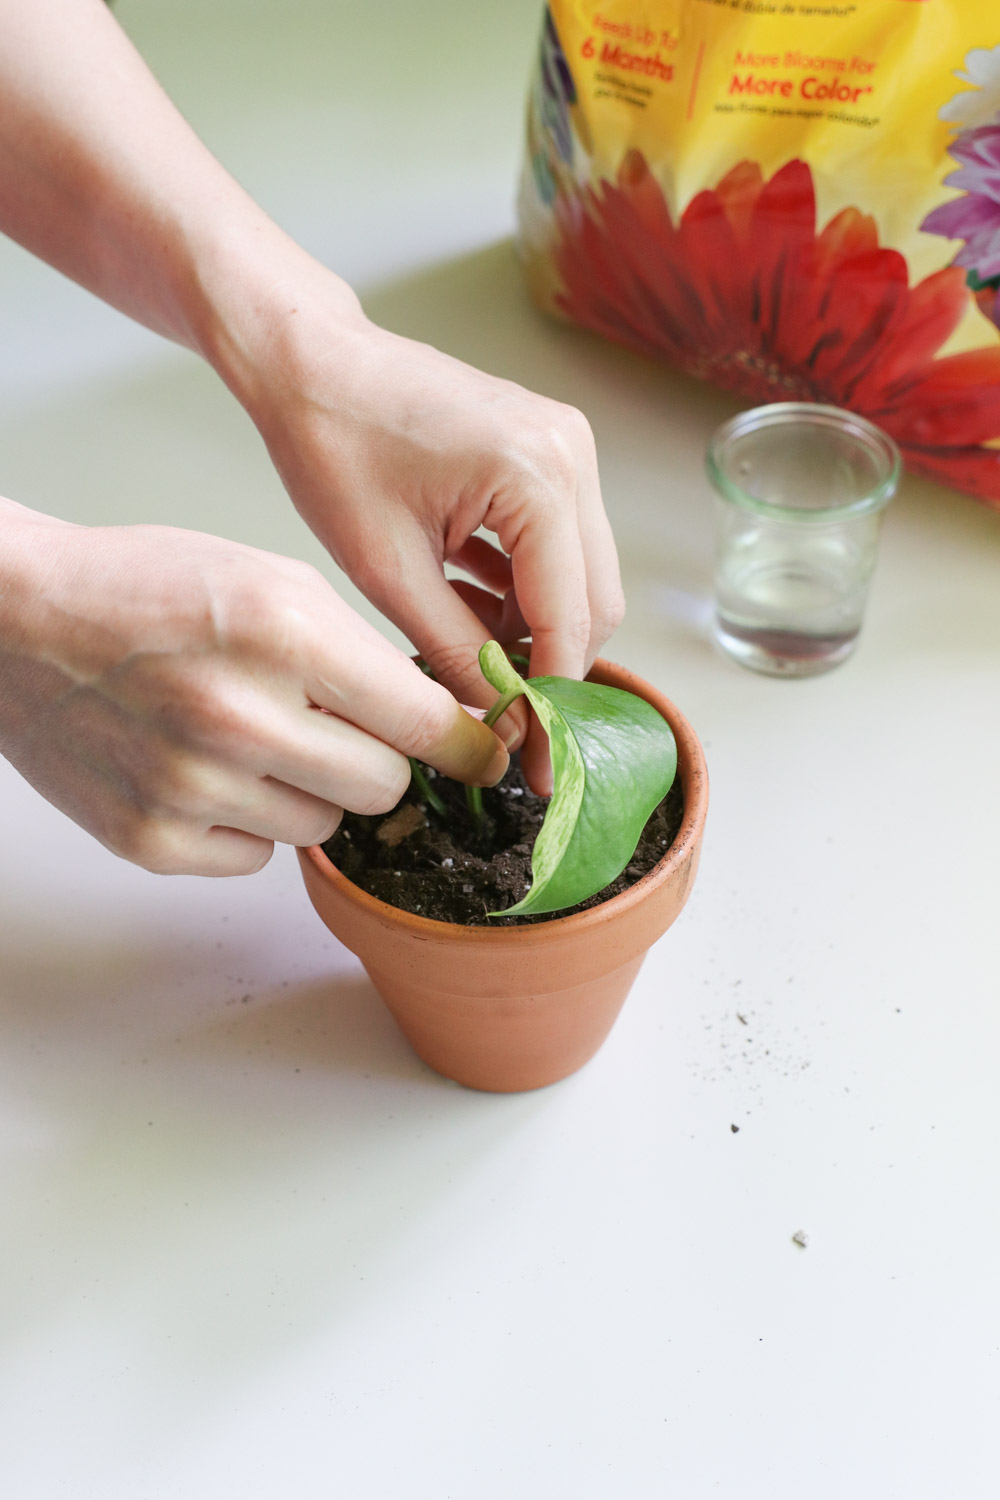
Once the roots reach approximately 5 inches long then it’s time to re-plant the cutting in soil (any good potting mix will do). Simply fill up a small pot 3/4’s of the way with soil, then make a small hole to set the plant in. Make sure the roots are completely covered with soil and then place it back in the same windowsill, where it will it will get plenty of indirect sunlight. Tend to your cutting like you would a seedling until it’s fully established and needs to be re-potted into a large pot.
You can continue to take cuttings from the same plant over and over as long as the mother plant looks healthy and has enough stems that it can comfortably lose a few. The sky’s the limit!
Leave a Reply